o_O S2000 | Mk I — Stage II

Permission to engage...

User avatar

andrewhake
Admin
Posts: 580
Joined: Oct 2016
Location: Mt. __________
Contact: YouTube IG
United States of America
#196

07-23-2016

Image

Got some new rotor rings mounted on my second pair of Girodisc front rotors. Swapping the rotor rings doesn't take much time (just 10 bolts per rotor) but cleaning the hats takes a little while. I just use Sonax wheel cleaner and a small wire brush to clean up as much as I can to get all the mounting surfaces clean. Rings come with new hardware and just need to be torqued to 60in/lbs, with some Loctite 262 red on the bolts.
o_O S2000 | Mark I Stage II...

That’s thirty minutes away. I’ll be there in ten.
User avatar

Topic Author
andrewhake
Admin
Posts: 580
Joined: Oct 2016
Location: Mt. __________
Contact: YouTube IG
United States of America
#197

07-28-2016

OS Giken 1.5way LSD in PM Stage 1.5+ rebuilt housing + EVS high capacity diff cover

Image

Image

Image

Image

Image

After buying an OS Giken 1.5way LSD quite a long time ago, I was able to work with my parts supplier to get it sent off to the well known to s2ki people at Puddymod to install it in a freshly rebuilt Stage 1.5+ diff. Stage 1.5+ means it has cryo treated upgraded 10.9 hardware, as well as cryo treated bearing caps and gears. As well as a heavy duty crush sleeve. I also opted to use an EVS high capacity diff cover which should allow the diff to run cooler and go longer in between gear oil change. The EVS cover also has dual fill/drain plugs to allow for an external oil cooler as well as being tapped for an oil temp sensor.

Waiting for the OS Giken gear oil to come in to get it installed along with new rear hubs and wheel bearings.
o_O S2000 | Mark I Stage II...

That’s thirty minutes away. I’ll be there in ten.
User avatar

Topic Author
andrewhake
Admin
Posts: 580
Joined: Oct 2016
Location: Mt. __________
Contact: YouTube IG
United States of America
#198

07-31-2016

Image

Did some minor ride height adjustments since my front was a few mm too low. Have been waiting to do the arm install and alignment until everything is settled with the springs and ride height and I think I am good to go now. Ended up around 327mm on each corner from wheel center to fender edge. The front was at 322mm before and just ended up scraping the little black hard rubber front tire spats unnecessarily in some situations. Easy to avoid with just a small change.

Image

Image

Car and wheels still clean up amazingly well with the coatings on both holding up well. Still just use a simple two 4.5gal bucket setup with grit guards (and the new angled attachment in the rinse bucket) with Optimum No Rinse and a microfiber wash mitt. I just spray each panel down with a 1L Kwazar hand pump sprayer with the same Optimum No Rinse solution, and then wash with the wash mitt, dry, and then move onto the next section. I start from the top of the car and work from the cleanest portions to the dirtiest. So hardtop and glass, front of the car including hood, bumper, headlights and tops of fenders, trunk, then each side, and rear bumper, and then I hit the wheels and tires last. Then I can just put the wash mitt and drying towels in the washing machine and dryer at low temps and they clean up fine for next time. If they ever get too dirty I just get new ones.

Jei is a bit busy but should be able to go in for an updated tune sometime in August. The engine definitely feels a bit more responsive in the mid range after installing the header, so looking forward to seeing what sort of difference everything will make with a new tune.
o_O S2000 | Mark I Stage II...

That’s thirty minutes away. I’ll be there in ten.
User avatar

Topic Author
andrewhake
Admin
Posts: 580
Joined: Oct 2016
Location: Mt. __________
Contact: YouTube IG
United States of America
#199

08-19-2016

Image
o_O S2000 | Mark I Stage II...

That’s thirty minutes away. I’ll be there in ten.
User avatar

Topic Author
andrewhake
Admin
Posts: 580
Joined: Oct 2016
Location: Mt. __________
Contact: YouTube IG
United States of America
#200

09-16-2016

Updated tune

Was finally able to bring the car in for an updated tune after installing, exhaust, header, test-pipe, intake, and throttle body. Below are the mid and peak plots with the car stock and stock tune.

Image

Image

And here are the mid and peak plots of the baseline using the stock tune + new parts vs. the updated tune +new parts. I also overlaid the stock and stock tune plots on these graphs to compare.

Image

Image

You can see there are some initial gains around 5500 rpm with just the additional parts all the way up to redline, with some small losses down at very lower end. Jei attributed the dip between 2000-3000rpm to the Mugen intake not getting as much airflow as the OEM airbox with the car static, having to pull timing a bit to avoid any chance of knock at the low end. A large fan was used to keep the car cool but it can only do so much. Same goes for the various other dips. With the car moving through free flowing air those dips could very well smooth out.

The updated tune is using a VTEC changeover point of 4000rpm with changeover parameters set so I won't be sitting in VTEC while cruising on the freeway or around town. Rev limit of 8500 was maintained from the earlier tune.

The updated tune provided a nice additional top end and midrange where it really counts, as expected with the particular parts used here. Most of the gains can likely attributed to the test pipe as is usually the case with S2000s, with everything else providing small increases throughout as well as increasing response and also dropping quite a lot of weight. If you are on a budget then a test pipe and quality tune is most effective route to take in regards to power for sure. But if you have the money to spend on the extra bits it just ends up that much more refined and responsive. And the sound, omfg the sound.

Overall from stock (on the same Dynapack in very similar conditions) to where I am now I have gone from 205.2 to 223.3 peak Hp (+18.1 Hp) and 146.0 lbft to 156.3 lbft (+10.3 lbft). With even larger increases all throughout the midrange. Very pleased with everything and so far from the limited driving I have done drivability is very good.

I have been looking into this little s-duct that ASM has posted up on their blog made to work with the Mugen intake. Nice simple design that would help increase airflow the the airbox that little bit extra. (http://www.autobacs-asm.com/blog/asm/in ... ew&no=3102)

Image

Another interesting development from ASM has been the use of these pressure relief valves. (http://autobacs-asm.com/blog/asm/index. ... ew&no=3150)

Image

I plan on making a Japan trip sometime soon, so might have to stop by ASM to get more info on this stuff.

And lastly on the engine related news. All of this talk of less and less short blocks being available from Honda has me eyeing the idea of buying a spare engine to have on hand just in case something every goes kablamo later down the line. I would likely end up building up a full long block ready to go. If one engine blows up, swap in the other one, rebuild the blown up one, and repeat that cycle until I am dead basically. I will stockpile and entire S2000 arsenal if need be. My commitment to the S2000 runs deeper than your commitment to your closest family members. :)
o_O S2000 | Mark I Stage II...

That’s thirty minutes away. I’ll be there in ten.
User avatar

Topic Author
andrewhake
Admin
Posts: 580
Joined: Oct 2016
Location: Mt. __________
Contact: YouTube IG
United States of America
#201

09-16-2016

Diff installed + new rear hubs/bearings + ARP studs

In other news I had the new diff setup installed as well as some standard length ARP wheels studs. I liked this idea when I saw them on SHG_Mike's thread so decided to do the same. That simple little bullet tip makes installing the lug nuts much less fiddly in wheels like the TC105N or CEs where they sit back in the face of the wheel with not a lot of room around them. That much less of a chance to cross thread something and they look about 20% more motorsporty.

Image

This photo is mid-install, so don't mind any missing bits like the lower subframe crossbeam.

Image

Not a lot of feedback on the new diff setup yet since I have had very limited running on it, but no daily driving complaints from me so far. No additional noise to speak of really. When transitioning from forward drive to reverse I sometimes notice a little thunk but no change in sound at all doing figure eights and simple things while testing it out and short run-in. With the way the diff was rebuilt and assembled it doesn't really require much run-in but I will give it a little time before going and and really testing everything. The EVS cover uses around 2.3L of gear oil compared to 0.8L of the stock cover, which is pretty obscene really. I will probably be changing out the oil at an initial early interval of 2000 miles or so just to check it out an make sure everything is good to go, and then I should be able to go for a very long time without worrying about the diff oil at all. If I ever end up running a datalogging setup like I have discussed in the past, I will be able to pop in a temperature sensor in the housing to keep tabs on the oil temps, but I can't imagine I will run into any issues. The large increase in capacity should help greatly with cooling and maintaining the fluid life.

Obviously I will report back once I have more testing under my belt with the OS Giken LSD, but I am definitely looking forward to that additional response from the rear end and what should be some pretty sexy corner entry and exit rotation. I also have a lot of available adjustment in balance if needed with the dampers and swaybars but so far I don't think the LSD will have many compromises if any at all.
o_O S2000 | Mark I Stage II...

That’s thirty minutes away. I’ll be there in ten.
User avatar

Topic Author
andrewhake
Admin
Posts: 580
Joined: Oct 2016
Location: Mt. __________
Contact: YouTube IG
United States of America
#202

09-25-2016

ASM front lower + rear lower brace

Image

Picked up these used and now discontinued ASM subframe braces from GoTuning. My rear lower subframe brace has been in need of replacement for awhile since it is a bit scraped up. I like these ones since they look like they could be on the car from the factory.
o_O S2000 | Mark I Stage II...

That’s thirty minutes away. I’ll be there in ten.
User avatar

Topic Author
andrewhake
Admin
Posts: 580
Joined: Oct 2016
Location: Mt. __________
Contact: YouTube IG
United States of America
#203

10-14-2016

ZE40s + Brigestone RE71R installed

Recently got another set of RE71R mounted to the ZE40s.

Image

Image

Image

And a few days later went ahead and swapped them on to run for awhile. The CEs still have RE71Rs with plenty of life left, but just wanted to try out the ZE40s to see how they look.

Image

Image

I really can't say I prefer one over the other, I just like them both. The ZE40s sort of end up looking like a larger wheel sense the spokes go all the way to the outer lip. I wonder how many people would even notice if I was running ZE40s in the front and CEs in the rear or vice versa.

Image

Image

Image

Here is a better look at the APR normal length studs in the rear. Haven't installed these on the fronts but will the next time I replace the hubs. It's such a simple thing and it's not like it is really that hard to get the lug nuts started on the studs, but these just make it perfect every single time. Definitely a fan.

Image

Image

Image

Image

Image

Image

Image

Image

Image

Image

Image

Image

Image

Image

Image

Image

Image

Really like how the ZE40s look on the car overall. Just as much as I like the CE28N and the Weds. Couldn't really choose which I like the most. Luckily reason doesn't come into play for me when it comes to S2000 parts so I don't have to choose.
o_O S2000 | Mark I Stage II...

That’s thirty minutes away. I’ll be there in ten.
User avatar

Topic Author
andrewhake
Admin
Posts: 580
Joined: Oct 2016
Location: Mt. __________
Contact: YouTube IG
United States of America
#204

10-14-2016

And here is a photo for the soft top removal enthusiasts that I took while I was taking the photos of the wheels.

Image
o_O S2000 | Mark I Stage II...

That’s thirty minutes away. I’ll be there in ten.
User avatar

Topic Author
andrewhake
Admin
Posts: 580
Joined: Oct 2016
Location: Mt. __________
Contact: YouTube IG
United States of America
#205

10-14-2016

And here is a photo for the soft top removal enthusiasts that I took while I was taking the photos of the wheels.

Image
o_O S2000 | Mark I Stage II...

That’s thirty minutes away. I’ll be there in ten.
User avatar

Topic Author
andrewhake
Admin
Posts: 580
Joined: Oct 2016
Location: Mt. __________
Contact: YouTube IG
United States of America
#206

And with that, here we are today! Back in the present. Welcome to S NI SEN :woot:

(Rebuilding this topic was quite the undertaking, but after a few long nights of carefully going through my old thread and finding all the relevant posts while enjoying my favorite car videos it is finally complete)

This also marks the moment that I feel that this new site is nearly ready. I have been working on it carefully for awhile now after frustrations with lack of care and quality of another forum. I simply cannot tolerate lack of care and lack of quality in something I use on a regular basis and thought I could do better on my own, so here we are!

Welcome to the future of this project. Feel free to comment or ask any questions about any of the posts you have seen from the past and I will gladly continue the discussion. Looking forward to many many more years driving and enjoying this S2000. :thumbsup:
o_O S2000 | Mark I Stage II...

That’s thirty minutes away. I’ll be there in ten.

Tama05
7000rpm
Posts: 1
Joined: Nov 2016
United States of America
#207

Hey Andrew, great job on the new site and will make an attempt to move my build over here. Look forward to watching this thing blow up, and the cars looking great as always. Ze40s are hit or miss for me but the bronze on silver with the Spoon calipers behind them look perfect.
User avatar

Topic Author
andrewhake
Admin
Posts: 580
Joined: Oct 2016
Location: Mt. __________
Contact: YouTube IG
United States of America
#208

Tama05 wrote:Hey Andrew, great job on the new site and will make an attempt to move my build over here. Look forward to watching this thing blow up, and the cars looking great as always. Ze40s are hit or miss for me but the bronze on silver with the Spoon calipers behind them look perfect.
Much appreciated! I figured why not give something brand new and purpose built a try. :shrug: If it catches on great, if not so be it. Thanks for joining up!
o_O S2000 | Mark I Stage II...

That’s thirty minutes away. I’ll be there in ten.
User avatar

Topic Author
andrewhake
Admin
Posts: 580
Joined: Oct 2016
Location: Mt. __________
Contact: YouTube IG
United States of America
#209

Alpine SPR-60C component speakers + Modifry DCI

Image

Quite awhile back I had the left channel speakers in my car fail, or what we later discovered to just be a failed connection. I had also been getting some annoying rattles in the car, particularly on the passenger side, on startup and under acceleration, not really much from the speakers themselves. At the car stereo shop we discovered what was a connection issue with the left channel, and the rattling likely coming from the crossovers that were installed with the current 
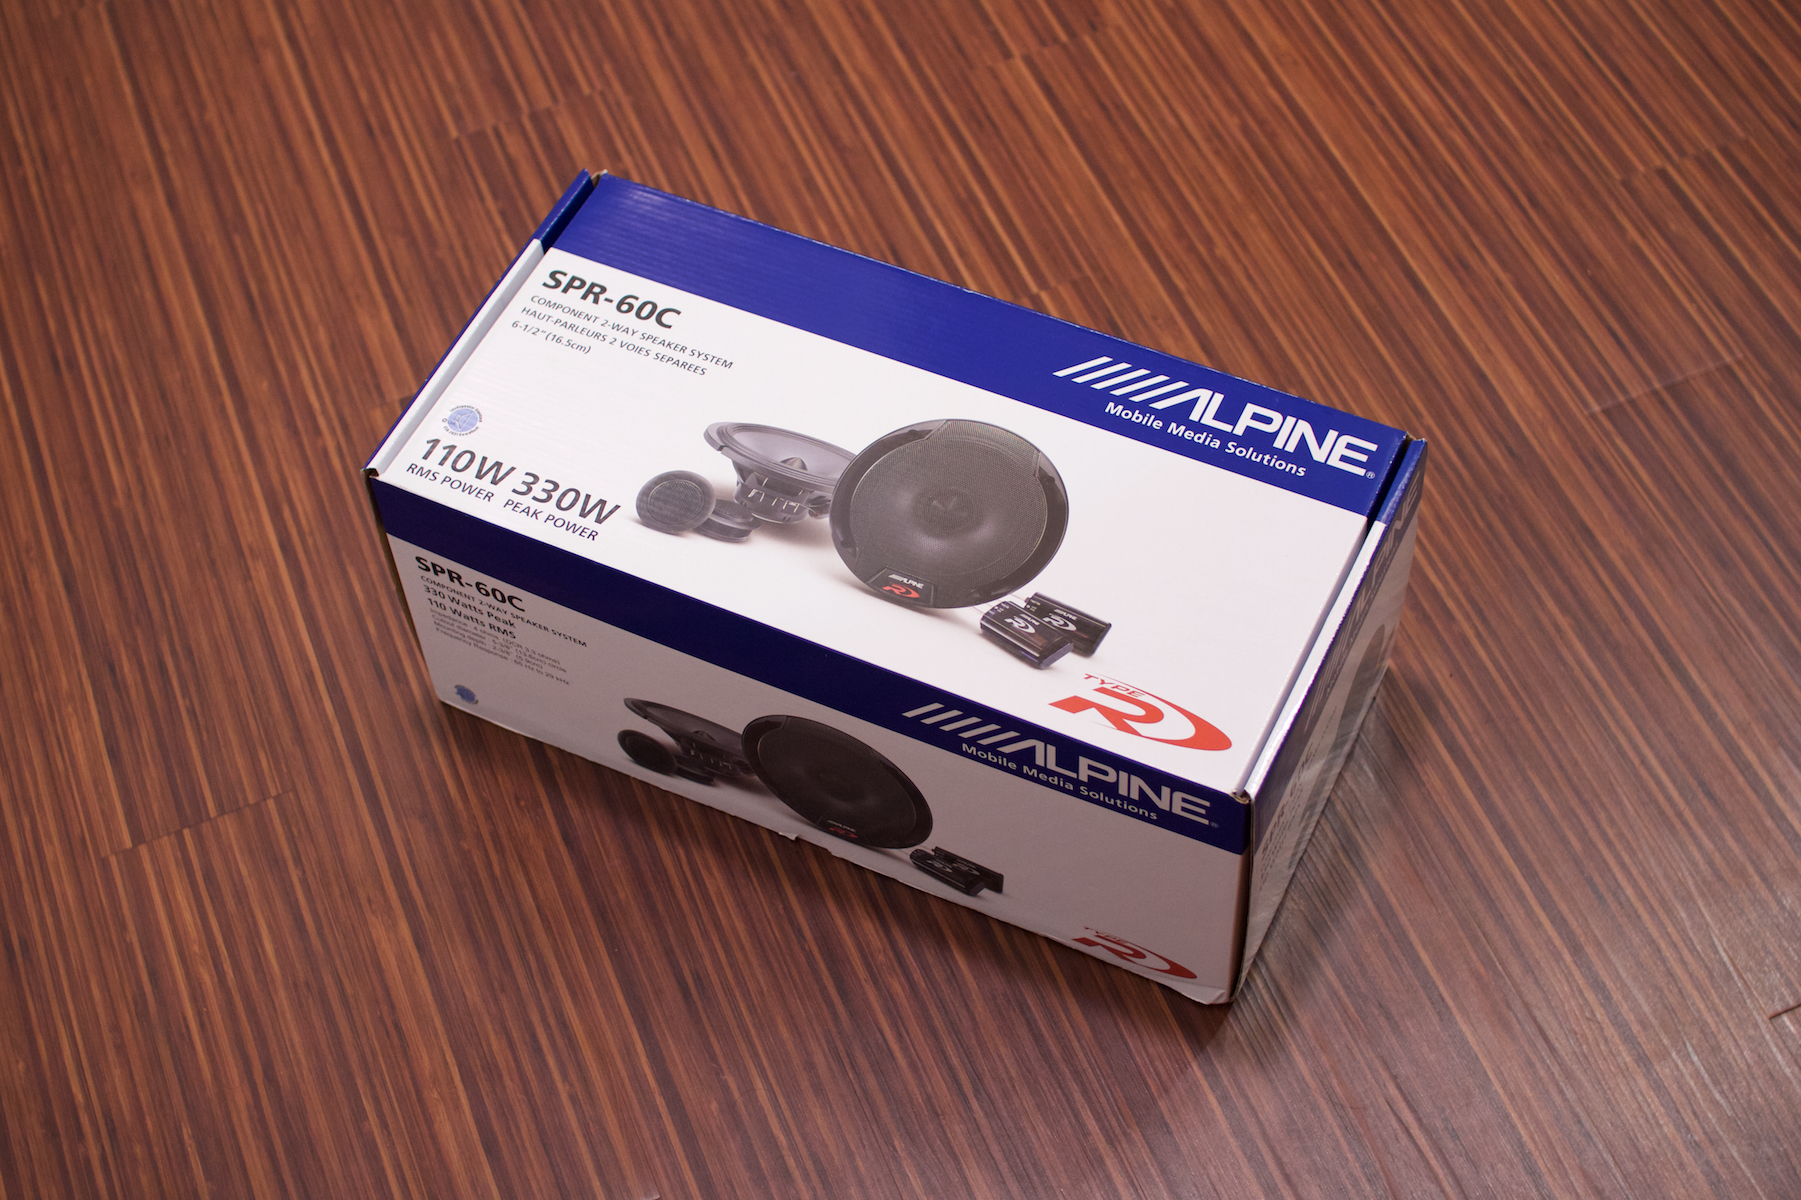
JL Audio C3-650 speaker setup which was in the car when I got it. I can't say I had any real complaints about the sound quality of the sound quality from the JL Audio setup, but seeing what else was available I decided to go with the Alpine SPR-60C to replace them. They are lighter, have a much smaller and lighter and simpler inline crossover which is less likely to develop any rattles, and are designed to be a little more efficient with a simple headunit only setup. I had the stereo shop do a small amount of work making sure nothing would rattle, and clean up anything they found that might, and they did a wonderful job! It is such a simple thing, but getting rid of any little annoying rattles makes the car feel so new again, even if they were just small. For a car with 116,000 miles and stiffer engine, transmission, and diff mounts, it is now beautifully rattle free. It's stupid but less NVH has a small effect of making me a slightly more confident driver I think.

My rear headrest speakers had also been disabled on the previous setup, so I had them get those back into the game. A subtle difference but the headrest speakers do a good job filling in as extra tweeters to fill in a little more high frequency sound. Really don't understand why anyone would disable them, they help make everything much more clear in a car with not a lot of sound deadening and quite a lot of road noise.

I also had them replace the crappy DCI that was currently in the car with the Modifry DCI. This gives me way better control over the headunit. My previous one would only allow me to seek forward with the Ch button, change mode with the Mode button, and change volume. The mute button wouldn't even work. Now everything works as expected, with a lot of extra functionality as well. My favorite thing being the ability to just quickly tap the giant mode button to seek forward, I can also seek forward and backward holding the mode button and triggering volume up and down. It's great to be able to just close up the radio door and have all the control I need from the dash again.

I'm not sure why I didn't do this sooner, I went for way to long with only a right channel, a not very effective DCI, and those few annoying little rattles. Removing those rattles also has the effect of making the entire powertrain and drivetrain just sound better and more crisp. Beautiful sounds from the exhaust manifold, intake, and exhaust without as much of the vibration throughout the interior bits, and the sounds of the transmission doing it's thing. :heart:
o_O S2000 | Mark I Stage II...

That’s thirty minutes away. I’ll be there in ten.

Sillyboybmxer
7000rpm
Posts: 18
Joined: Nov 2016
United States of America
#210

Ive been putting off the modifry dci as well. I always think i can just deal with it, but my constant opening and closing of the radio door is probably why the spring failed in the old one.

For your front emblem, did you drill the Amuse or just cut off the pins of the emblem and stick it on?

Return to “Projects”