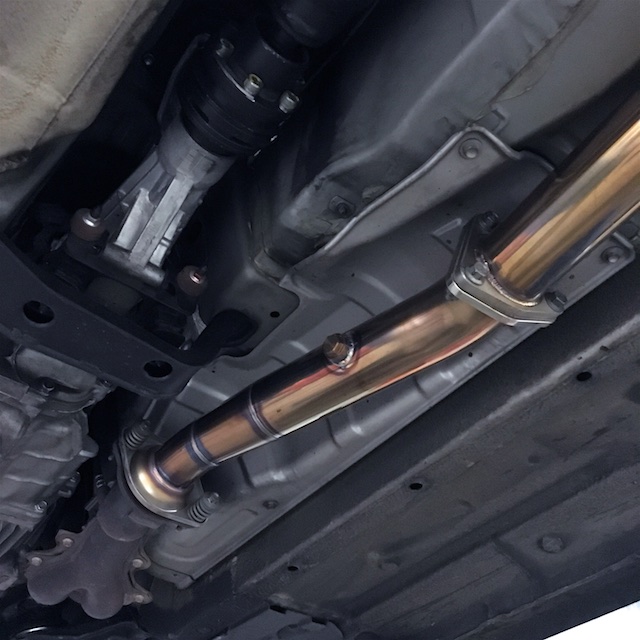
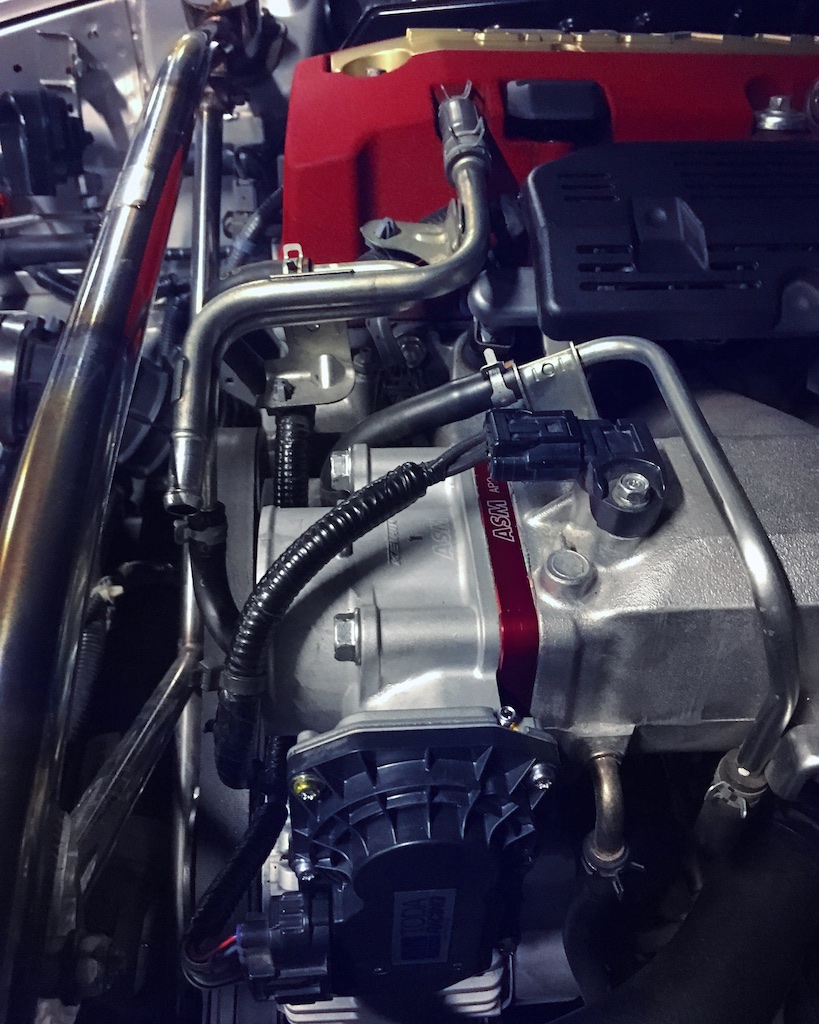
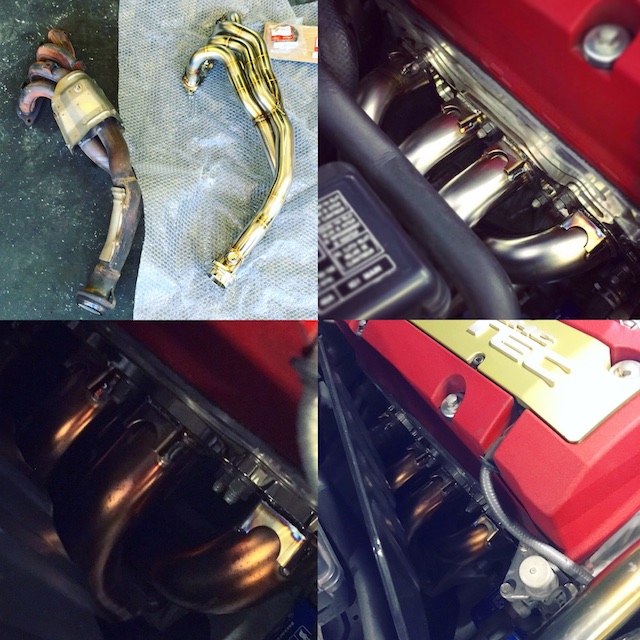
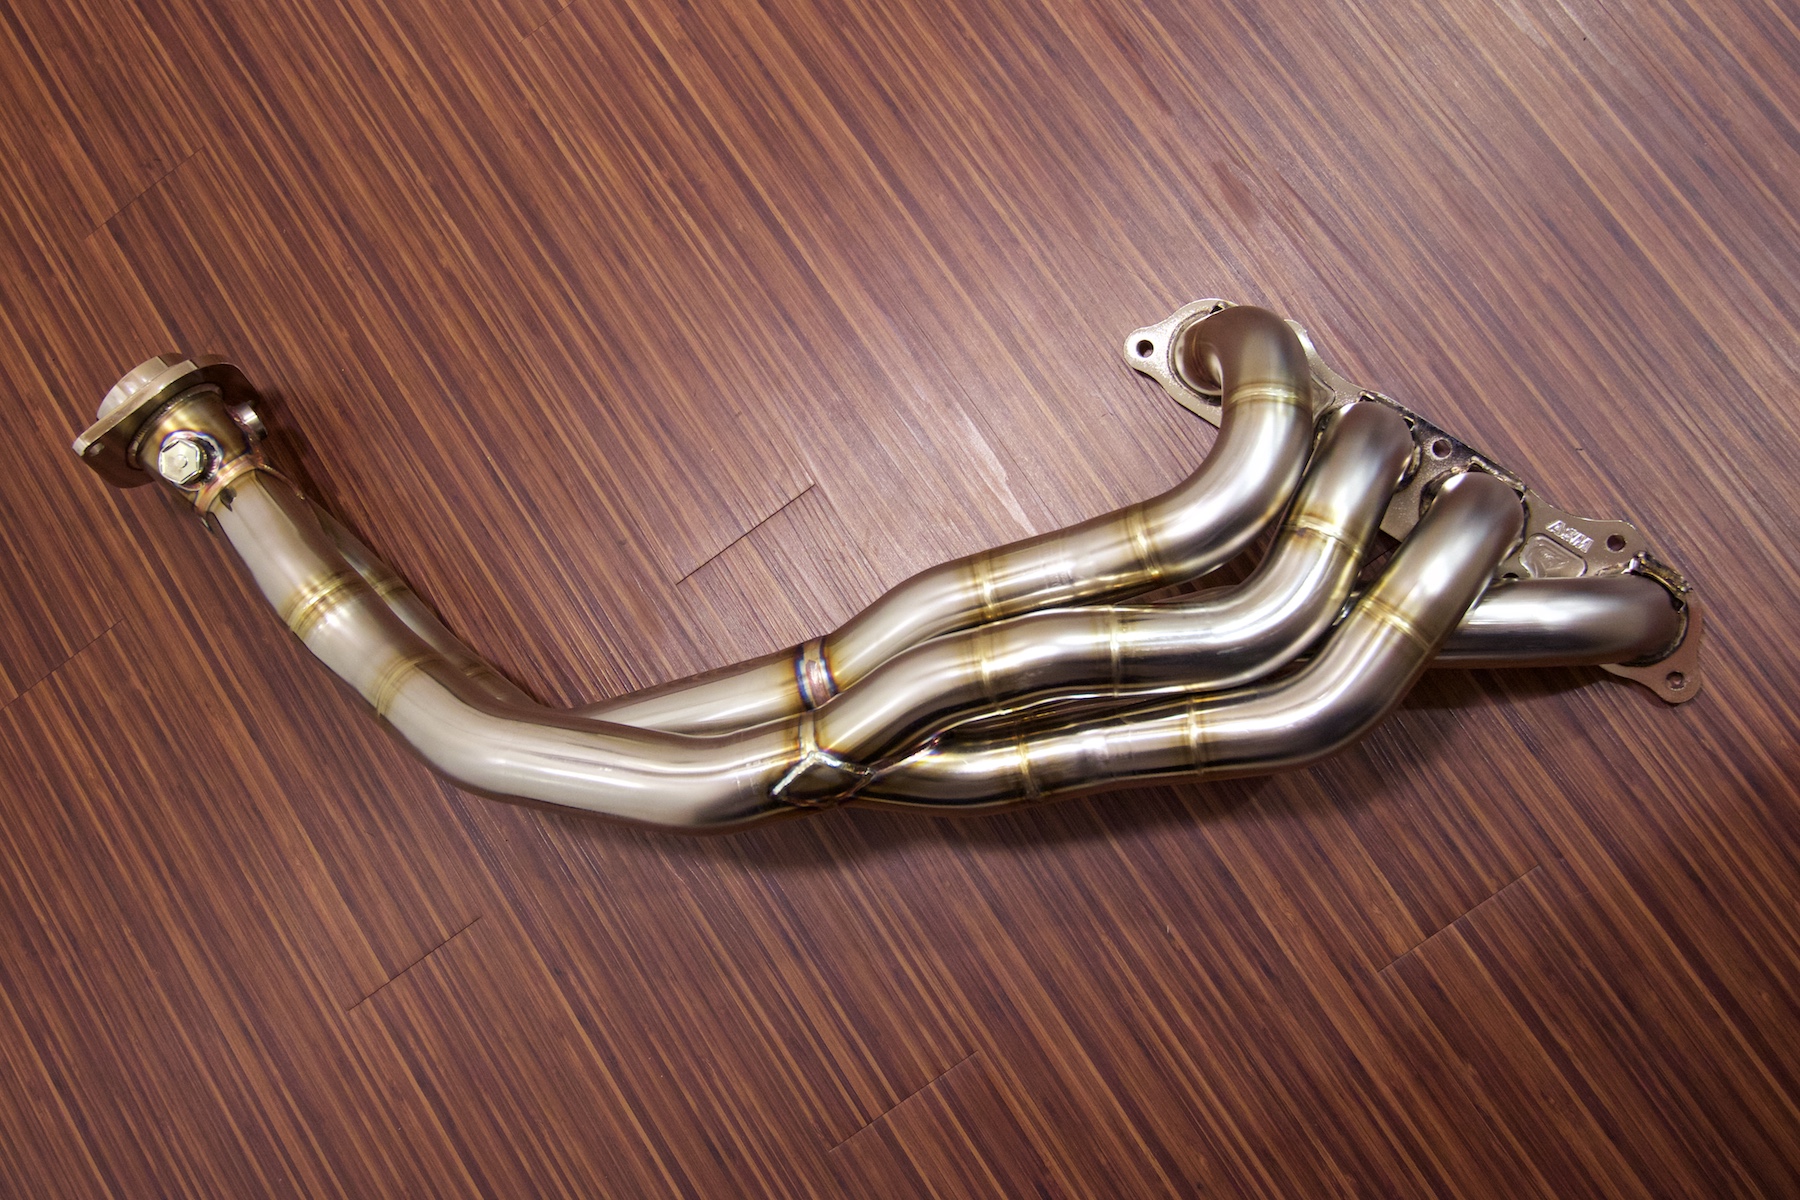
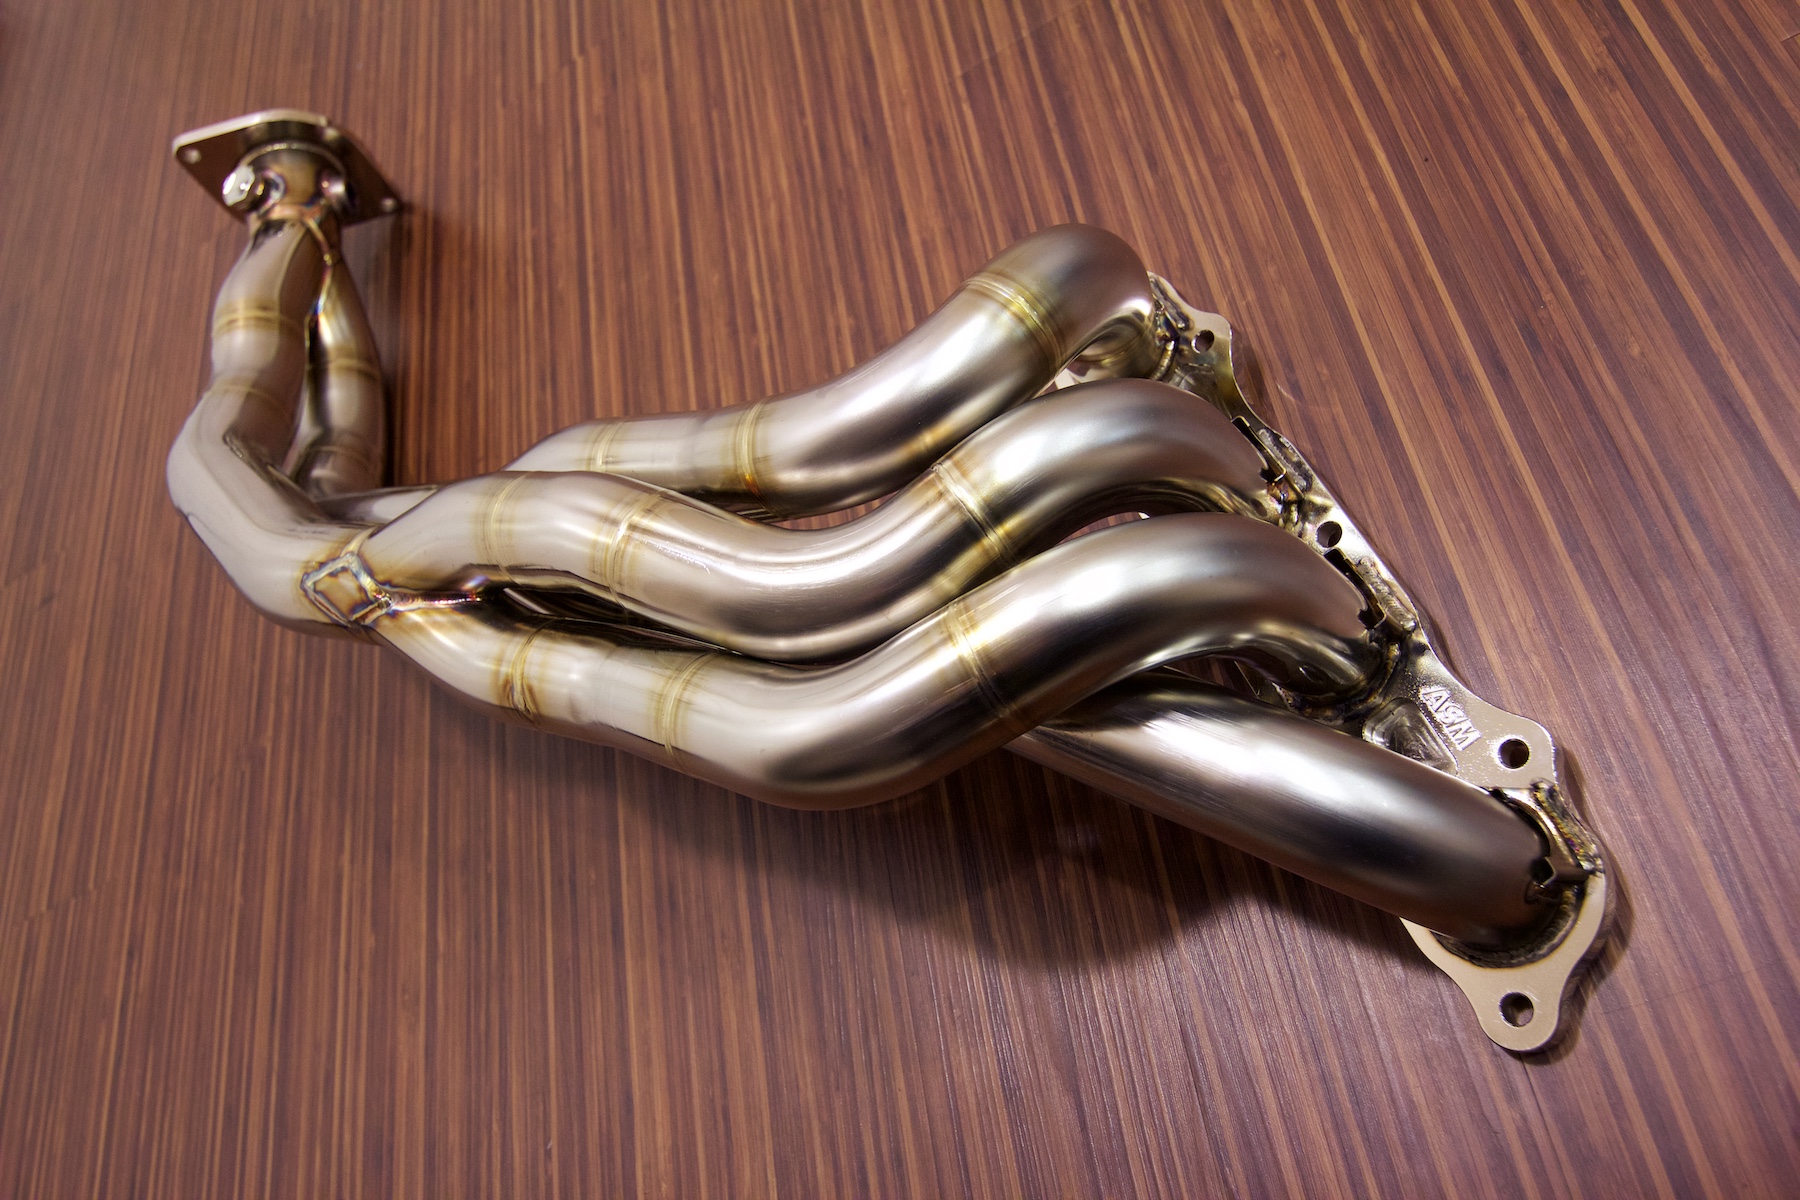
o_O S2000 | Mk I — Stage II

Permission to engage...

User avatar

andrewhake
Admin
Posts: 580
Joined: Oct 2016
Location: Mt. __________
Contact: YouTube IG
United States of America
#181

05-17-2016

ASM 07 header

Image

Image

Image

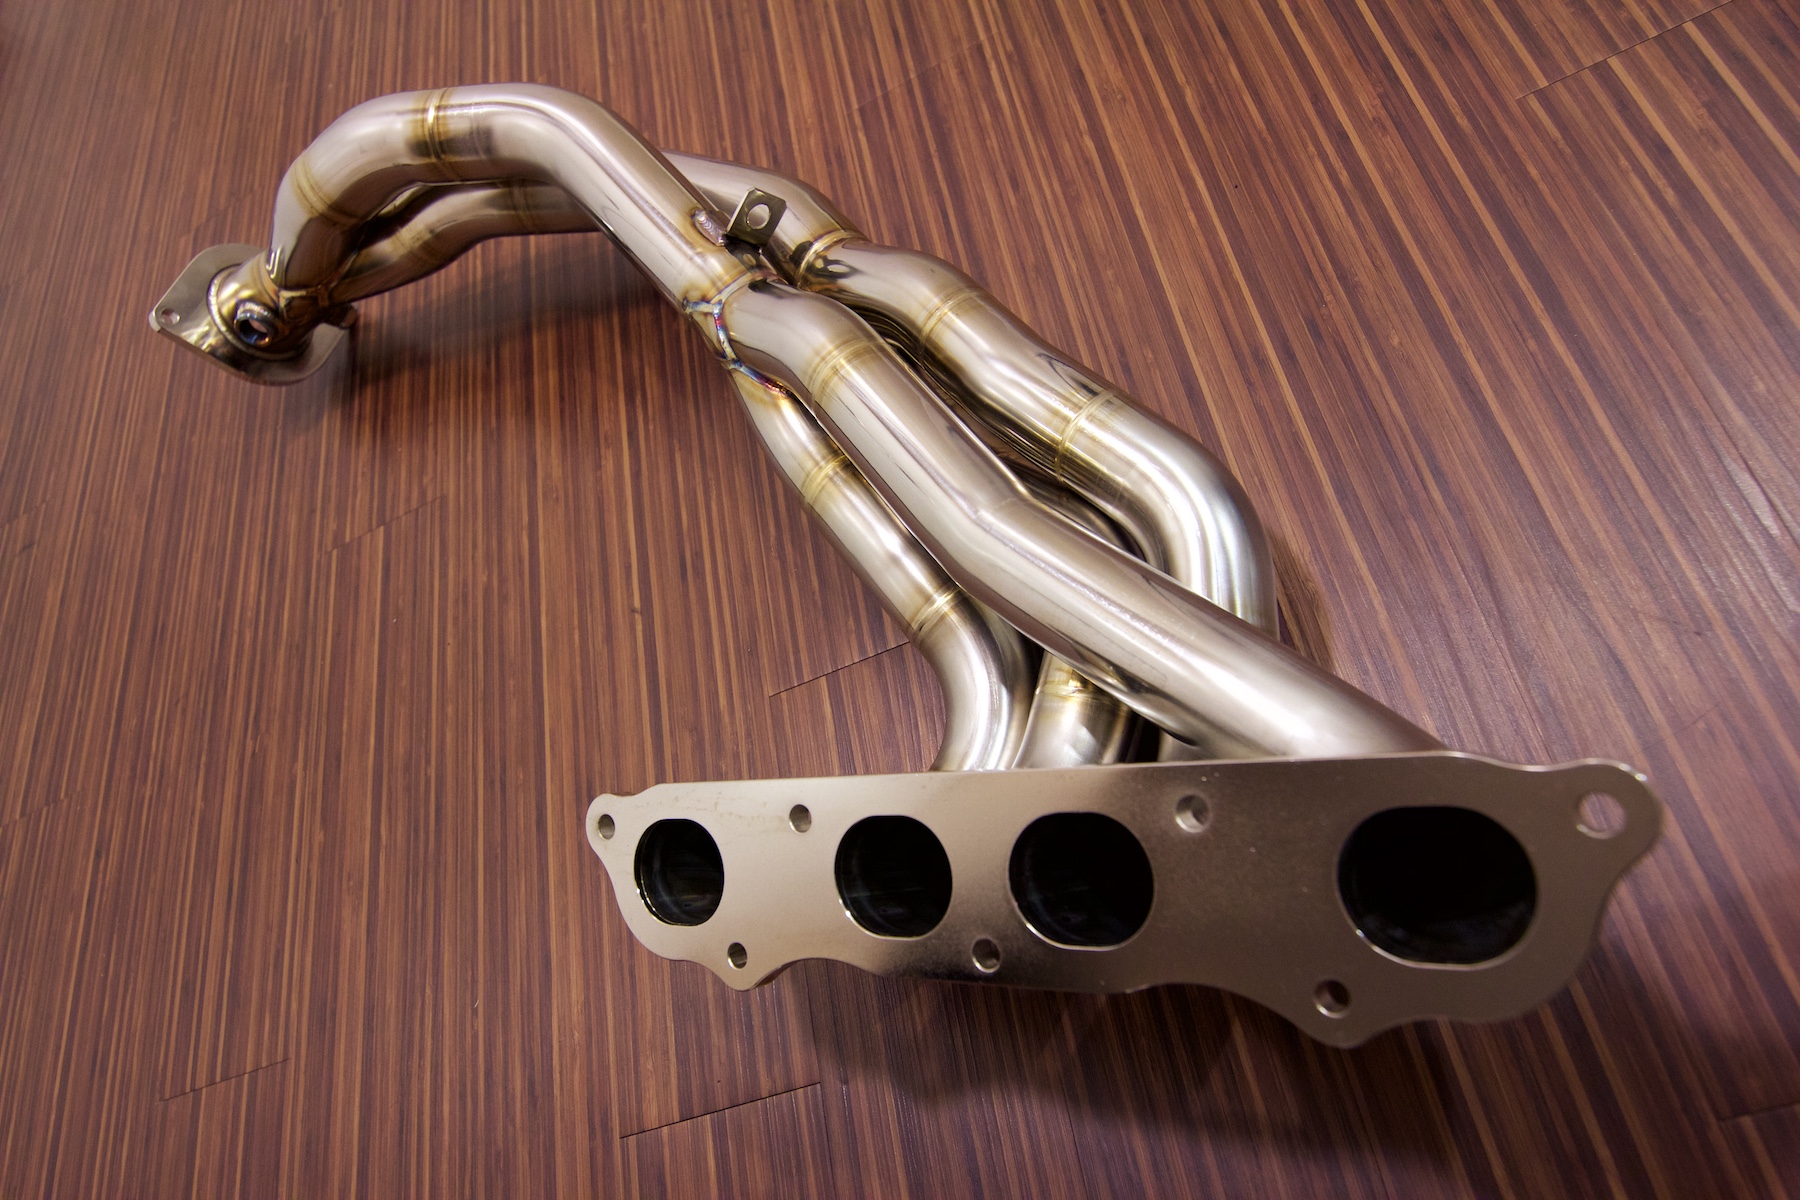
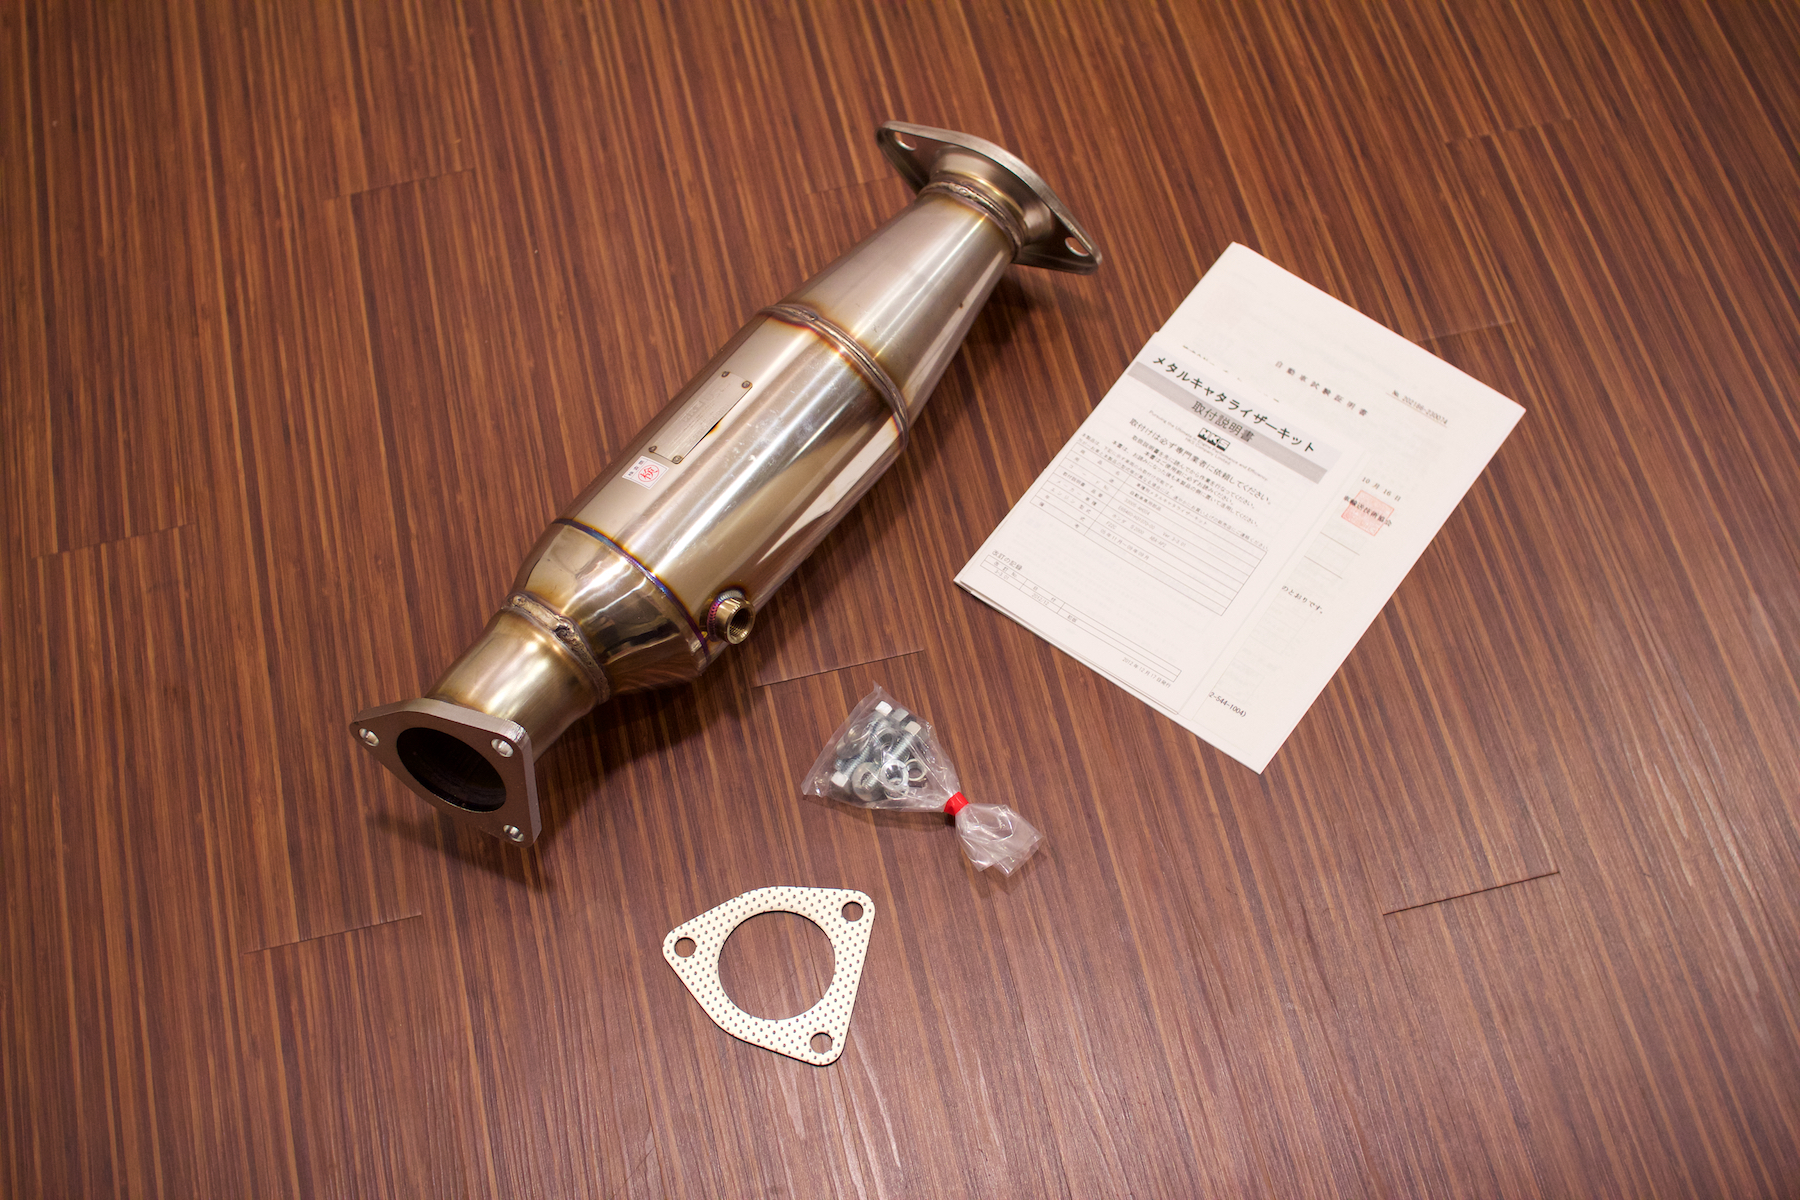
Here is a gift my car will be receiving after it passes it's standardized smog exam later this month.

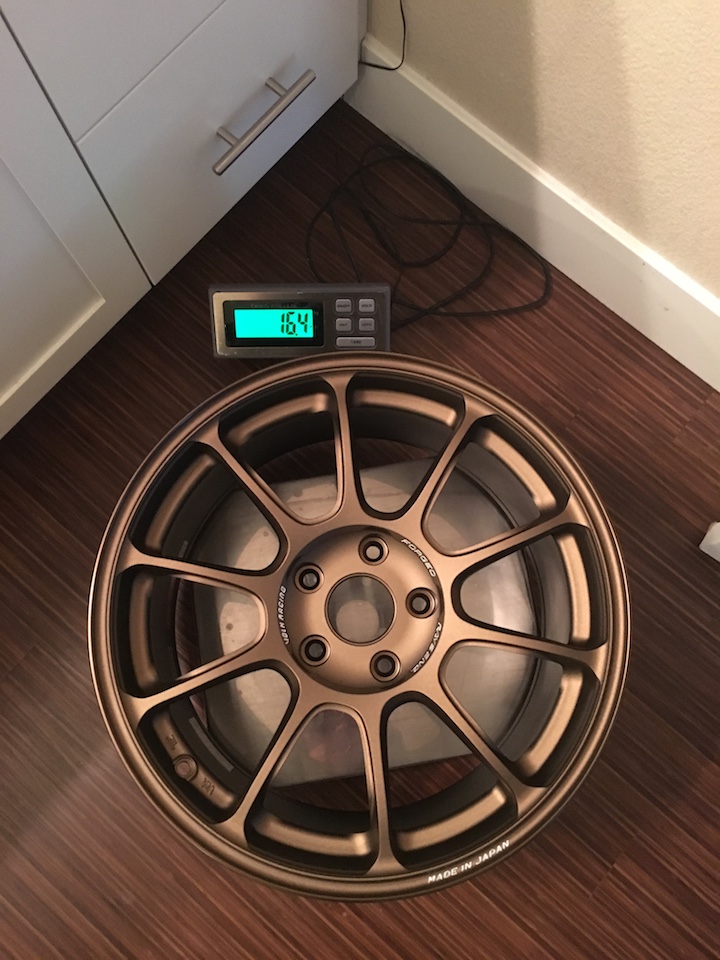
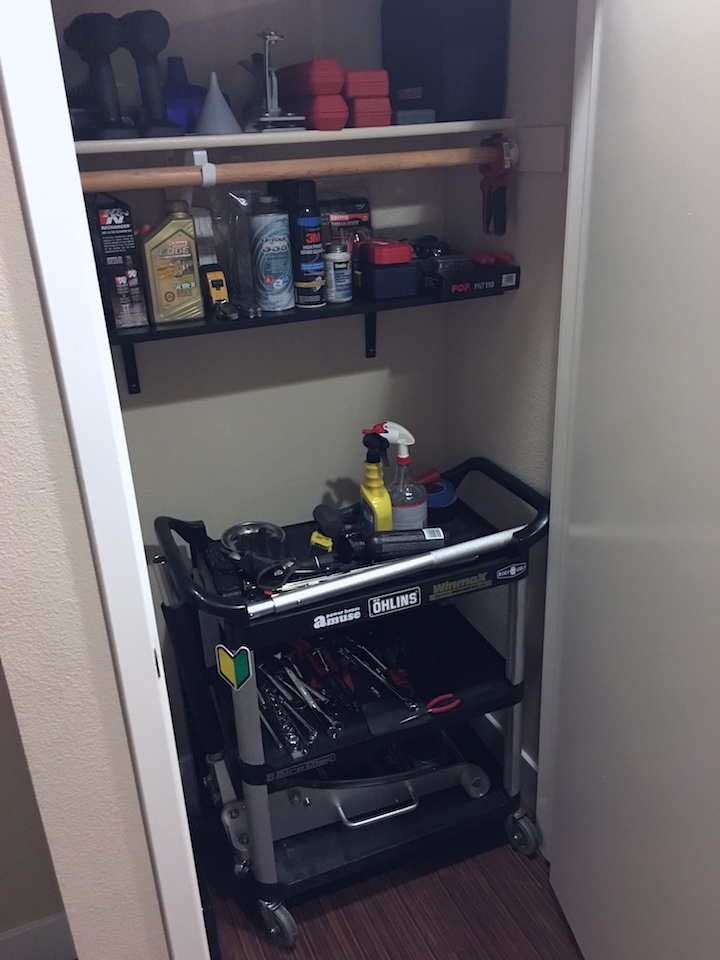
Here is the ASM 07 header weight:

Image

Image

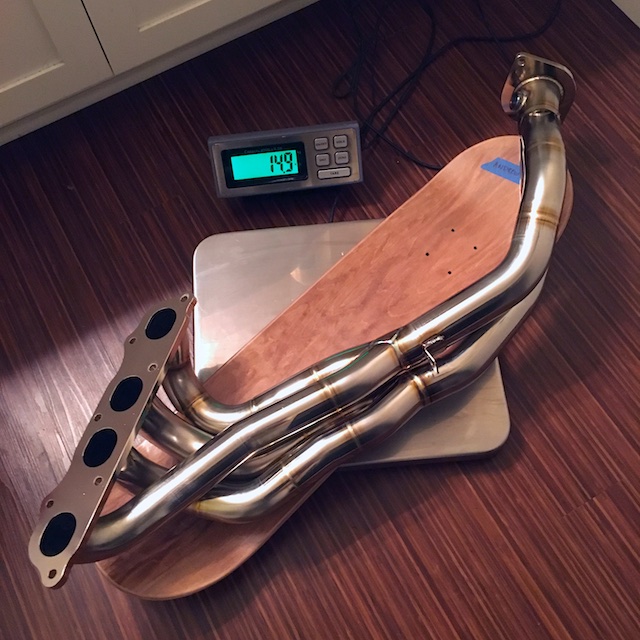
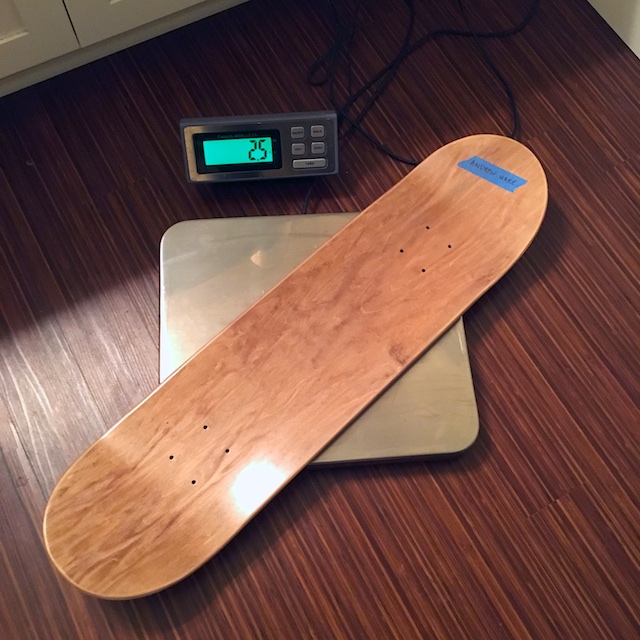
Skateboard deck is there to support the header to be able to measure the weight. 14.9lbs - 2.5lbs for the deck = 12.4lbs total. I believe the OEM header weighs around 22-25lbs total with the heat shields from the data I have found so quite a nice savings there.

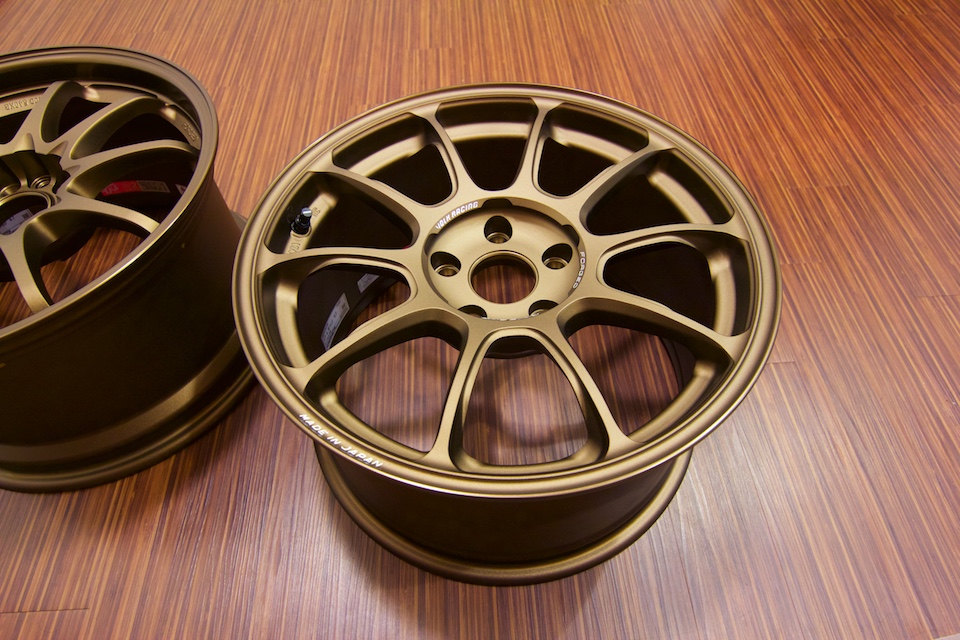
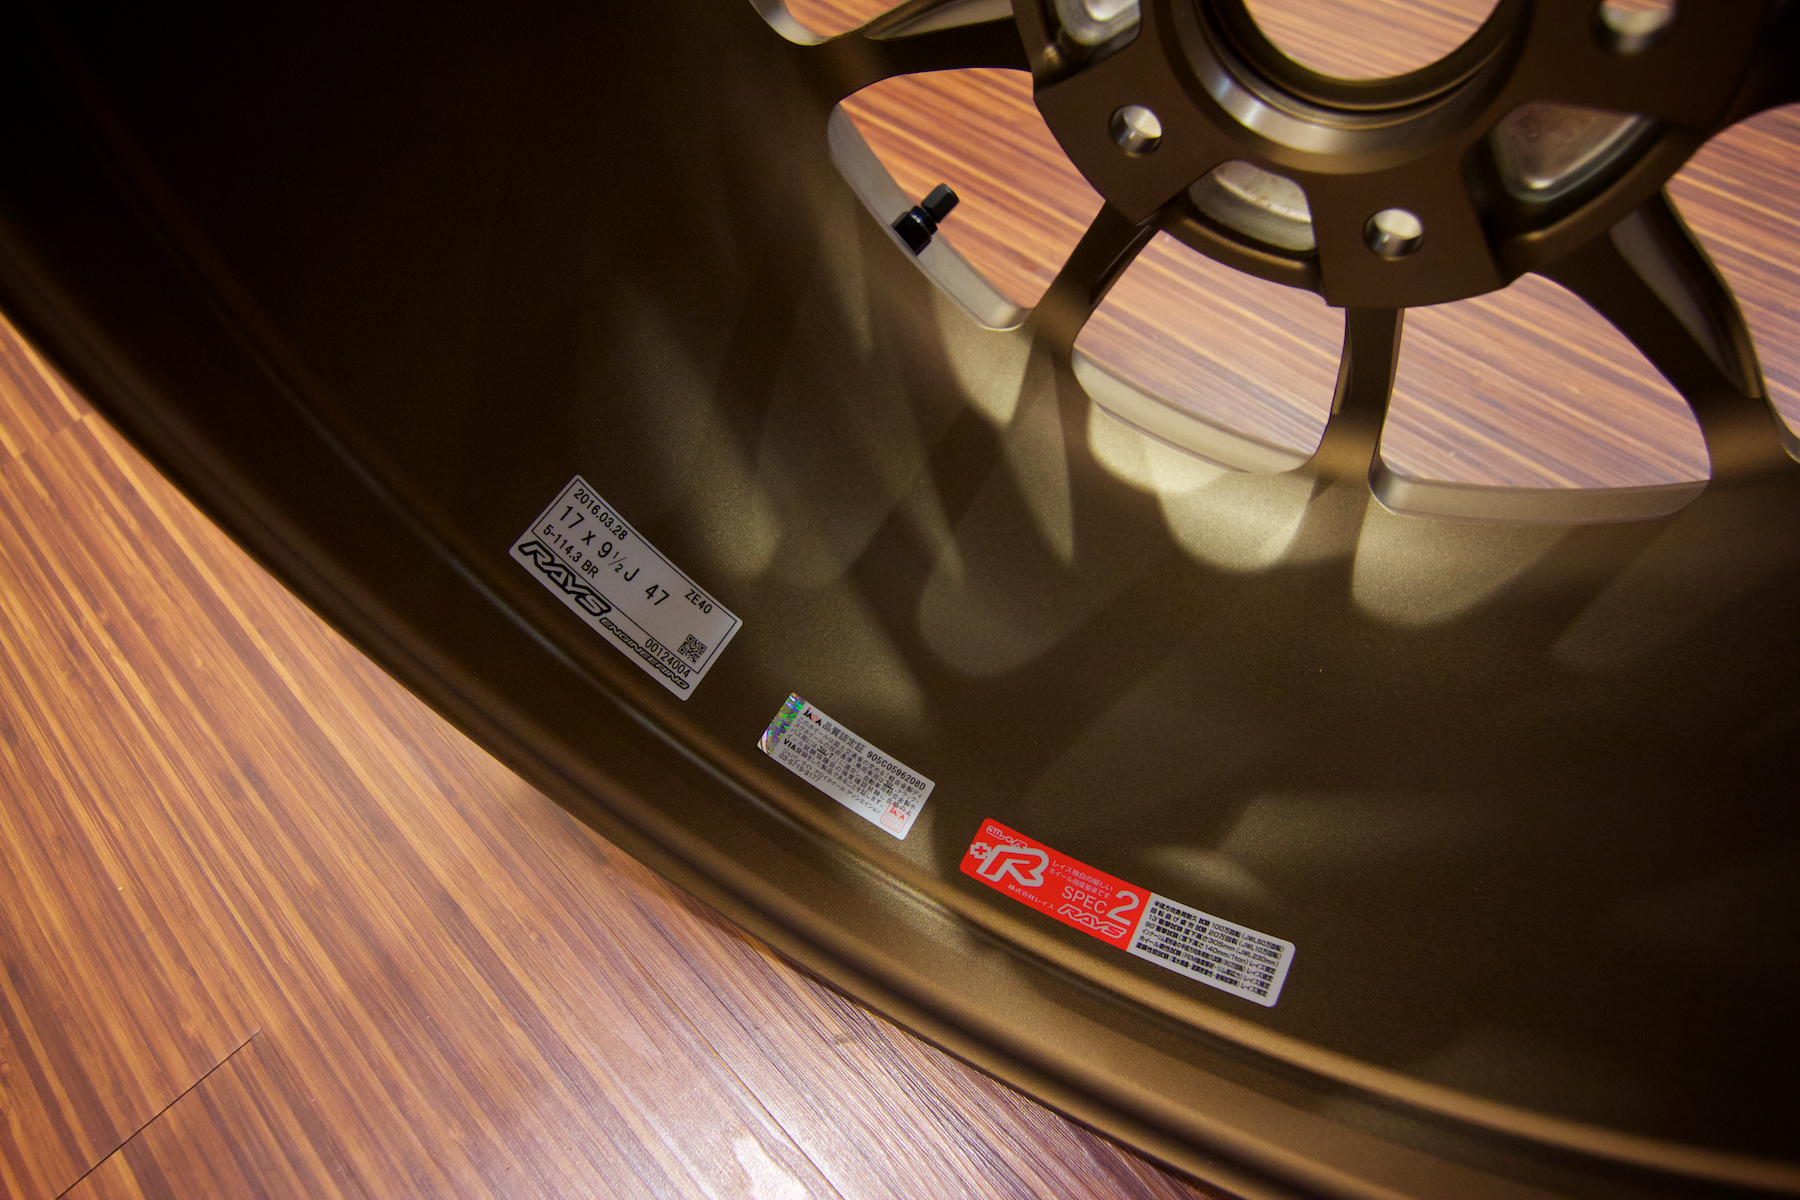
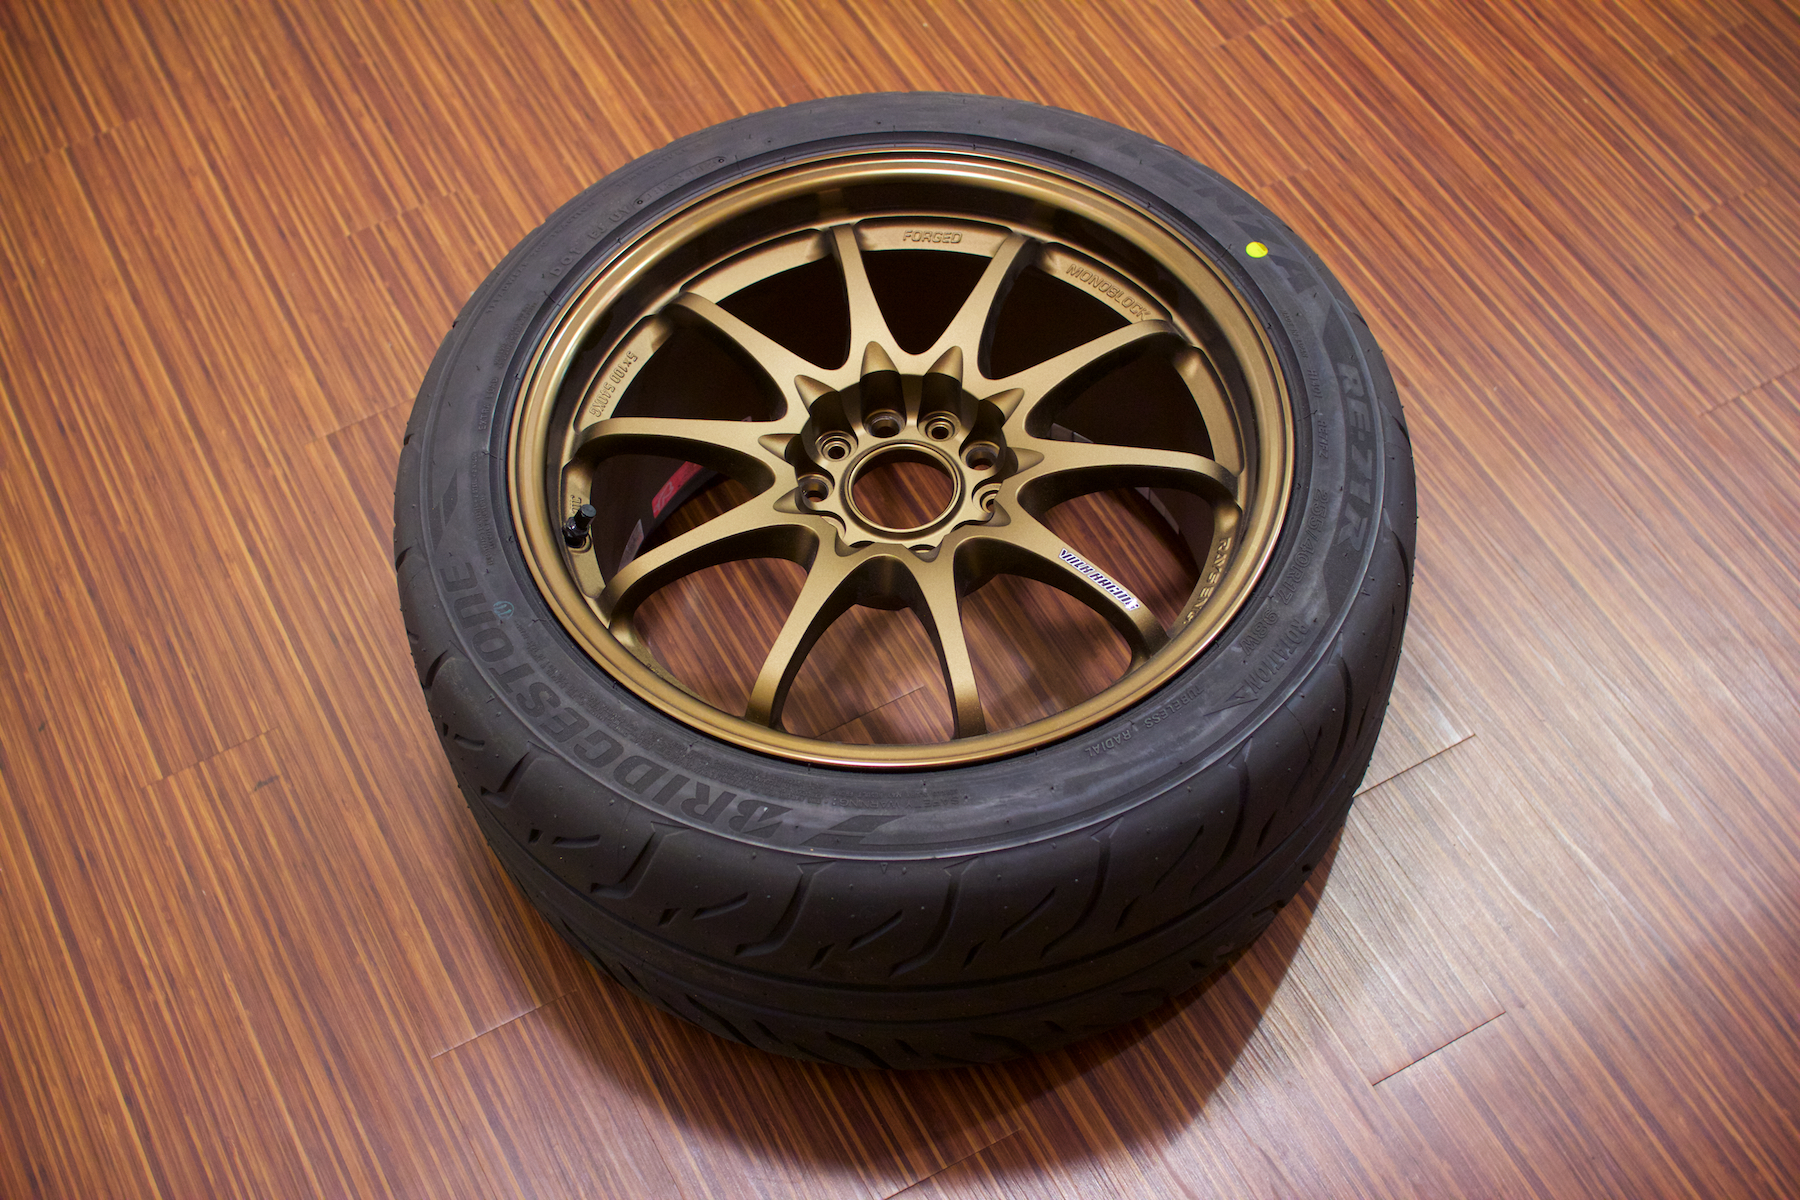
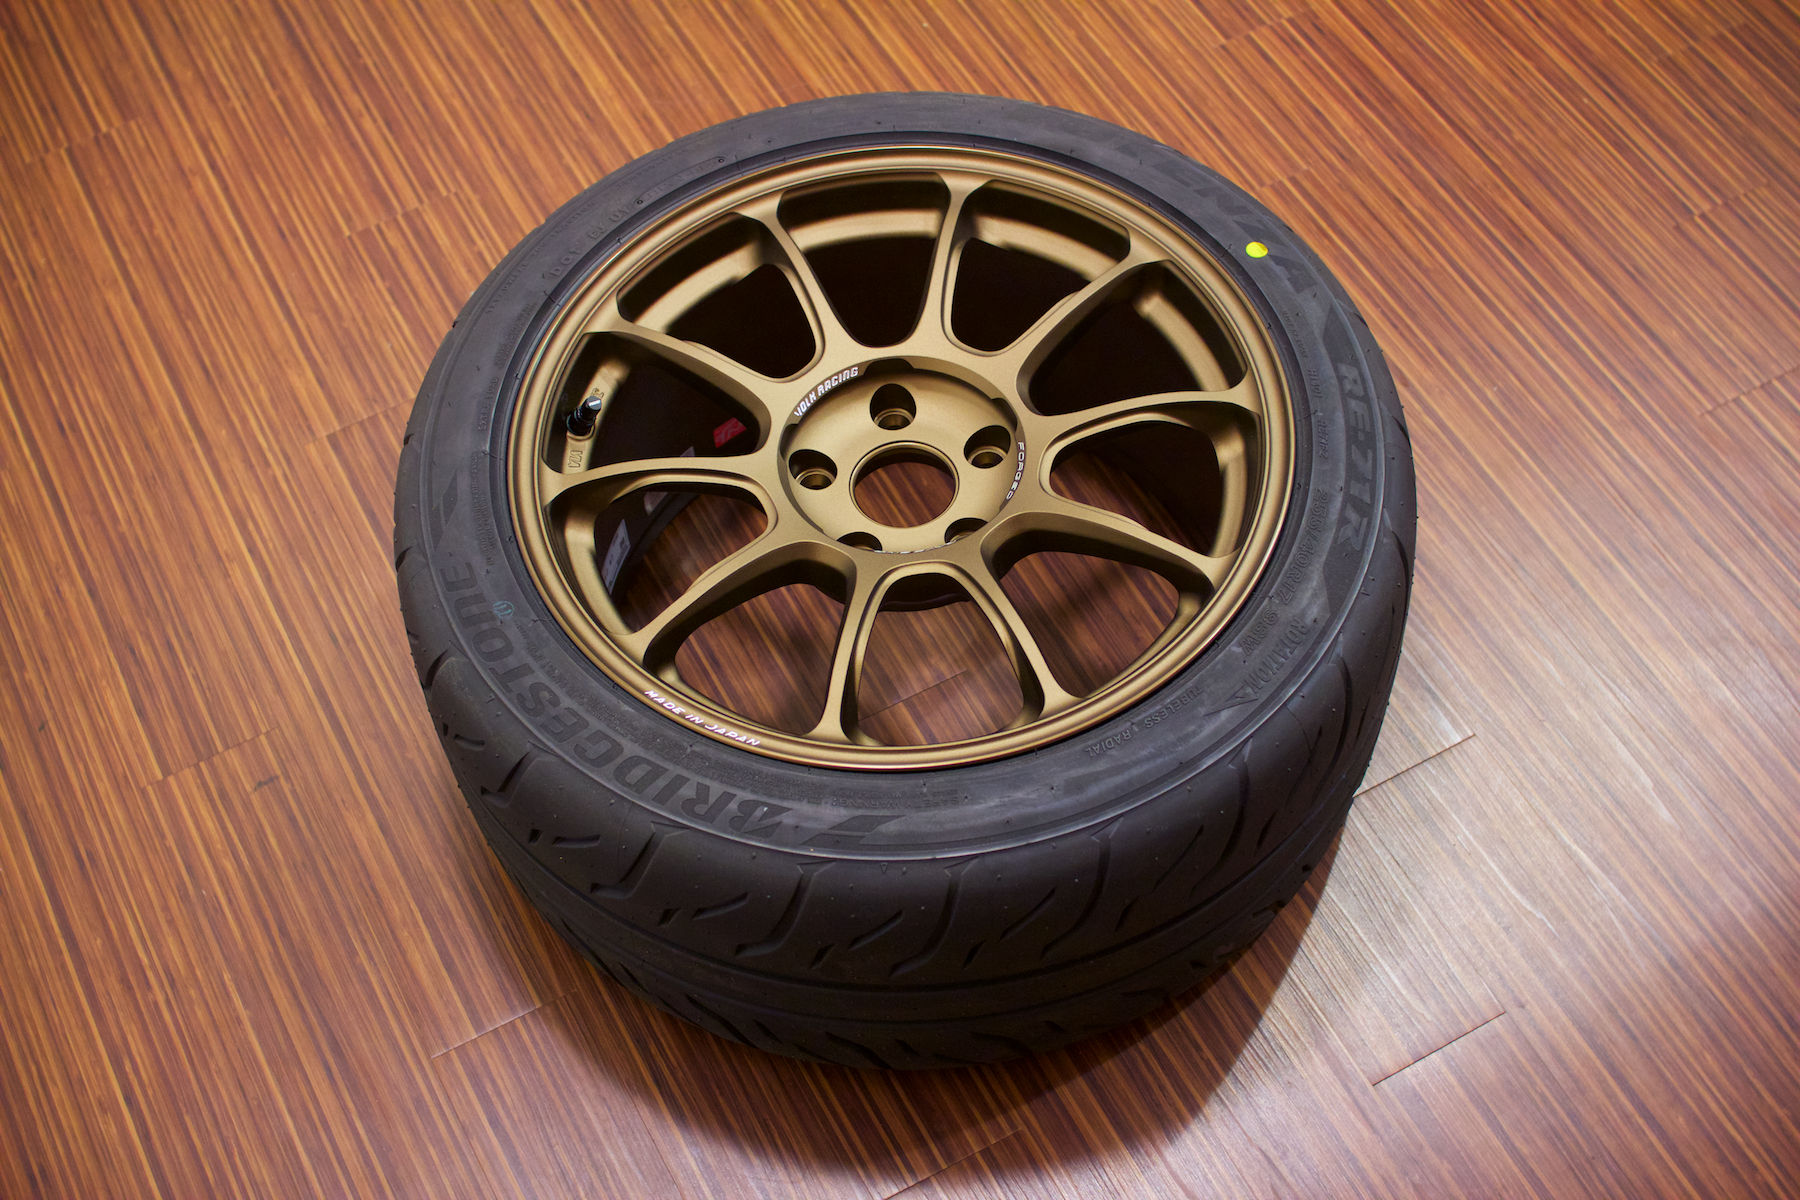
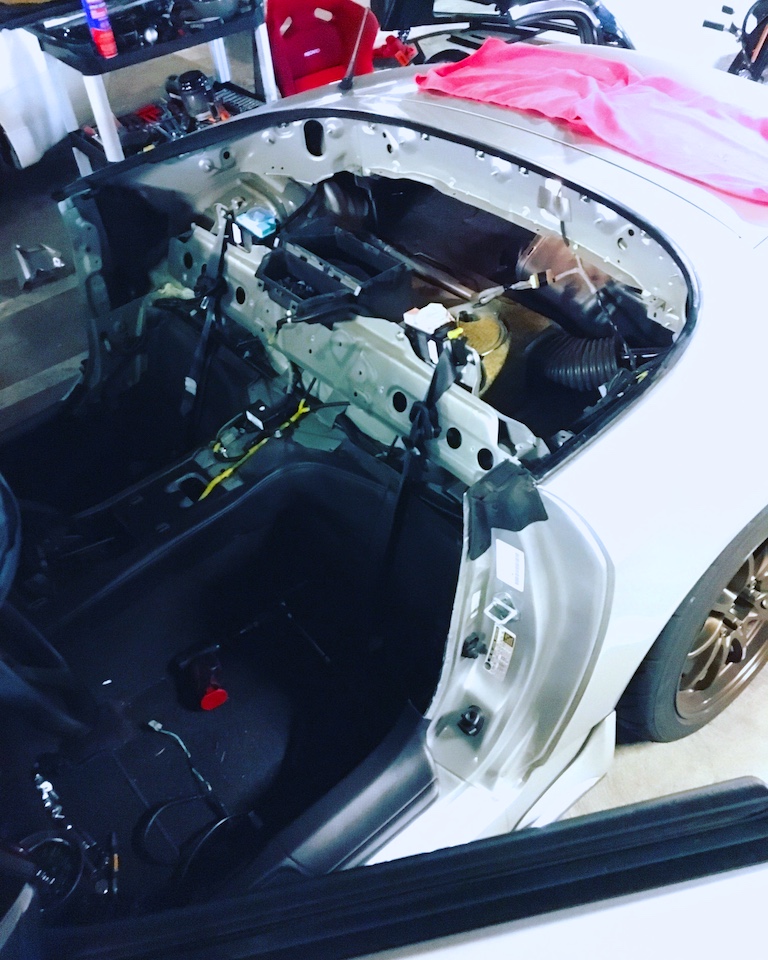
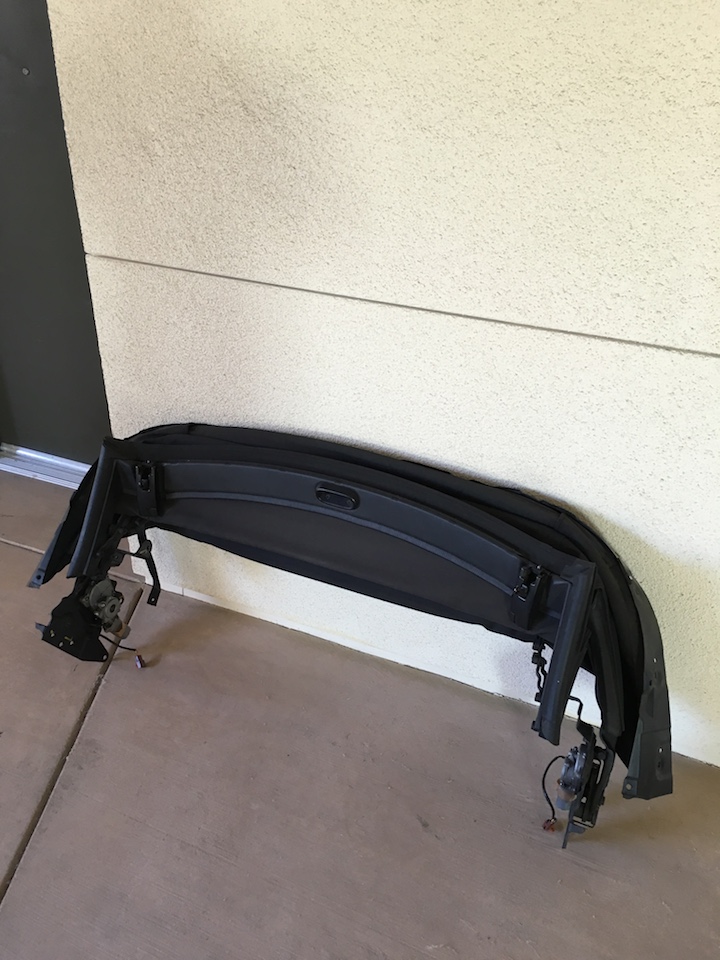
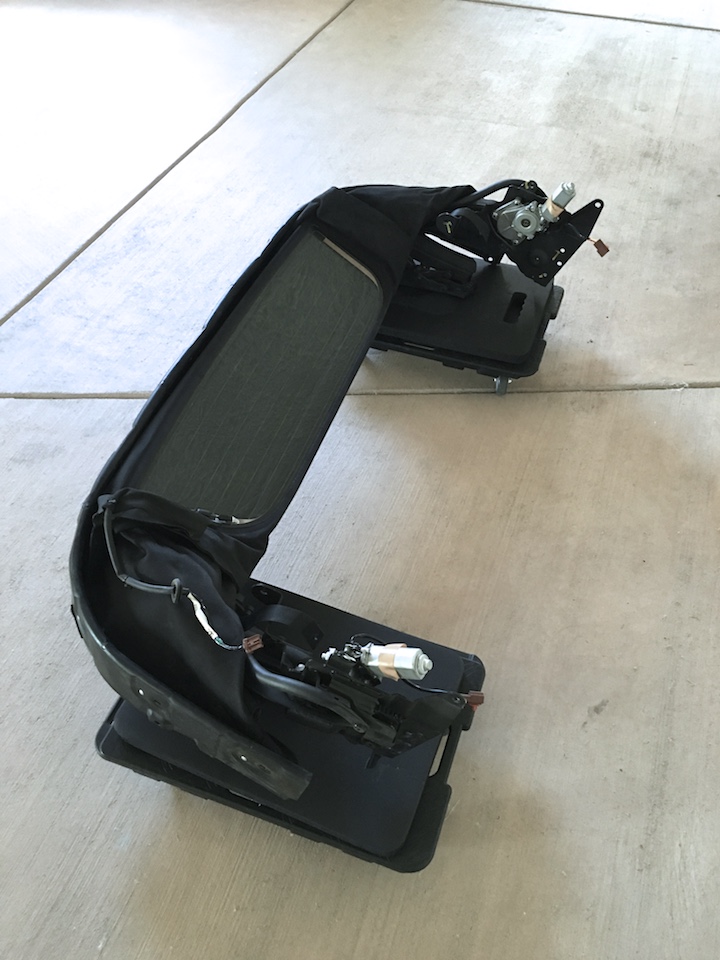
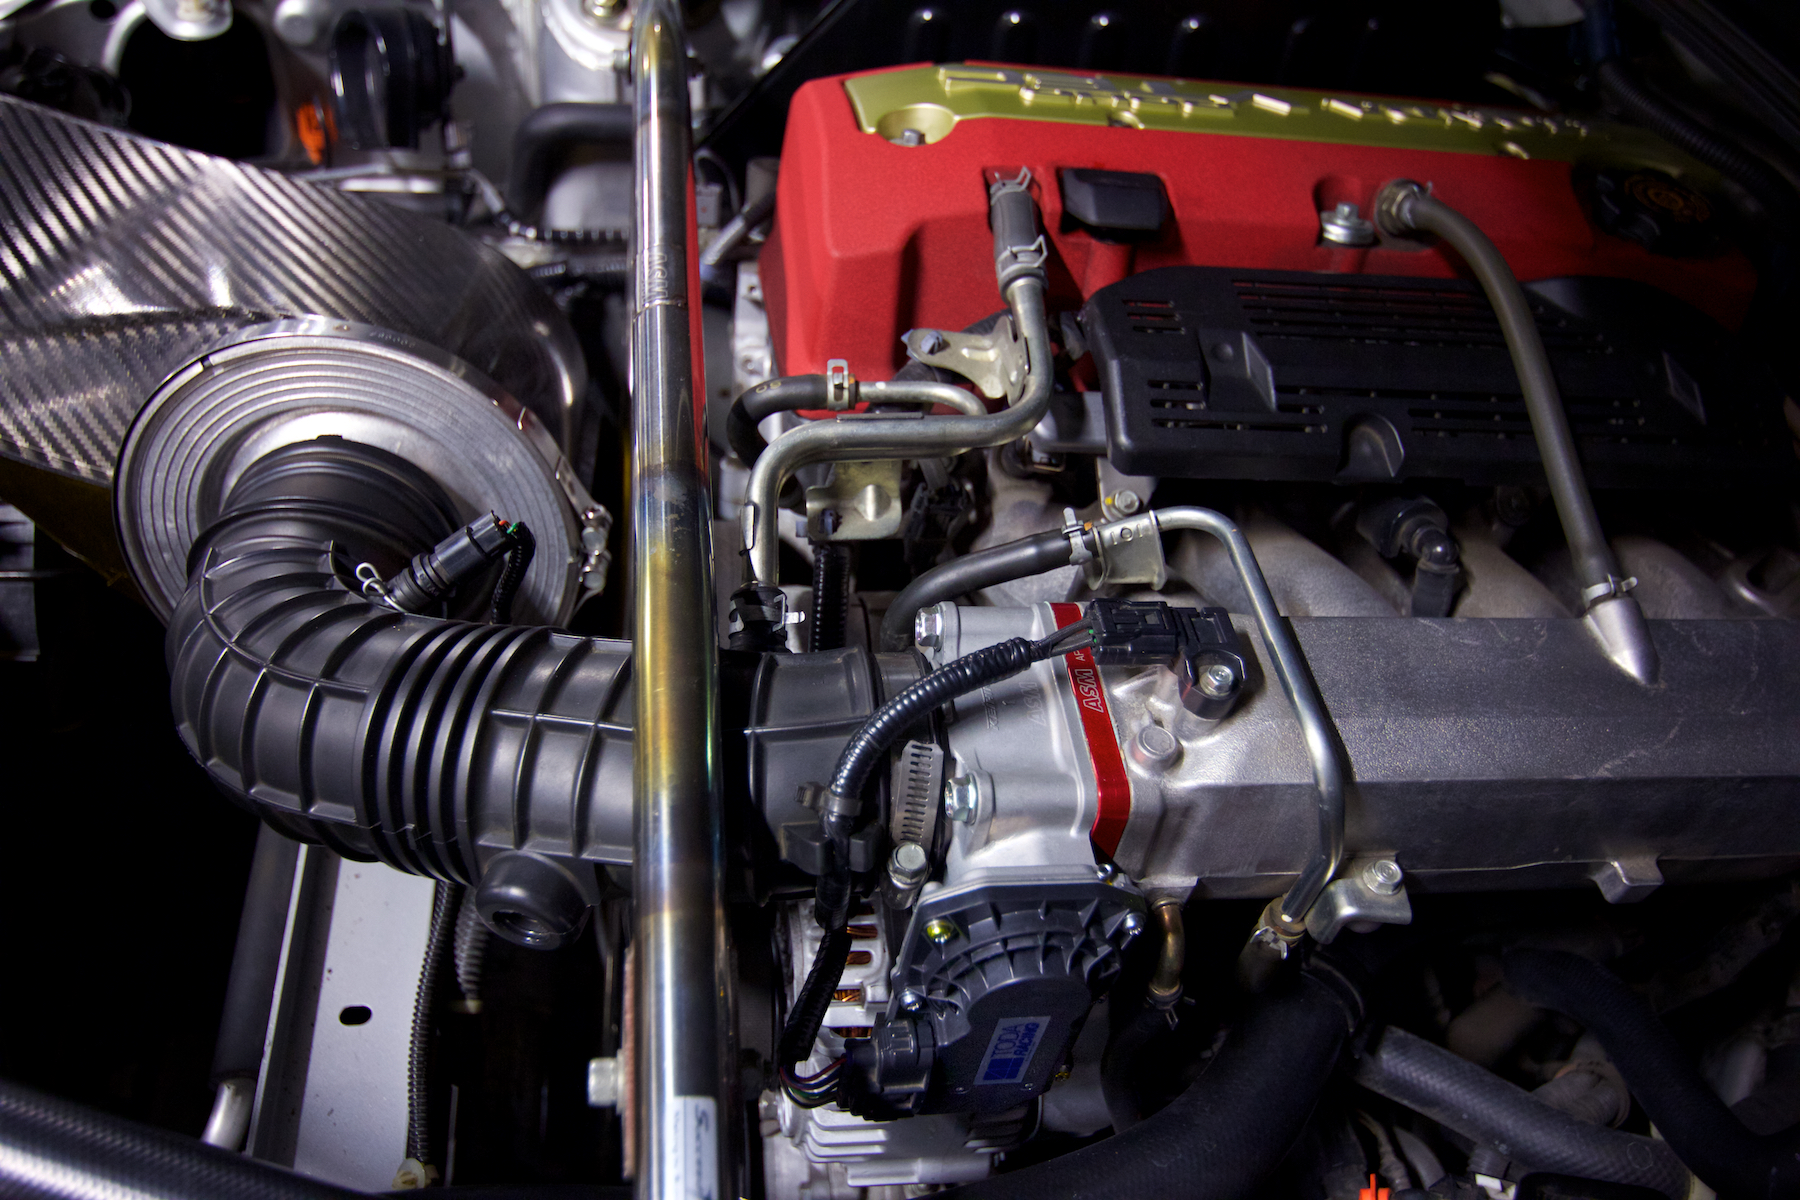
Going to try to get the soft top pulled out soon, smog done, header and throttle body installed, and then re-adjust ride height as springs should have had time to settle by then. And then go in on the suspension arm stuff I have been putting off for too long as well as Spoon steering rack bushings, and do a proper corner balance since most of the weight reduction stuff will be done at that point. And after all that I can finally get into installing the new rear bumper, mirrors, and drop it off for paint. ZE40s should also be shipping out to me this week. Just in time for me to put on the CEs instead. :D

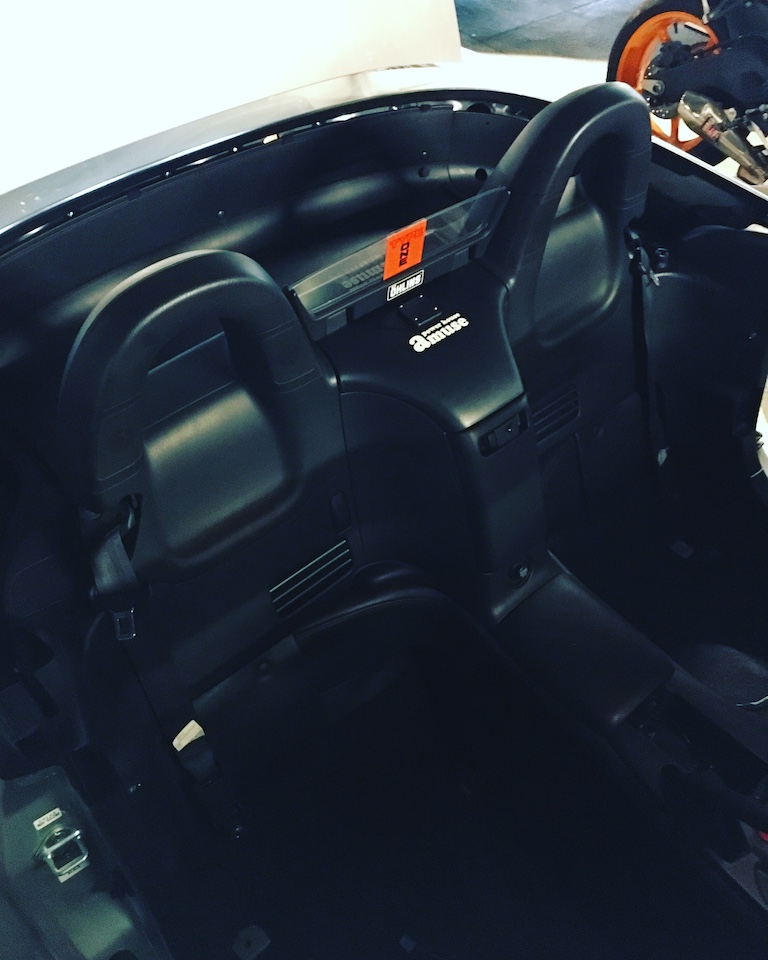
I have been pretty carefully measuring the ride height every couple days to see if I can get a decent understanding of how the springs are settling but so far not really a measurable change. I suppose the stiffer a spring gets the less it settles. The 550lb/10kg springs I had before easily settled around 5mm all around. Will be interesting to see how removing the soft top effects the ride height as well as the behavior of the car. I have gotten very used to the car as is now so always interesting to pull another 40-50lbs out of it with the soft top gone and the header. And always have the option to lose another 14lbs by putting the Amuse exhaust on.

I am still a bit overly excited that I finally figured out how to properly mic this car. It is awesome to be able to just put my backpack with my camera and sound gear in the car, plug in some XLR cables into my recorder from mics that are always in the car, and hit record on the GoPro/s and sound recorder and be ready to go. Whenever I want I can also pop on the Hero 4 Session camera and set it up in looping record mode and use it as a dashcam to protect myself from stupid commuters.
o_O S2000 | Mark I Stage II...

That’s thirty minutes away. I’ll be there in ten.
User avatar

Topic Author
andrewhake
Admin
Posts: 580
Joined: Oct 2016
Location: Mt. __________
Contact: YouTube IG
United States of America
#182

05-27-2016

Ray's Engineering ZE40 17x9.5 +47

ZE40s motha f@#kaaaaaaaaa! Got these in just in time to finally mount of my CE28Ns for proper use. The pain of me having waited months and months to get in the CEs after long trying to get the particular spec remanufactured and then not using them for nearly a year is definitely not lost on me haha. I kept getting punctures on the AD08Rs on the Weds at annoying times and didn't want to waste tires so tires were sort of replaced in a way that led me to using them for much longer than I normally do. Either way those tires are finally nearing the end of their life so the CEs will go on soon and I will have another set of wheels laying in wait while those tires hopefully live a much shorter life. Big thanks to Eddie (Gruppe-S) once again for the great deal and getting this spec made and for facilitating the +47 CEs in the first place.

ZE40s look amazing to me. I don't think I really have a preference between the CE28N and the ZE40. The center cap area is identical on both, so the new caps or the older flat caps work fine on both. The concavity of the faces are pretty similar between the two wheels, with it being a little more apparent on the ZE40 since the spokes go all the way to the wheel lip. The color and finish looks identical to my eyes, in some of the photos one may look more gold than the other, but it all just comes down to the lighting and camera position. In an evenly lit environment I would say it is the exact same finish. The CEs do have the more polished bronze lip that the ZE40s do not, and the ZE40s have the nice engraved markings rather than stickers.

Image

Image

Image

Image

Image

Image

Image

Did a quick composite and gif of the ZE40 with a tire "mounted".

Image

Image

Image

Surprisingly the ZE40s do weigh a little more than the CEs. I would guess all of that additional weight is around the mounting area as the CEs have the extra holes and a little less beefy mounting area overall. The ZEs definitely have a more refined barrel design and also have the knurled tire mounting surface. Any difference and stiffness and weight is probably pretty negligible when it is this close but interesting to see the differences either way.

Image

Image

I would like to try a different tire on the ZE40s to compare to the RE71-R on the CEs, but the RE71-R is really good value for money, and the only tire I would really want to compare it to (AD08R) is rather expensive right now. Kind of want to hold off and see if Advan comes out with a new tire but will probably just cave and get more RE71R when I can get a set just so I can see the wheels on the car. Wheel see, wheel see..
o_O S2000 | Mark I Stage II...

That’s thirty minutes away. I’ll be there in ten.
User avatar

Topic Author
andrewhake
Admin
Posts: 580
Joined: Oct 2016
Location: Mt. __________
Contact: YouTube IG
United States of America
#183

05-28-2016

Ohlins Super DFV + CE28N Unicorn Spec installed

Decided to finally swap over to the CE28Ns and RE71R after a very long run on the Weds and AD08R. Much more selective time out in the mountains and on track allowed me to get a lot of life out them. The left rear has a little tiny nail puncture right in the center tread block so decided it was a good sign to finally switch over. But I can finally start getting into testing out the RE71R and new dampers. I really f@#king love the gunmetal Weds, but man there is just something about the bronze that does it for me.

Image

Image

Image

Image

Image

The car is about 5mm lower than it has been in the past and when I last showed it with these CEs on so now if anything they fit even better to my eye. The Ikeya Arms will give me the very fine control I want to adjust how the wheel sits as well as play around with the arm length to see how it changes the camber gain under compression to see if there are any benefits with slightly shorter upper arms. I may eventually pick up the rear upper arms as well for the fine tuning ability back there too.
o_O S2000 | Mark I Stage II...

That’s thirty minutes away. I’ll be there in ten.
User avatar

Topic Author
andrewhake
Admin
Posts: 580
Joined: Oct 2016
Location: Mt. __________
Contact: YouTube IG
United States of America
#184

06-03-2016

Got the ZE40s back from getting coated by my friend Jason. If you need any detailing or paint protection, protection film stuff done in the bay area he would be my only recommendation. (http://www.carzwerk.com)

Image

Image

Image

Now just need to find some tires.
o_O S2000 | Mark I Stage II...

That’s thirty minutes away. I’ll be there in ten.
User avatar

Topic Author
andrewhake
Admin
Posts: 580
Joined: Oct 2016
Location: Mt. __________
Contact: YouTube IG
United States of America
#185

06-07-2016

Urge rear rotors

Image

Urge rear rotors arrived today. They me even be on the car by the end of the evening rather than hoarding them away like I usually do.

Urge rear rotors installed!

Image

Image

Very rare occurrence of me receiving parts and actually getting them installed the same day. Got the rear rotors installed no problem. Only real issue is that it has been awhile since I have removed the rear rotors so those rotor screws took a little love. Come to think of it. I think the SOS rotors that were on the car are the only other set of rear rotors I have ever put on the car since I have had it, they were on for about 26k miles and till looked pretty good. SOS rotors are 10lbs each and the Urge rotors are 8lbs each as they list on their site.

Image

The new caliper bracket was perfectly machines and repainted nicely. The wider opening in the bracket doesn't allow you to run the little metal pad retainer clips that go in the bracket but those particular clips aren't very important anyway. The retaining clip in the actual caliper does the work of keeping the pads in place. I put a small coating of the high temp ceramic brake lube I use for the caliper pins on those areas and on the portions of the pad that contact the caliper and piston like I normally do.

Image

My current Endless ME20 rear pads were worn just enough to fit with the wider rear rotors. Twisting the rear caliper pistons all the way back in, I was able to fit them no problem. I decided to grind down the inside pad on each side a very small amount just to make sure there was no chance of drag in the rear. Did a quick test drive and everything seems to be working as expected. Looking forward to seeing how the rear rotors effect front pad and rotor life as others have seen with them. Definitely feels great to have some proper vented rear rotors on this car, which is a damn sports car and should have come with vented rear rotors in the first place.
o_O S2000 | Mark I Stage II...

That’s thirty minutes away. I’ll be there in ten.
User avatar

Topic Author
andrewhake
Admin
Posts: 580
Joined: Oct 2016
Location: Mt. __________
Contact: YouTube IG
United States of America
#186

06-11-2016

Image

Image

Image

Some rare photos taken by a friend of my car at a car meet with other cars, meeting.
o_O S2000 | Mark I Stage II...

That’s thirty minutes away. I’ll be there in ten.
User avatar

Topic Author
andrewhake
Admin
Posts: 580
Joined: Oct 2016
Location: Mt. __________
Contact: YouTube IG
United States of America
#187

06-14-2016

In other exhaust related news I swapped the OEM catalytic convertor back on so I can take the car in for a smog check.

Image

The Toda test pipe still looking rather beautiful. Between the 70mm Toda pipe and the 60mm I noticed the little pop/snap the exhaust does when I lift off throttle at high RPMs got a little more aggressive. It does this awesome sort of low end thlunk sound it never did before.

With the OEM cat back on the exhaust is SIGNIFICANTLY quieter. Doesn't really produce any more drone or anything to my ears either. Also all of the raspiness that you sometimes get near the VTEC changeover on the over run is gone too. I am looking into some hi-flow cat options and will probably end up running one for day to day street use and swap the test pipe on for track use. I tend to give the car a quick once over before going to the track each time and swapping on the test pipe is really simple. Especially with the secondary o2 sensor disabled and removed.

I will also be flashing back to the Stock tune for smog since it requires the secondary o2 sensor to be enabled (which was reinstalled with the OEM cat). Will be doing that and swapping on the OEM airbox tonight for a smog check later this week and then it is party time.
o_O S2000 | Mark I Stage II...

That’s thirty minutes away. I’ll be there in ten.
User avatar

Topic Author
andrewhake
Admin
Posts: 580
Joined: Oct 2016
Location: Mt. __________
Contact: YouTube IG
United States of America
#188

06-15-2016

"What do you use to transport your tools when working on it in your garage? In the same living situation and have been leaving the jack behind the car but I don't think management will take to kindly to having jack stands, tool boxes etc. (granted this will be for similar tasks - brakes, suspension adjustment, maybe oil changes)"

Image

Jack, 2 jack stands, and 2 ramps fit on the bottom part of the cart no problem. I keep this cart in my coat closet since I don't really need coats. Even added a little shelf for extra storage.

http://www.amazon.com/gp/product/B003HE ... detailpage
o_O S2000 | Mark I Stage II...

That’s thirty minutes away. I’ll be there in ten.
User avatar

Topic Author
andrewhake
Admin
Posts: 580
Joined: Oct 2016
Location: Mt. __________
Contact: YouTube IG
United States of America
#189

06-16-2016

Soft top deleted

Big thanks to Mike (s2k_born) for coming down from Sacramento to help take care of the soft top removal. Mike has a ton of experience doing this after removing/replacing many soft tops so I enlisted his help to get mine removed. While he did is thing and handing me interior panels I got them all cleaned up and got the car all cleaned up inside once everything was removed. (sorry for the crappy photos they were taken in a rush)

Image

With someone with a little experience doing this it can be done pretty quickly. Doing it on my own it would have taken me all day for sure.

Image

Since the soft top motor brackets are removed along with the top Mike re-used some 12mm bolts that were removed with the top and used nuts on the other side to maintain all 4 mounting points for the hardtop catchers. Normally just the front 2 would remain but this way maintains those other two points. Without the soft top bracket these points aren't as strong but helps keep the catchers more secure still.

Image

Image

Still looks great with all the interior panels back in. The total weight of the parts removed was 67.4lbs. I decided to remove the black metal brackets that mount around the edge since they weighed a few lbs. Those brackets as well as the little soft top hold down brackets that mount to the back of the hardtop weighed in at 4.7lbs. And .9lbs for the little side rain gutter panels that have the outer brushes on them. So entire soft top assembly with motors and mounting brackets is 61.8lbs not including those other parts.

I weighed it on a very accurate large shipping scale and total weight with everything you see here is 61.8lbs. I weighted myself at 206.5lbs (I am about 6'2", fight me, I wish you would) and then weighed myself holding everything I removed (including a few small additional brackets and panels) at 273.9lbs.

Image

Image

The additional brackets and panels were the metal brackets that go along the edge of the rear of the tub and the plastic side brushes/rain gutter as well as the soft top hold down brackets that are on the rear of the hard top (5.6lbs) for a total weight savings of 67.4lbs compared to having both the hardtop and soft top installed. I think this would be a pretty standard method of removing the top and maintaining the interior panels. It maybe be possible to remove additional small brackets but there is no way you would get anywhere near 97lbs (that I saw in another thread) without also removing the roll hoops (which actually aren't that heavy) or something else. Would probably need to remove the roll hoops and the bulkhead to get there as well as all of the rear interior panels.

I will be getting the weight of the complete hardtop with all interior and OEM mounting when I go in for a corner weight of the car and will update this thread again.

Just wanted to say after reconfiguring my estimated weight savings spreadsheet I am now at -210.3lbs from the OEM curb weight. And that is with the EVS 70mm exhaust which is 11.4lbs heavier than the Amuse. Should lose another 10lbs with the header so I have now easily removed my own weight from the car. My data isn't perfect as I have only weighed so many parts and only have estimates for some OEM parts but within the margin of error I am still well covered at pulling the 200lbs I was hoping to from the car so very pleased with that.

Also just by sheer luck the rear ride height is now exactly where I was aiming for visually with the soft top removed. It was sitting a little bit low after the springs settled in a bit and I was planning on adjusting but I will now be able to just make some fin adjustments to get it all dialed in before I go in for the new front arms, alignment and hopefully a corner balance.

Also decided to set the rear sway bar back to the middle setting to try it out with the new wheels and tires on the car. My rear AD08Rs were definitely more worn than my fronts so I was losing a little rear grip with the Weds and AD08s. Going to go out and see how I like that car with the extra weight removed.
o_O S2000 | Mark I Stage II...

That’s thirty minutes away. I’ll be there in ten.
User avatar

Topic Author
andrewhake
Admin
Posts: 580
Joined: Oct 2016
Location: Mt. __________
Contact: YouTube IG
United States of America
#190

06-23-2016

It doesn't really bother me much, but was looking at my photo library and thought I would try a quick mockup of what a nice little carbon fiber garnish piece might look like to cover the exposed areas of the chassis with the soft top removed.

Image

Could be designed and made to just mount directly to the plastic pieces beneath them, and could integrate pretty well into the side garnish panels on the outside next to the seats. Will it happen? Who the f@#k knows.

On another note removing the soft top put an end to one of the last little annoying rattles I was getting sometimes when the car was warmed up and idling. Was probably just some part of the soft top vibrating around a bit but definitely nice to get rid of stuff like that. Road noise has probably gone up a tiny bit from the rear, but not much different than just driving around before with the soft top up, and removing it has gotten rid of of other annoying sounds so win win really.

Got distracted with other stuff so intake and throttle body isn't on yet, but should happen soon enough.
o_O S2000 | Mark I Stage II...

That’s thirty minutes away. I’ll be there in ten.
User avatar

Topic Author
andrewhake
Admin
Posts: 580
Joined: Oct 2016
Location: Mt. __________
Contact: YouTube IG
United States of America
#191

06-24-2016

ASM throttle body installed

Got the ASM throttle body and space installed. Install was simple, just made sure to let the car cool down to avoid dripping a lot of coolant everywhere from the intake manifold recirculation lines. ASM includes the 4 longer bolts necessary to install the spacer, so just had to remove the studs (that Honda for some reason used on the top instead of bolts) and use the new bolts and included gaskets. I trimmed the top part of the gaskets that stick out a little bit since it looked a bit odd with the two gaskets. And then just a matter of plugging everything back in. Hard to tell any particular difference right away as that would mostly come from tuning and optimizing. I also went from the OEM airbox and stock tune back to Mugen intake, ASM throttle body, and tuned setup. The tune alone makes such a massive difference, and the intake has a pretty noticeable effect on throttle response as I have already experienced before.

Image

Image

I am still on my tune that was done when the car had stock intake and exhaust and everything, but I did push the rev limiter from 8400 to 8500. Will be getting the header and the test pipe back on and then getting an updated tune based on all the new stuff. The extra 100rpm to redline is definitely nice. Like with any high revving engine, every extra 100 rpm or so makes such a nice difference in sound at the top end. And that extra 100 definitely gives that little extra range that is sometimes necessary and allows you to avoid shifting up right before braking points.

Image

Nice to keep making progress little by little on all of these things.
o_O S2000 | Mark I Stage II...

That’s thirty minutes away. I’ll be there in ten.
User avatar

Topic Author
andrewhake
Admin
Posts: 580
Joined: Oct 2016
Location: Mt. __________
Contact: YouTube IG
United States of America
#192

06-24-2016

Measured my ride height again last night after installing the throttle body after the new suspension has seen a good amount of use and now that I have taken a lot of weight out of the car.

LF 322mm RF 322mm
LR 327mm RR 327mm

I like to get ride height measurements from the center of the wheel hub to the fender edge, so I have found that the best way of measuring this is to measure the entire wheel face lip to lip. In my case that is 472mm. (A 17" wheel is 17" at the barrel of the wheel, it's overall diameter is around 18.5" or 472mm). Divide 472mm by 2 and you get 236, which is exactly half of the diameter of the wheel. Next I measure the distance from the bottom lip of the wheel to the edge of the fender. So using the LR as an example this measurement was 563mm. Then you just need to subtract the half wheel face measurement from that so 563-236=327mm. This gets you an exact measurement from the "center" of the wheel which is normally pretty hard to do since there isn't really anything to accurately measure from at the center and on the same plane as the fender edge.

Some old photos with a little diagram to explain:

Image

472mm

Image

563mm. Subtract 236 from that and get 327mm.

This will vary a little bit from car to car and with different alignments and fenders and what not, so measurements can't always be compared car to car, but I find it to be the most effective when dialing in my own ride height.

But back to my measurements. VERY happy to see how little the springs have settled and how consistent it is from spring to spring. When I installed I made sure the front and rear damper lengths were very exact from side to side, and with such little variance in how the springs settle makes it that much easier to adjust. I am going to get the header installed (which should remove a little more weight from the front end, and the will probably raise up the front a few mm to closer match the rear if needed. With the small 5mm difference front to rear the ride height visually looks very similar front to rear in terms of distance to the fender/quarter panel edge.
o_O S2000 | Mark I Stage II...

That’s thirty minutes away. I’ll be there in ten.
User avatar

Topic Author
andrewhake
Admin
Posts: 580
Joined: Oct 2016
Location: Mt. __________
Contact: YouTube IG
United States of America
#193

06-29-2016

HKS Metal Catalyzer

Image

After being back on the OEM catalytic convertor for awhile I decided to pick up a high flow cat to use in certain situations. I love the test pipe setup I have but it is significantly louder at higher RPM compared to having a cat. So a high flow cat can help me quiet the car down a large amount which should let me go to tracks like Laguna with silly sound regulations without having to swap back on the stock exhaust. In the mountains a loud car can be a bit of an attention getter than I would like sometimes as well, so good to have options to quiet it down. The car will definitely be tuned with the test pipe, and more often or not the test pipe will be on the car.

HKS is 7.6lbs compared to 12.6lbs total for the OEM cat and heat shields and everything. I think the Berk HFC are a little lighter but I preferred the larger diameter catalyzer and the way the HKS expands before the metal catalyzer cell material. Nothing at all wrong with the Berk but just wanted to try something different. This should be a good in between from the OEM cat and something like the Berk HFC I think. I also looked at the Amuse and SARD HFC but HKS had the better design to my eyes.
o_O S2000 | Mark I Stage II...

That’s thirty minutes away. I’ll be there in ten.
User avatar

Topic Author
andrewhake
Admin
Posts: 580
Joined: Oct 2016
Location: Mt. __________
Contact: YouTube IG
United States of America
#194

07-09-2016

ASM Exhaust Manifold 07 installed

Image

Image

Image

Got the ASM exhaust manifold and Toda oil pan installed. Took it into a friend's shop so we could let the oil pan sit overnight so everything could cure. The car sounds amazing with the new manifold. With the EVS 70 exhaust and test pipe there is generally a lot more sound coming from the rear and underneath the car, but with the manifold you get more sound back up from so it balanced it out nicely from the drivers seat, just sounds like the entire car is making noise now which is great. It definitely sharpens up the noise a bit as well especially at high rpms near redline. Sounds glorious. Will be interesting to try it out with the HKS cat.

Some photos of it installed and after running in and putting some heat through it.

Image

Toda oil pan:

Image

Image

The oil pan holds the oil at the bottom of the engine really well. None of the oil spills out at all, also probably holds it near the oil pickup better than the stock one. Didn't have any setup to read oil pressure so can't really comment on how effective it is.

I also got a nicer photo of the ASM throttle body and spacer.

Image
o_O S2000 | Mark I Stage II...

That’s thirty minutes away. I’ll be there in ten.
User avatar

Topic Author
andrewhake
Admin
Posts: 580
Joined: Oct 2016
Location: Mt. __________
Contact: YouTube IG
United States of America
#195

07-15-2016

I have been doing some preparations making sure I am ready to install the Ikeya front upper arms so I figured I would share some details. The arms actually come with very detailed documentation and I took the time to do a rough translation to gather some of the useful information. Something I was concerned with was being able to properly measure and account for the length of the the stock suspension arms. Luckily Ikeya Formula has already done all this and they provide specific measurements of how to setup the arms for the normal OEM length.

Image

This diagram (which I have written on for later reference) actually shows the arms setup to match the OEM length. Which according to the diagram is 213.5mm from inner to outer mounting points. The arms are essentially setup this way out of the box, with the balljoint bolts a little loose to allow for adjustment, but very easy to adjust back to the standard length.

They also list the amounts the arms can be lengthened and shortened from the OEM length. They can be extended 10.5mm, or shortened by 8.5mm from the normal OEM length arms. So a pretty massive range. Each notch on the balljoint adjustment plates is ~1mm from what I measured. You could also technically adjust the inner mount points if you wanted even more fine control. I plan to try to test out the entire range to see what the actual range of adjustment will be if time on the alignment rack allows, but I plan on just try shortening the arm by 3-4mm to maintain a usable alignment with my J's S1 joints. Might not even need to do that much but it seems like it will be an appropriate amount to get the little extra clearance I am after up front.

Ikeya Formula does mention in the documentation that with a high offset wheel it is possible to shorten the arm too much to the point that the wheel could come in contact at high steering angles. (Example they used was a 17x9+63 wheel with the arm shortened a large amount). Shouldn't be an issue with my wheel size and offset and plans for adjustment.
o_O S2000 | Mark I Stage II...

That’s thirty minutes away. I’ll be there in ten.

Return to “Projects”