o_O S2000 | Mk I — Stage II

Permission to engage...

User avatar

andrewhake
Admin
Posts: 580
Joined: Oct 2016
Location: Mt. __________
Contact: YouTube IG
United States of America
#106

10-16-2014

Went in for a valve adjustment this evening at 25k since my last one:

Image

Exhaust side was all a little tight. Smooth as butter again now. I really love this photo, the lighting was just sort of perfect.

I also came across this beauty and went for a ride along. I need to own one yesterday:

Image

Image

Image

So dreamy...
o_O S2000 | Mark I Stage II...

That’s thirty minutes away. I’ll be there in ten.
User avatar

Topic Author
andrewhake
Admin
Posts: 580
Joined: Oct 2016
Location: Mt. __________
Contact: YouTube IG
United States of America
#107

10-19-2014

My car is still not in the body shop post #3548...

It's at the beach!

Image

Image

Image

Image

On the way back I ran into a massive 2 car traffic jam where there are normally no cars.

Image

I was up in San Francisco checking out an OEM hardtop (wasn't as nice as I hoped) and decided to take the scenic route back. Earlier that day I took my car into Spider Autoglass to have them do a headlight restore and apply a protective coating. Highly highly highly recommend Spider Autoglass (http://spiderautoglass.com) if you need a windshield replacement or any detailing work, the owner has a CR in the shop and they thoroughly know the S2000. I believe I have even come across the owner at the track on multiple occasions. Not very often you end up discussing the details of an Ohlins damper at an autoglass shop. They did an excellent job restoring the headlights. Mine aren't overly fogged up or anything, but they take a beating and have plenty of pitting. They did an excellent job and go way above and beyond just a simple headlight restore kit using multiple levels of sanding and polishing, and then finish it off with a coating for UV and additional protection. These guys are way more detail oriented than any other autoglass or detailing shop I have been to. :thumbup:

I decided to have this done so when my front end is finished up everything will look nice and fresh.
o_O S2000 | Mark I Stage II...

That’s thirty minutes away. I’ll be there in ten.
User avatar

Topic Author
andrewhake
Admin
Posts: 580
Joined: Oct 2016
Location: Mt. __________
Contact: YouTube IG
United States of America
#108

10-21-2014

OEM Honda Access Premium Red Floor mats:

Image

I decided I would give some red floor mats a try for some Type R vibes. I think I like both about the same. Some red on the floor does give it a little extra spice but really I like both about the same I think. Once I get a hard top on this mama jama I think red will be the floor mat of choice. There was an beautiful black OEM hardtop for sale in San Jose last week but I was 3 hours too late to the thread to get it in time. :( Luckily I have already had plenty of other hardtop scenarios in the works and think I found one that I will be happy with. Then there is this other option...

Image

(Don't mind the weird fold, just needed to jiggle it into place a bit.)

Body shop visit is imminent. Hold onto your butts.
o_O S2000 | Mark I Stage II...

That’s thirty minutes away. I’ll be there in ten.
User avatar

Topic Author
andrewhake
Admin
Posts: 580
Joined: Oct 2016
Location: Mt. __________
Contact: YouTube IG
United States of America
#109

10-26-2014

Had to go back up on the alignment rack to adjust rear camber in toe. Had a little too much dialed in last time and didn't meet the specs I asked for.

Image

At -2.8, 6.4, -2.6, 1/16th total now. -2.6 was good but I lost some of the liveliness from the rear end in low speed stuff. Should retain the excellent rear grip but get back the low speed rotation with this I think.
o_O S2000 | Mark I Stage II...

That’s thirty minutes away. I’ll be there in ten.
User avatar

Topic Author
andrewhake
Admin
Posts: 580
Joined: Oct 2016
Location: Mt. __________
Contact: YouTube IG
United States of America
#110

10-29-2014

It's happening!

Image
o_O S2000 | Mark I Stage II...

That’s thirty minutes away. I’ll be there in ten.
User avatar

Topic Author
andrewhake
Admin
Posts: 580
Joined: Oct 2016
Location: Mt. __________
Contact: YouTube IG
United States of America
#111

11-23-2014

Car still in shop means I do stuff like this instead of spending all of my time driving. Mockup of F1 influenced systems display using Motec D153 display.

Image

Image

Image

Maybe with enough money and time it could actually happen. Who knows? Seems that it would be possible with Motec hardware, they have a pretty awesome custom display creator that the data can be piped into.

I think I may give the Defi Smart Adapter a try as well.
o_O S2000 | Mark I Stage II...

That’s thirty minutes away. I’ll be there in ten.
User avatar

Topic Author
andrewhake
Admin
Posts: 580
Joined: Oct 2016
Location: Mt. __________
Contact: YouTube IG
United States of America
#112

11-27-2014

Amuse R1 front bumper installed

Image

Image

Image

I also decided to test out the OEM emblem on the car which I plan on installing properly soon enough. Just eyeballed it on and I am definitely a fan. Not standing out as a modified car is important to me for many reasons and I just like the way it looks.

Image

The body shop has a solid plan for painting the hood after a lot of slow research, lots of calls and emails back and forth between an OEM paint company isn't a very speedy process unfortunately, and now just waiting to get the materials in so it should be going on soon after Thanksgiving if all goes to plan. The grill on the bumper was just painted for now, but will be powder coated once they are ready to paint the hood which will involve having that grill powder coated black as well. The grill is very subtle painted satin black since it sits so far back in the bumper, and the mounting solution I came up with is extremely strong. I will be installing brake ducts on the bumper as well which I don't think I have posted any pictures of? Another s2ki user designed some nice ones and 3D printed them specific for the R1 bumper so it will be a fantastic solution combined with the APR backing plates. The APR's have a 3" inlet but I think I will just be running 2.5" hosing as it should be more than enough for my uses and give me more clearance.

I am so happy to finally have the bumper on the car! It's so great to see the car start to come together in the way I always imagined it.I am going to try to get in some engine temperature data logging done with FlashPro before the hood is installed so I can do some runs after and compare. Hopefully I will be able to test the car on days with similar ambient temps.

Image

Image

The CE28N center caps were off the car at the moment since i lost one in the mountains. But since then I have got some more in so I will get those popped back in and now I have some spares as well. I am still undecided but I am leaning towards keeping the staggered CE28Ns once my 17x9.5+47s come in next year so I can switch between a square and staggered setup if I want. I am still sort of amazed that I was actually able to make that happen without too much effort.

But in the meantime...

Image

I realized I never posted these up in this thread yet. These beautiful Wedsport TC105Ns 17x9+49 in dark gunmetal popped up from the same vendor that setup the CE28N deal. Oddly enough it was me purchasing a set of the TC105Ns that lead to that CE28N deal, but the Weds were such a good deal I couldn't resist as I knew they would work with my future brake plans, and would make for a perfect set of wheels to start testing out a square setup before my CE28Ns come in. They will also give the ability to try different tires back to back. Still need to get some tires for the Weds, but I think I will wait for another part that is on its way before I do that. :)j

I will get out and shoot some real photos soon with the new bumper installed.
o_O S2000 | Mark I Stage II...

That’s thirty minutes away. I’ll be there in ten.
User avatar

Topic Author
andrewhake
Admin
Posts: 580
Joined: Oct 2016
Location: Mt. __________
Contact: YouTube IG
United States of America
#113

11-27-2014

I almost forgot. Another part of my car received an important upgrade to go with the new bumper.

Image

Lot's of Hondas have a little ASIMO robot hanging from the mirror, but few have ever seen some shit like the one hanging from my mirror has seen.
o_O S2000 | Mark I Stage II...

That’s thirty minutes away. I’ll be there in ten.
User avatar

Topic Author
andrewhake
Admin
Posts: 580
Joined: Oct 2016
Location: Mt. __________
Contact: YouTube IG
United States of America
#114

12-07-2014

Side under panel 3D mockup

Image

Image

Added a little inner fence piece. The idea here is to allow less turbulent air to get to the center open tunnel section of the car. Full tray would be more effective but it would also be a total pain in the ass. Going to add some hardware to this and then put together a mock up of how it would be placed on the car. Just for fun I might use the little knowledge I have about car aerodynamics and model up a rear diffuser.

And for those waiting patiently for me to get the hood on the car, trust me it is driving me just as mad.

Spent some time setting up a real carbon fiber shader.

With clear coat:

Image

Dry carbon:

Image

Pretty fun modeling this and setting up the materials. Just like doing carbon fiber lay up in real life, in 3D you have layout each piece in a pattern that best hides the seams and best fits into the shape of the model.
o_O S2000 | Mark I Stage II...

That’s thirty minutes away. I’ll be there in ten.
User avatar

Topic Author
andrewhake
Admin
Posts: 580
Joined: Oct 2016
Location: Mt. __________
Contact: YouTube IG
United States of America
#115

12-20-2014

I got an awesome little cart so I can take my garage tools from my apartment down the elevator to my parking garage. I put the Ohlins sticker on there to help make the cart more compliant over bumps.

Image
o_O S2000 | Mark I Stage II...

That’s thirty minutes away. I’ll be there in ten.
User avatar

Topic Author
andrewhake
Admin
Posts: 580
Joined: Oct 2016
Location: Mt. __________
Contact: YouTube IG
United States of America
#116

12-22-2014

Power! Took the car into BlackTrax today to do a baseline and have Jei work his magic with the FlashPro.

Image

He was able to get some great gains throughout the entire rev range and really get everything optimized. Quite a lot more to be gained with I/H/E/Testpipe but pretty surprised at the overall increase in power and even the top end power. With everything stock he found the optimal VTEC crossover point to be at 5500rpm and set the redline to 8400rpm.

Image

Here are the overall gains (dotted lines are the baseline pulls, blue line being the final pull after letting the car cool, purple same tune with a little more heat in everything):

Image

Of course there is a lot more to be gained with a test pipe and other parts in the top end. But still a good amount of power gained up top. This was more about optimizing the VTEC crossover point and getting some nice midrange increases though:

Image

For someone who uses the car the way I do it's pretty staggering how these small improvements can make such a big difference in the drivability of the car. The VTEC crossover is nice and linear now and having the extra room to play above the normal redline makes the car so nice to drive. Just provides more room in both directions and makes the car feel super responsive. It's amazing how much better the car can sound at 8400 rpm compared to 8200.

Big thanks to Jei and the rest of the guys at BlackTrax, can't wait to come back with I/H/E and slurp up some more power. It was awesome watching Jei work and he was happy to explain everything to me in a way I could understand.
o_O S2000 | Mark I Stage II...

That’s thirty minutes away. I’ll be there in ten.
User avatar

Topic Author
andrewhake
Admin
Posts: 580
Joined: Oct 2016
Location: Mt. __________
Contact: YouTube IG
United States of America
#117

12-31-2014

In the meantime...

Amuse Euro Single exhaust

Image

20141231 Powerhouse Amuse Euro Single 60mm titanium exhaust:

Big thanks to Anish @ speedfreaksusa.com and Powerhouse Amuse for getting this to me so quickly. Was ordered in October and made to order and I got it today.

Image

Image

Image

This thing is as beautiful as any exhaust I have seen on any car. I ordered the Type B tip option with gold ring.

Image

Image

Image

Image

Image

Image

The exhaust weighs 15.8lbs (figure 16lbs, but my scale is pretty accurate). Not the lightest single exhaust in the Amuse lineup but probably one of the lightest possible without being incredibly loud.

Image

I also got a J's Racing 60mm test pipe to go with it and J's rubber exhaust hangers which are stiffer than the normal rubber hangars. The Euro single uses one of the triangular type hangars in the rear (J's type b) and the other 3 are the standard style (J's type a).

Image

J's Racing testpipe weighs 3.7lbs

Image

Looking forward to getting this installed. I will likely wait until I get my header and get everything fitting well. I have other rear bumper plans as well, but will likely get all the exhaust bits fitted before changing that out.

I will do some nice sound comparisons once everything is installed. I have a nice controlled environment I can use and some good sound recording gear so hopefully give people an idea of how this exhaust sounds. This also just got me thinking that once the Amuse hood is finally installed I should get a little more sound from that as well hopefully since it gets rid of the support structure in that section of the hood and won't have an insulation.

I decided to go with a 60mm exhaust to hopefully maintain the higher pitched sounds from the engine and avoid the deep bass sounds that usually come with installing a larger diameter exhaust. I don't doubt more power is to be had with a 70mm but it's worth the compromise to me. I really love the design of the Amuse Euro with oval canisters that aren't fully polished but have more of the glossy reflections going on. And I have always loved the Type B blue tip with gold ring since the first photo I saw of one. I considered the Type C tip that is more rounded off but I really love the blue and gold.

Here's some close up shots of the exhaust tip:

Image

Image

Extra parts the Amuse exhaust comes with.

Image

The middle hanger mount, silencer, and of course the Amuse sticker.
o_O S2000 | Mark I Stage II...

That’s thirty minutes away. I’ll be there in ten.
User avatar

Topic Author
andrewhake
Admin
Posts: 580
Joined: Oct 2016
Location: Mt. __________
Contact: YouTube IG
United States of America
#118

01-23-2015

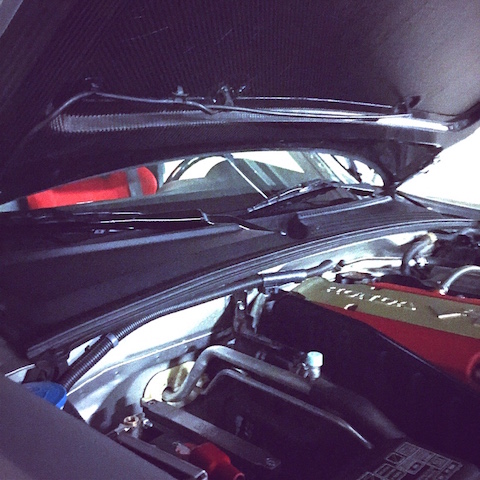
Amuse dry carbon hood installed

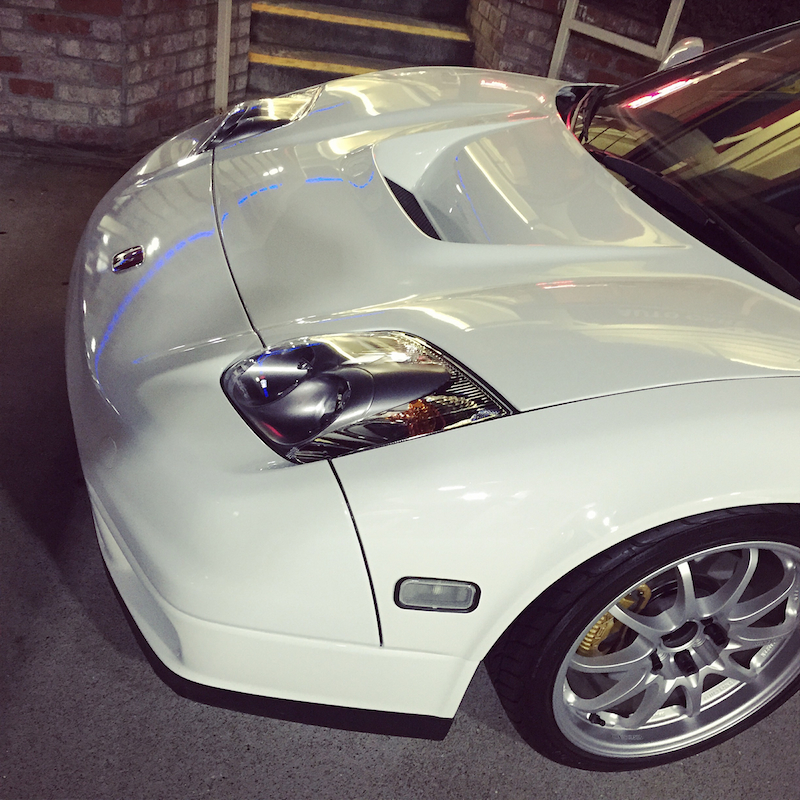
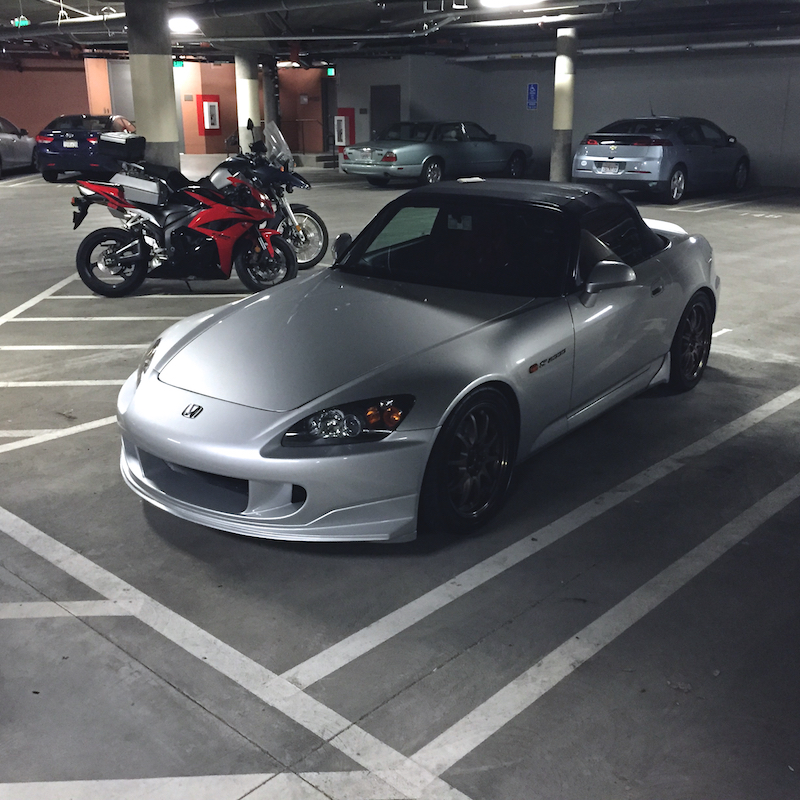
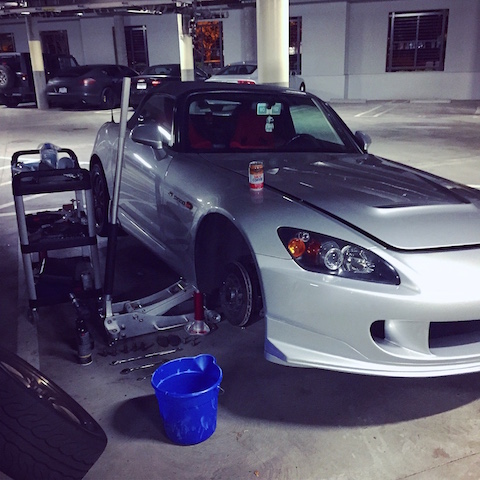
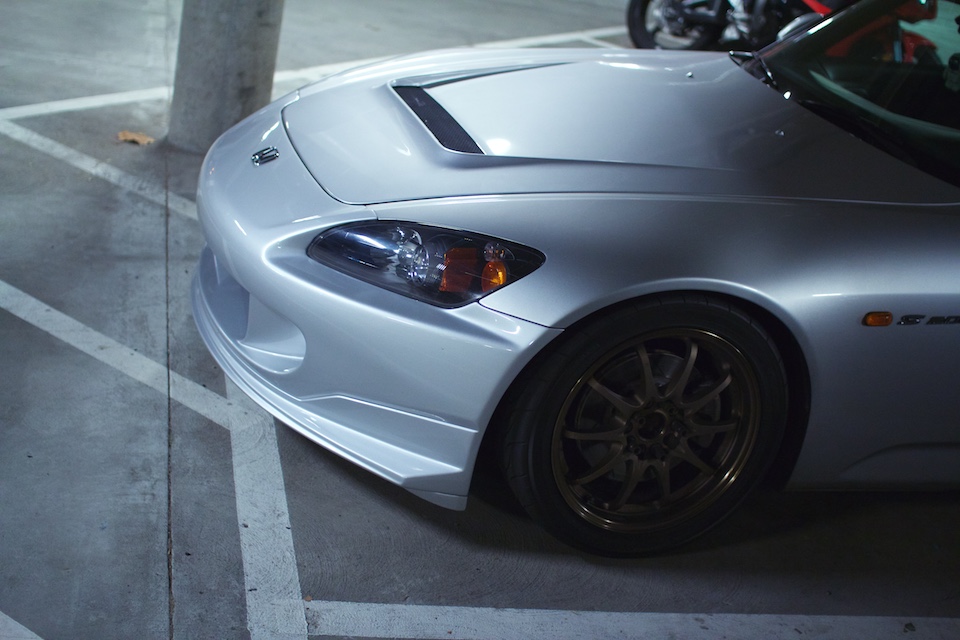
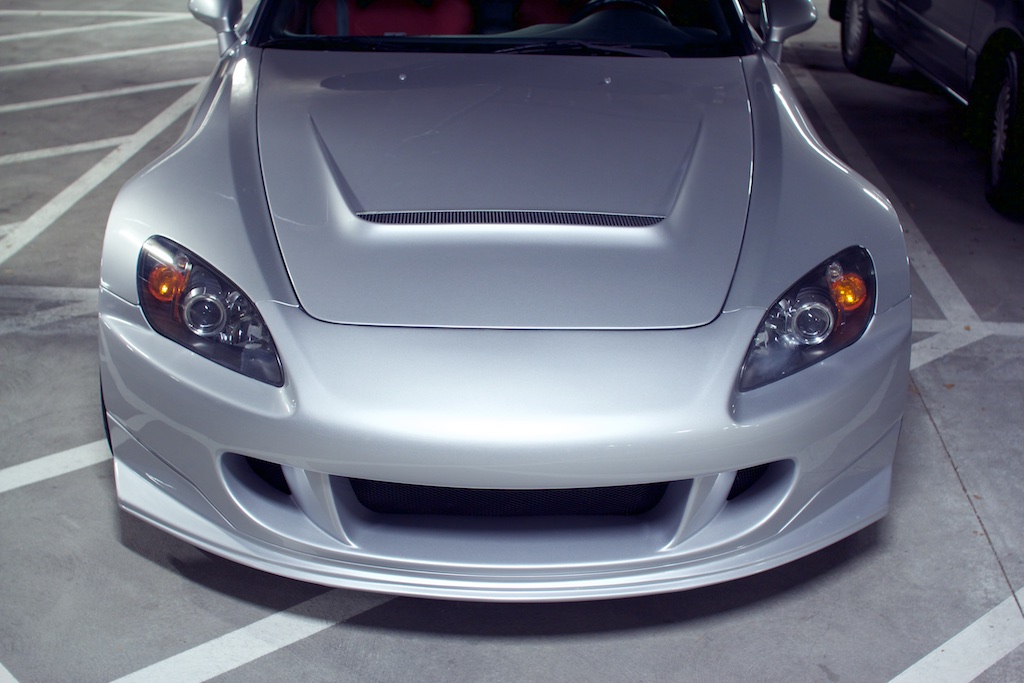
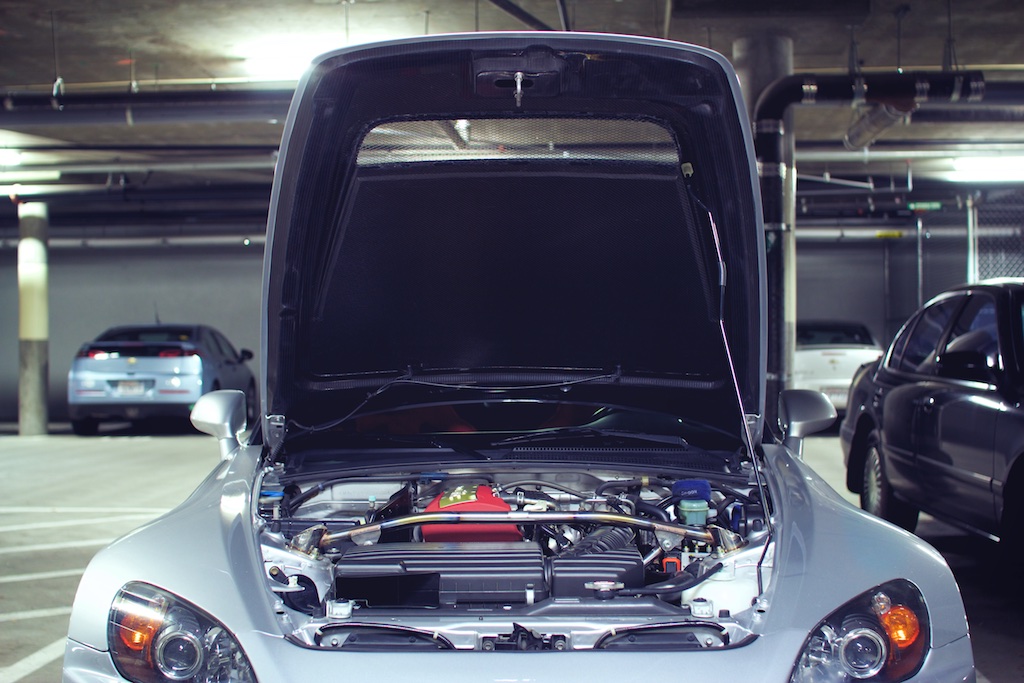
After a very long wait the Amuse dry carbon hood is on the car and looking rather classy. Very happy with how well the hood and bumper color match the rest of the car. If anything looks off I assure you it is just the poor lighting of my parking garage.

Image

Image

Image

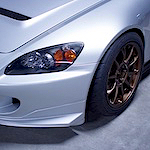
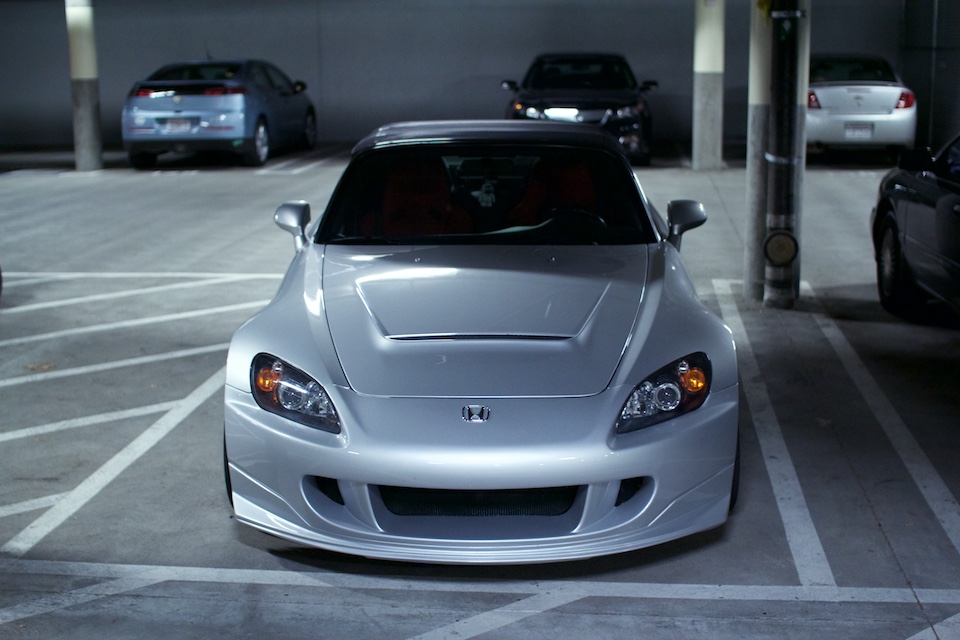
Don't mind the dirty headlights.

Image

Image

Image

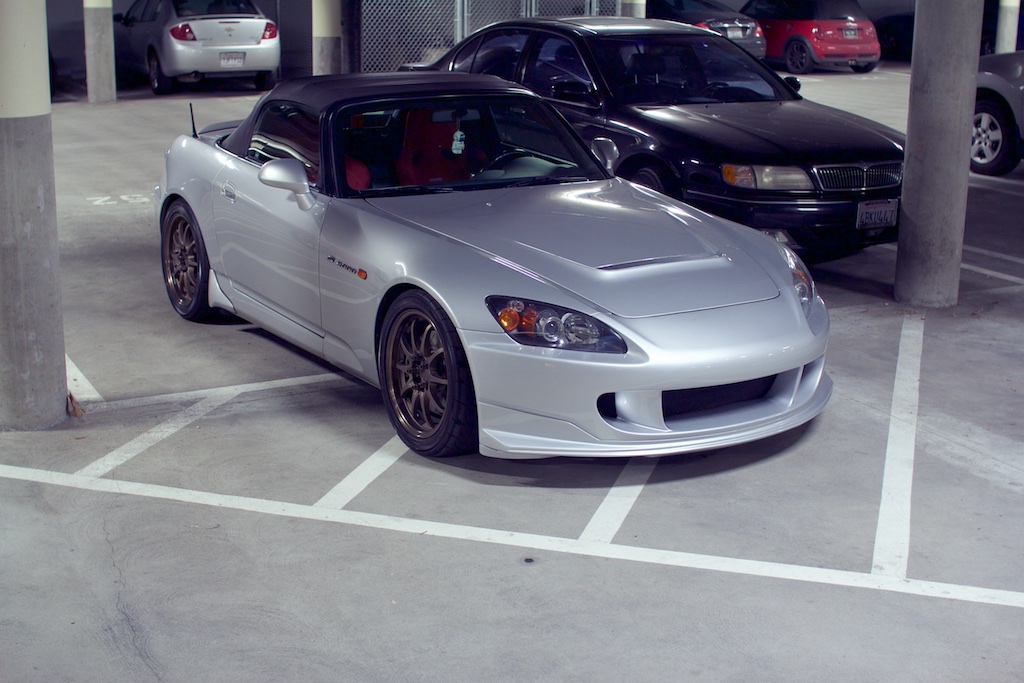
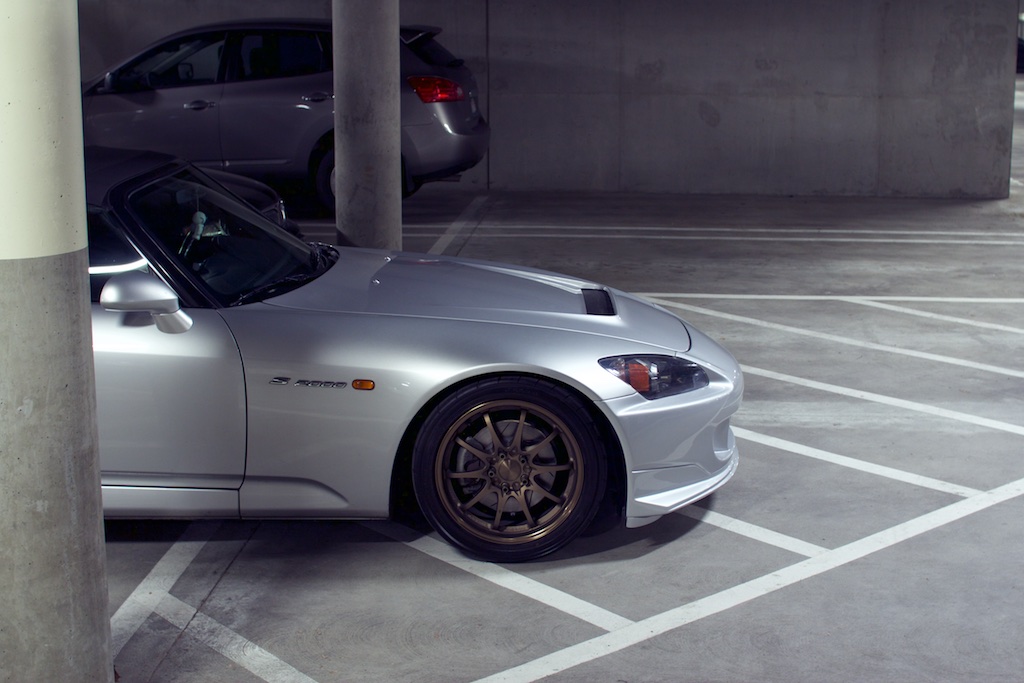
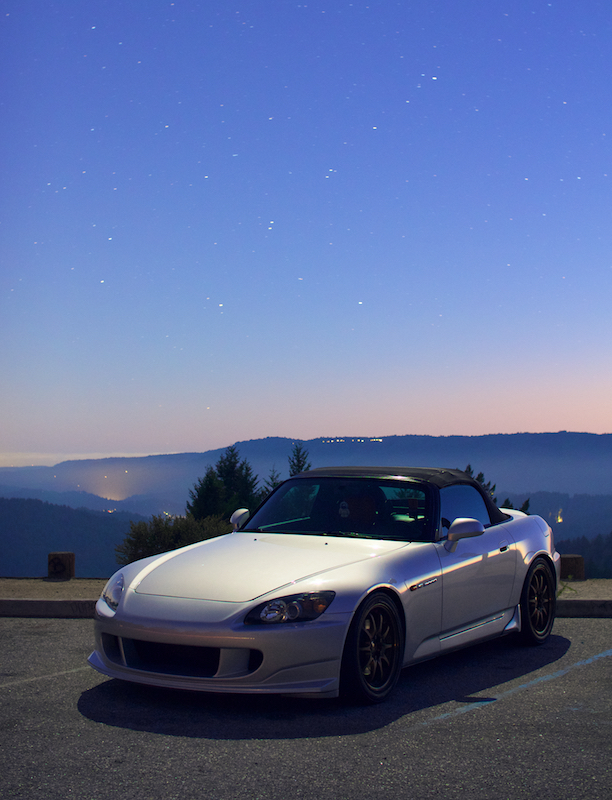
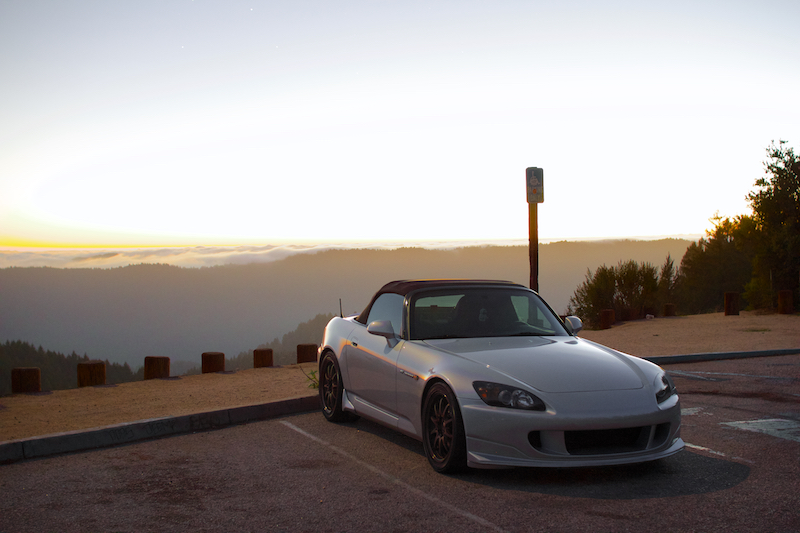
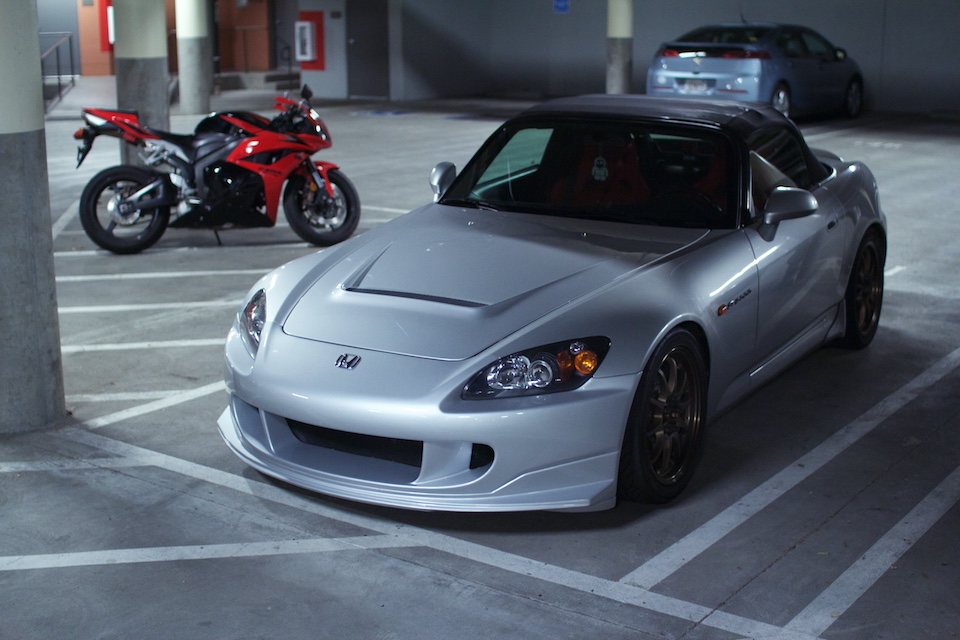
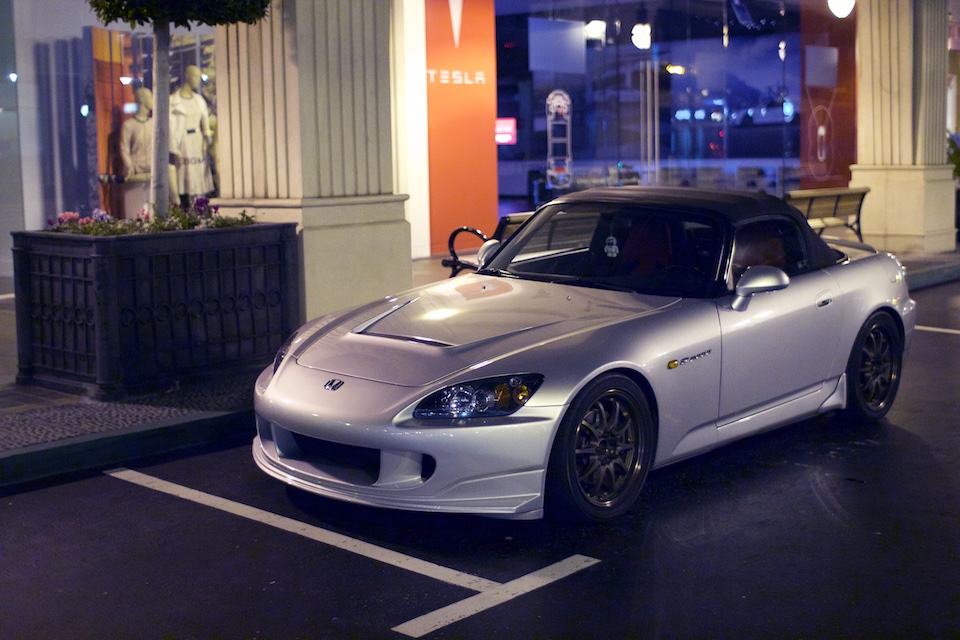
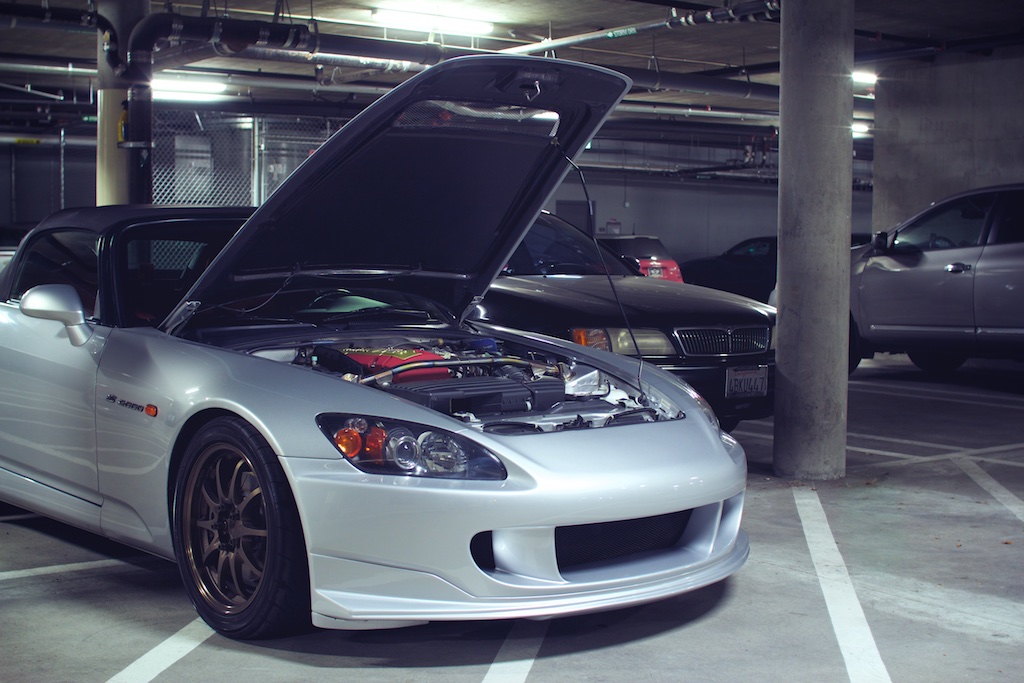
Swoon. The side profile is definitely one of the S2000's best angles and it just gets better with the R1 bumper and Amuse hood.

Image

Image

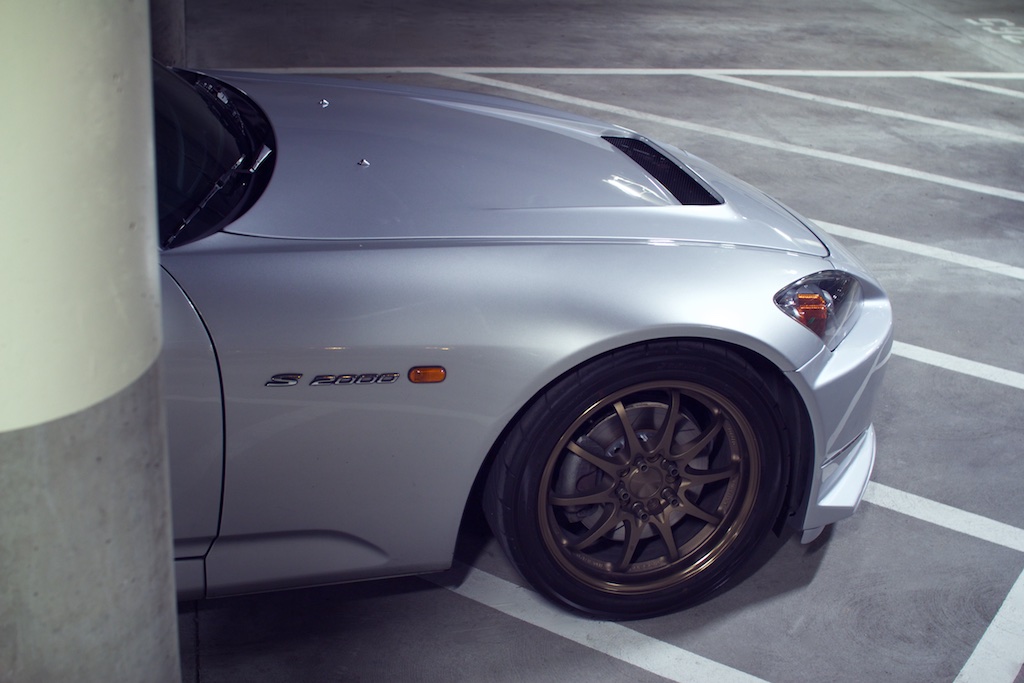
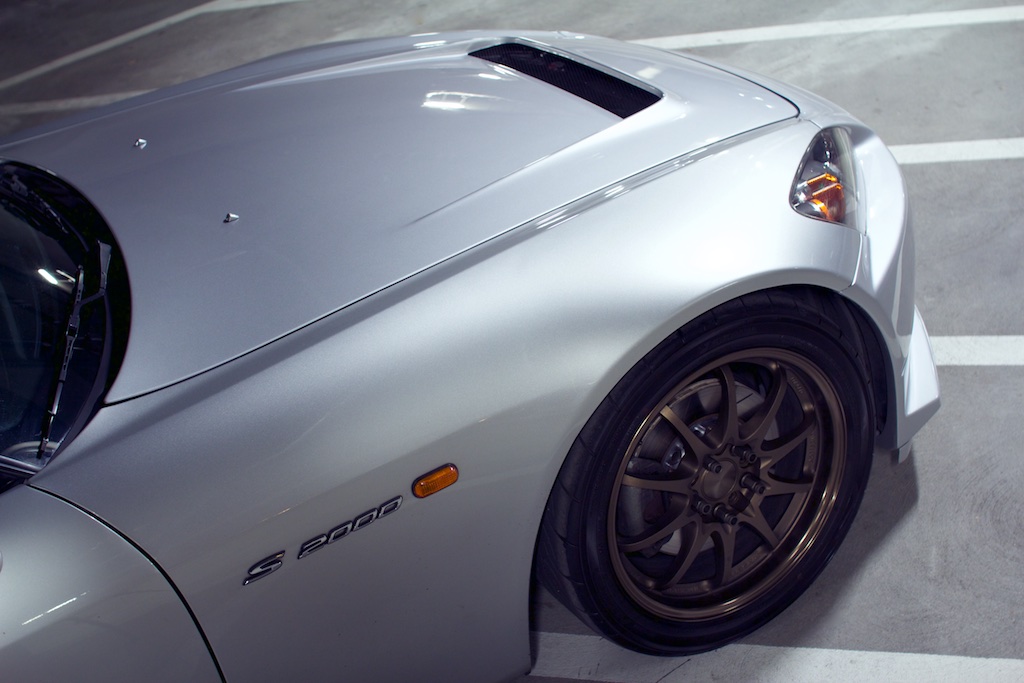
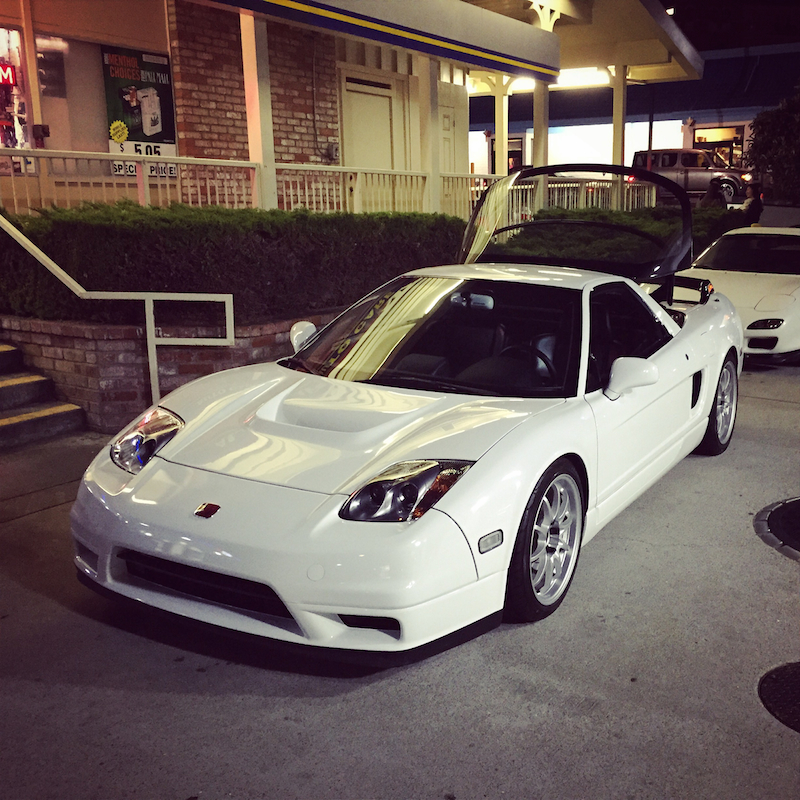
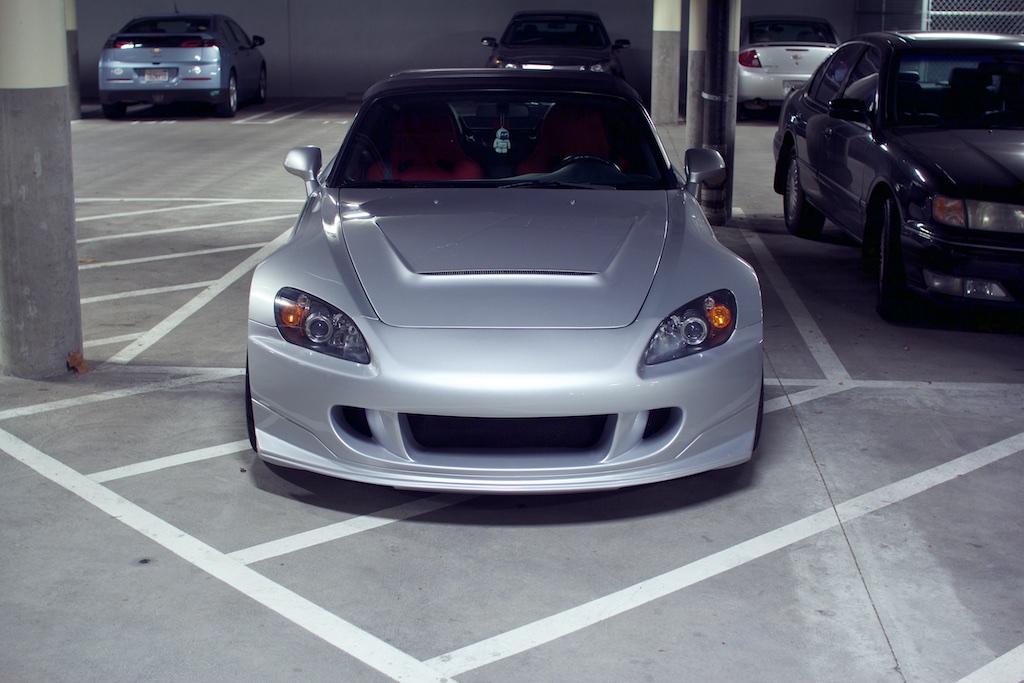
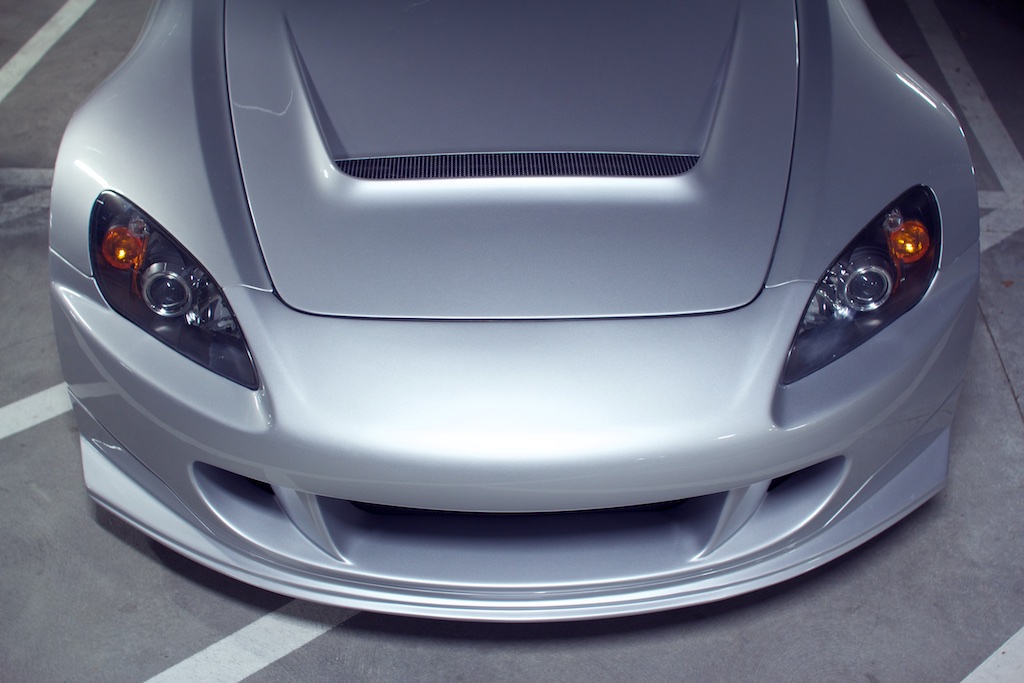
Amazing how much more of a presence the car has with only a different hood. It is an absolute perfect match with the R1 front bumper I think. It really manages to make the car look more aggressive and purposeful all while still being able to pass as OEM to the untrained eye.

Image

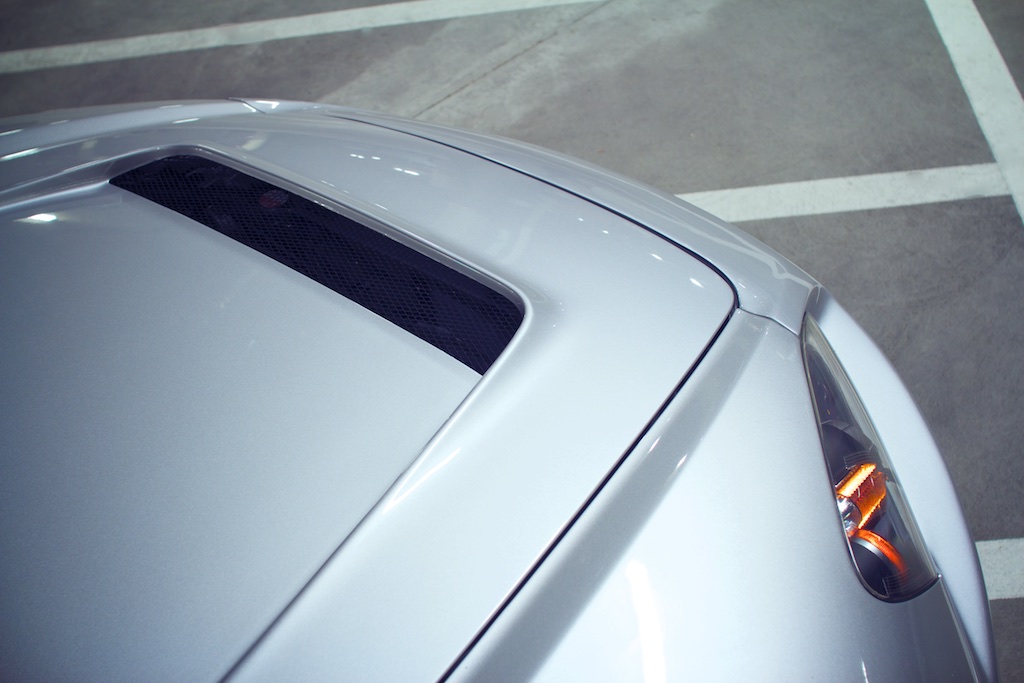
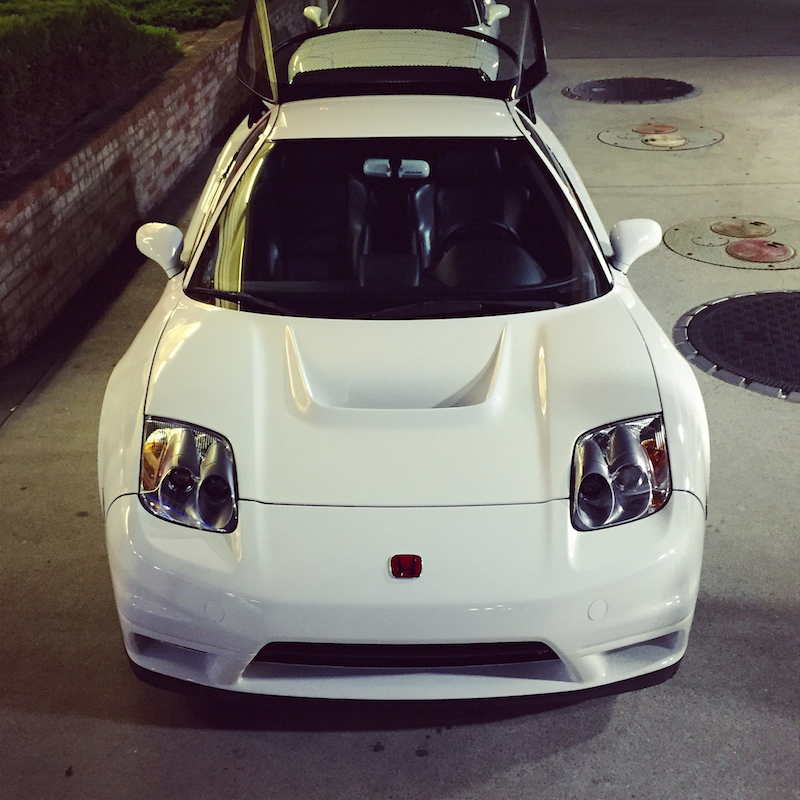
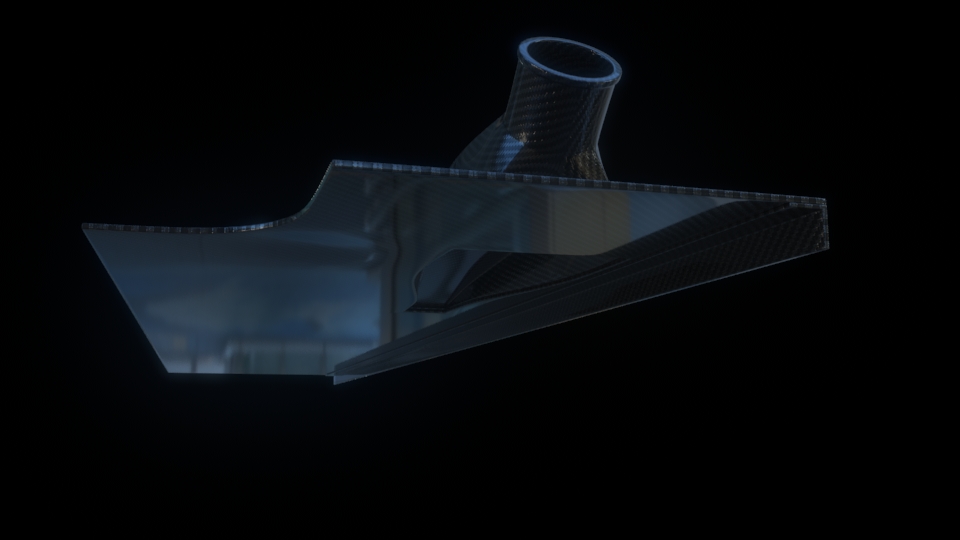
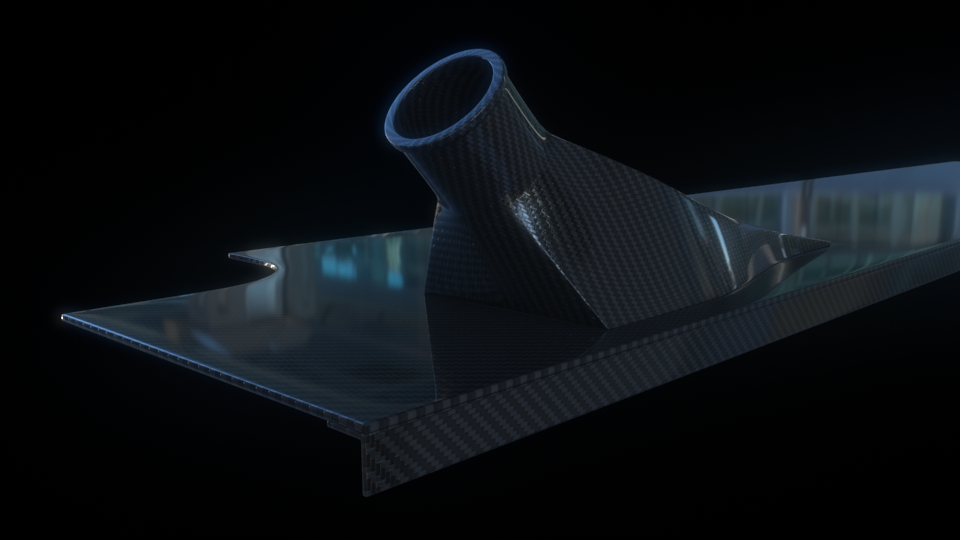
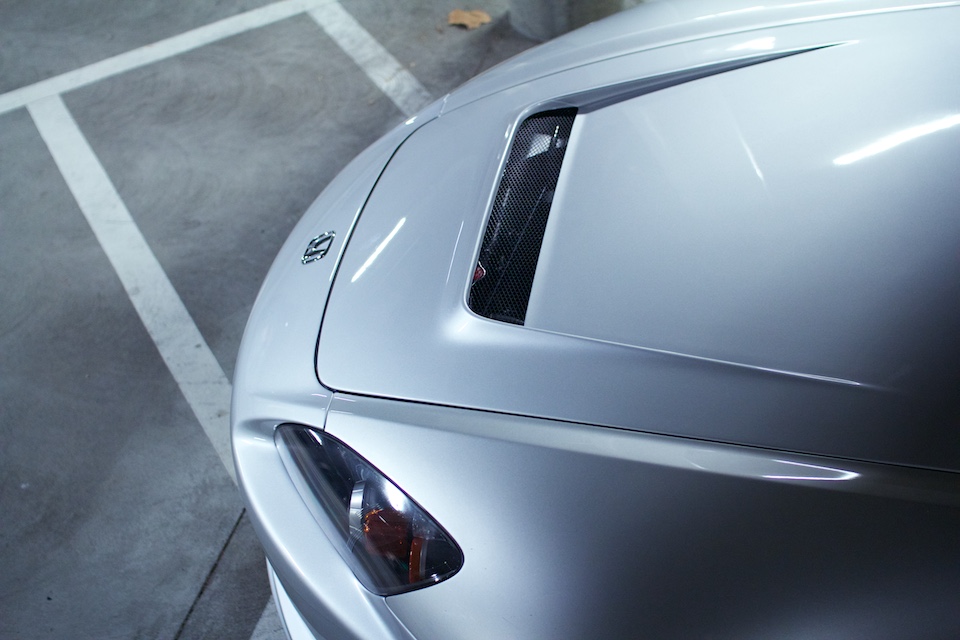
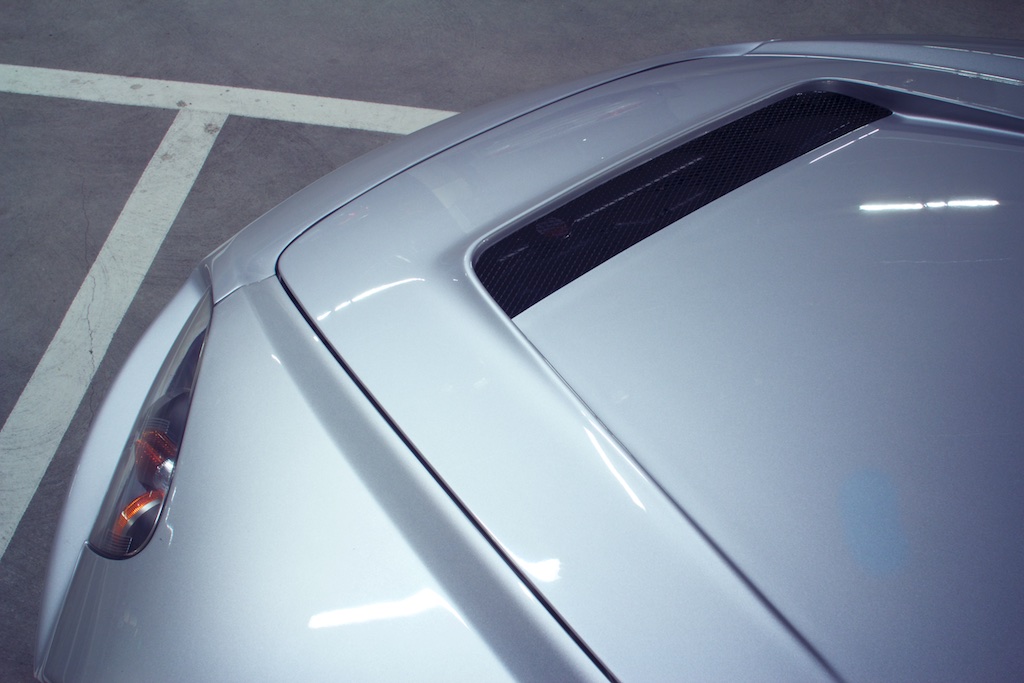
The hood really has three main benefits. The vent is very well placed and designed. Placed right behind radiator, it creates a low pressure area that helps pull hot air exiting the radiator out of the engine bay before reaching the rest of the engine. According to Voltex's wind tunnel data, a vented hood actually provided a reasonable increase in front downforce with very little drag penalty. And finally this hood is incredibly light, one of few aftermarket hoods that really is significantly lighter than the OEM aluminum hood. At 7.4lbs it isn't even heavy enough to latch by dropping onto the latch. It is much stiffer than the OEM hood though so closing by pushing it down over the latch is no problem.

Image

Image

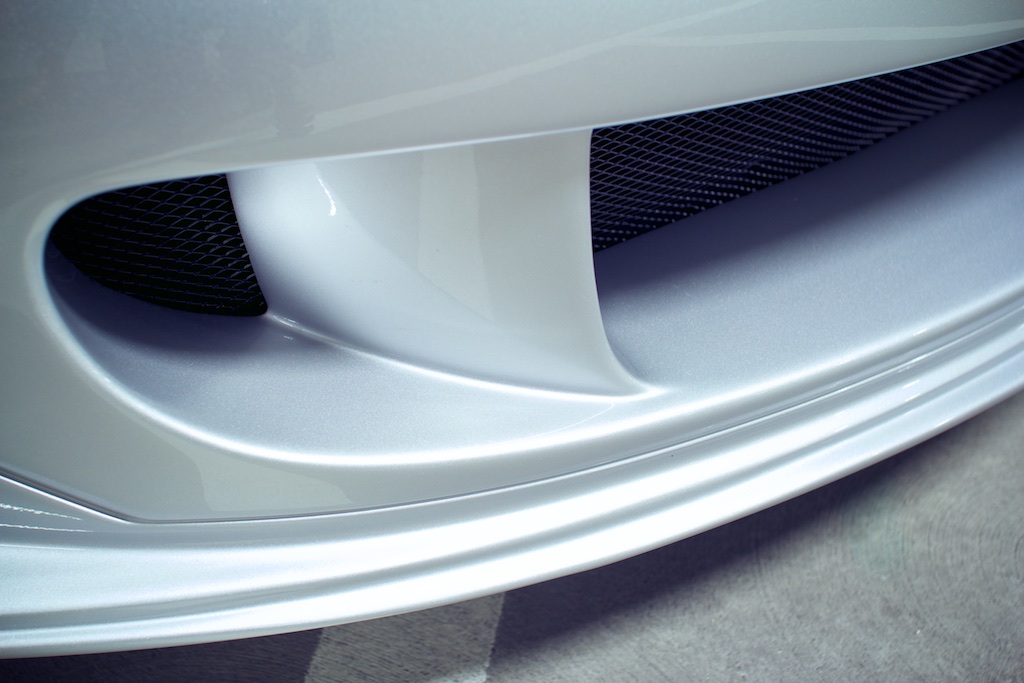
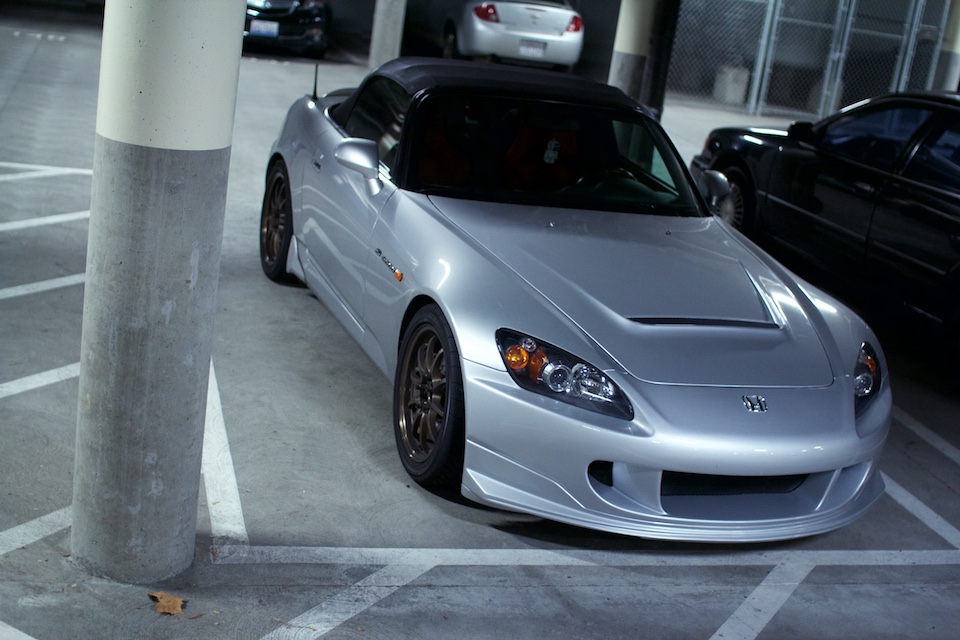
The front bumper was actually re-painted since you last saw it as well since there a few little areas that the body shop and I could be improved. The grill pieces were also sent for powder coating which will hopefully help them stay their subtle satin black color. You really don't notice the grill pieces in the bumper at all unless light is shining directly on it. And my custom mounted grill mounts work great! Very strong. I could probably hit a small animal and the grill would just catch them rather than pushing in I think.

Image

Image

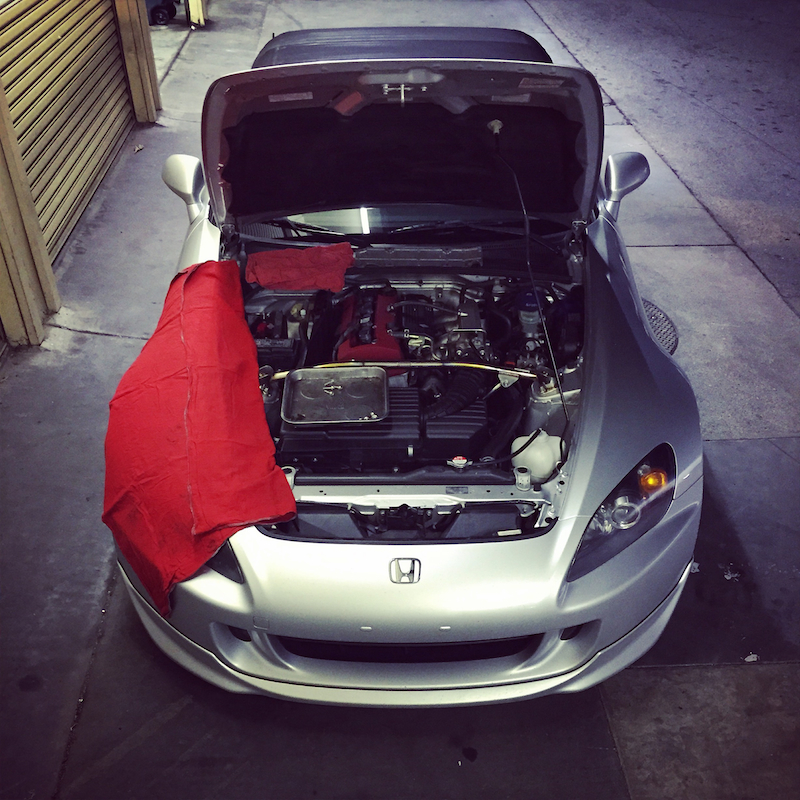
I love how the hood looks when open as well. As you can see it was painted around the interior lip. It actually has a pretty well defined and even line all the way around the hood due to the way the simple inner frame of the hood is designed. The frame of the hood is clear coated while the main hood panel is left bare dry carbon. The interior has been protected with 303 coating. Something I will be doing now as regular maintenance.

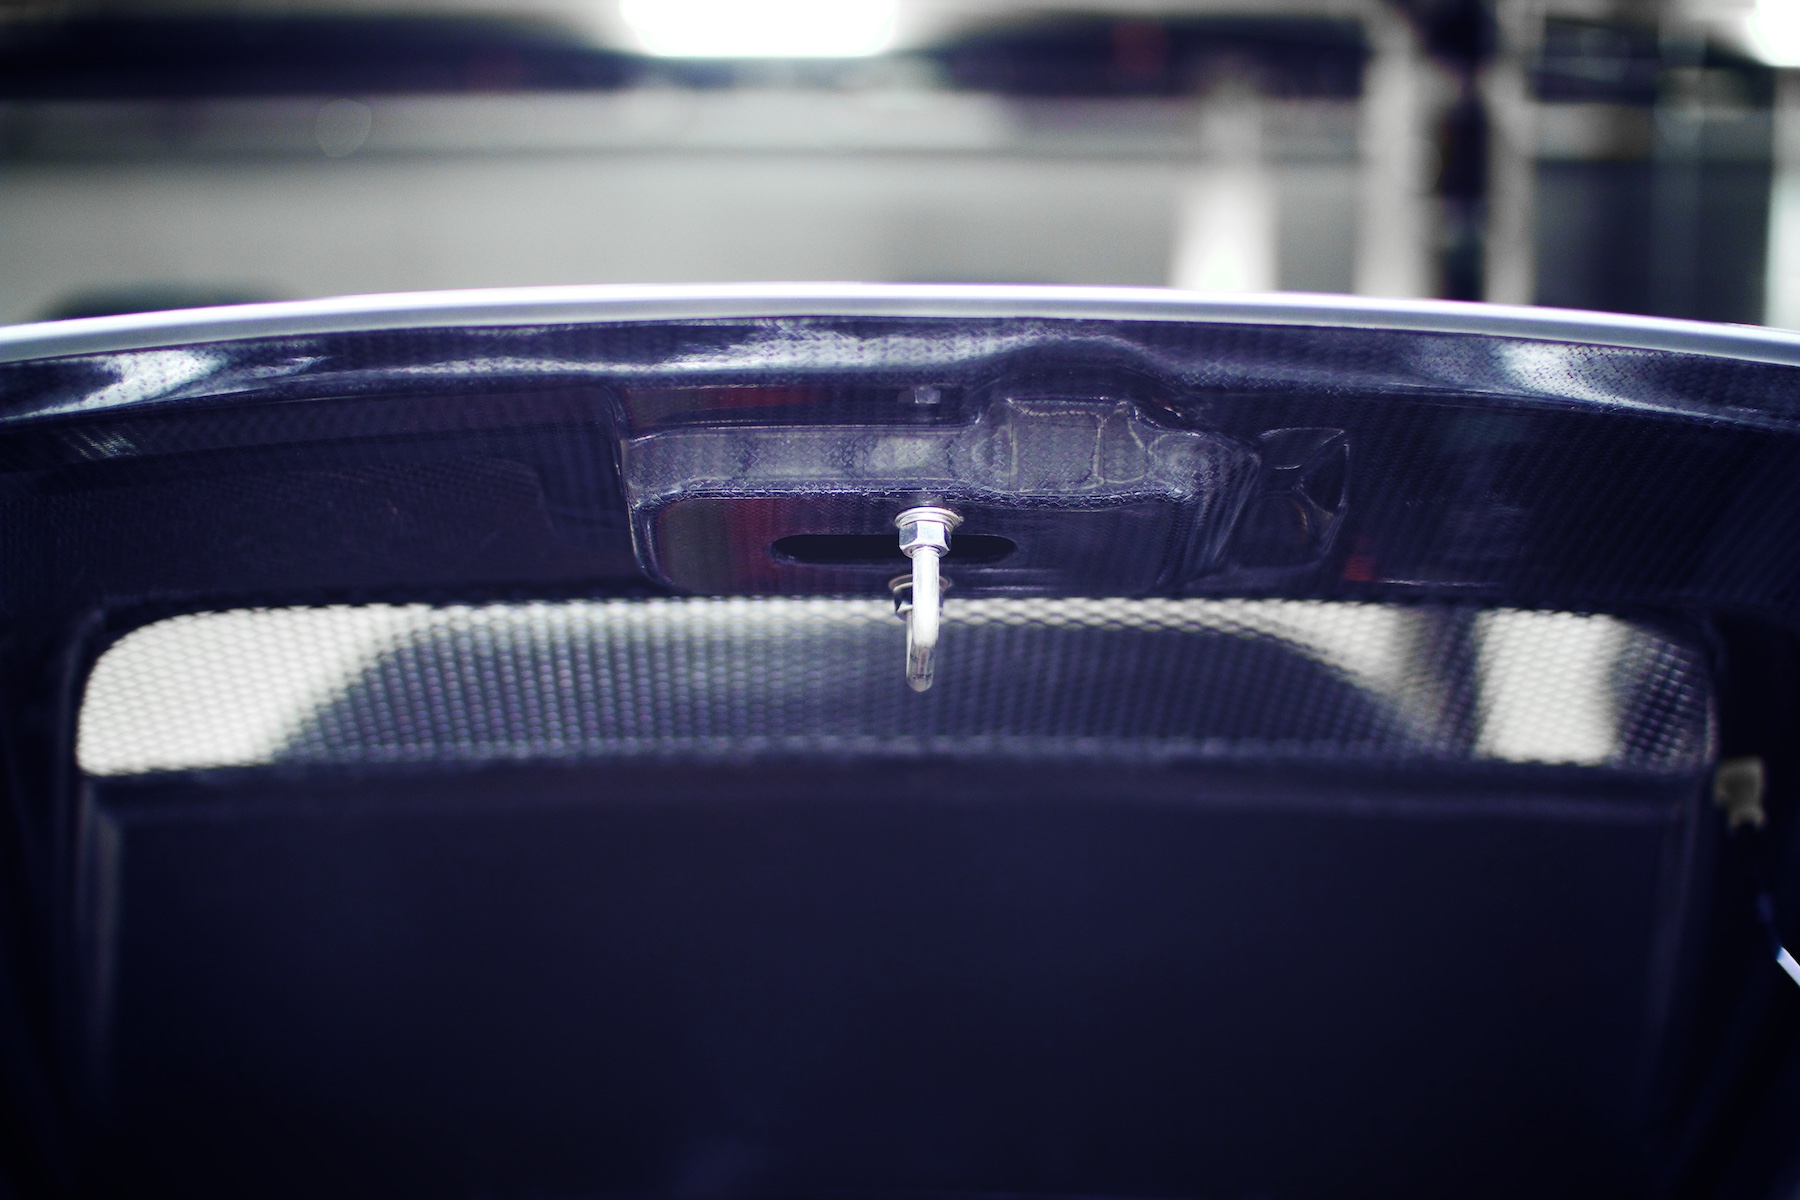
The bottom side of the hood doesn't have any provision for the hood prop, but luckily for basic maintenance the prop can be placed pretty securely to the right of the vent. This hood is so light I don't think I will be popping it open for long periods of time when in the paddock at the track. I think without any hood prop solution I will be perfectly fine, but I have a simple idea for integrating a place that the prop can lock into a bit more securely. Initially I planned to cut a provision for the prop into the frame of the hood (a simple rounded rectangle shape) as I saw this is what ASM had done on their hoods. Doing some tests with it on the car I think the best solution is to design a simple piece that fits into the groove created by the vent lip.

Image

Here is a closer look at the latch area and the edge of the hood. Very much like the OEM hood. You can see the area of the inner frame on the left that is opened up to allow a Mugen intake to fit without a bulge in the hood.

Because I am planning to install the Amuse Euro exhaust soon, I also decided to make a video to demonstrate how the car sounds currently. This will give me a reference point to how much the sound of the car is change with the new exhaust. The hood DRASTICALLY increases the sound from the front end of the car. Large increase in induction and mechanical noise from the engine. The best kind of noise in my opinion. It is amazing how different an S2000 with stock exhaust, cat, and intake can sound by just changing the hood, as well as adding rigid collars (which also seemed to increase sound to the cabin slightly). This is most easily noticed while driving the car, I love really being able to hear what the engine is doing. It should be interesting to see what effect the Mugen intake has on the sound. This increase in sound from the hood + Hondata reflash with higher redline is glorious.

http://www.youtube.com/watch?v=N4HxgR35_eY&hd=1

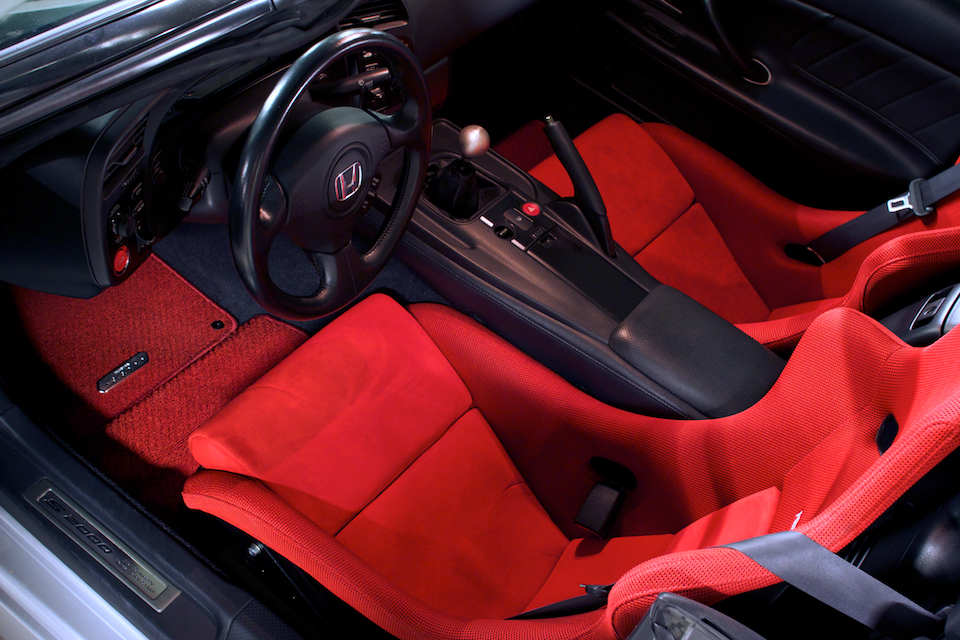
Extremely happy with this purchase, and after a lot of time spent waiting for the body shop to do research and finally get everything painted, it was all very much worth the wait. It is still amazing to me that I have an S2000 let alone one with an Amuse R1 front bumper and Amuse hood. I am so happy every single time I see the car and climb into the seats, and all that joy just multiplies when I am driving it.
o_O S2000 | Mark I Stage II...

That’s thirty minutes away. I’ll be there in ten.
User avatar

Topic Author
andrewhake
Admin
Posts: 580
Joined: Oct 2016
Location: Mt. __________
Contact: YouTube IG
United States of America
#119

01-31-2015

Found a good solution for securing the windshield washer tubing last night. I was looking at some different options but I realized the best option was already clipped onto the tubing. The clip that is used to clip the tubing to the OEM hood was perfect for the chop after snipping off the part that clips into the opening, and then smoothing everything out with a Dremel. Then after cleaning everything with rubbing alcohol I applied some 3M automotive mounting tape to the round flat surface of the clip, and then mounted it to the bottom of the hood.

Image

I still need to do the same with that small piece you see in the photo. Very happy with this solution, and it seems to hold up just fine after putting the car through it's paces.

Image

I also spent some time thoroughly cleaning my front calipers to once and for all figure out if it is in fact my brakes that are causing my slight clicking issues under heavy load with quite a bit of lock in the steering. It seems to have helped initially but the clicking slowly began to return it seems. I am starting to think it could possibly be worn compliance bushings or something like that. Since my car has 99k miles now, I think I might actually get all new suspension arms, or at least lower arms. Suspension component wear happens so slowly it is easy to just get used to parts that could be a bit worn out, so I am curious how the car will feel with new bushings all around. The simplest option to do this seems to be getting all new arms from Honda with everything ready to go, and I can get quite a good deal through my friend on OEM parts. I was considering doing the BlackTrax sphericals or stiffer Mugen or Spoon bushings, but in the end I think starting fresh with new OEM bushings is the way to do it. And about $1000 cheaper than either of those options when labor and everything is considered.

What are people's thoughts on doing new OEM arms but putting in Mugen or Spoon compliance bushings? That is also an option I am considering since those seem to be the ones that wear the most. Do you think I would see any negative side effects only having stiffer compliance bushings?

I think I will also be replacing the end links as well as the steering rack bushings.

As a side note my tool cart is one of the best purchases I have made as far as maintenance is concerned
o_O S2000 | Mark I Stage II...

That’s thirty minutes away. I’ll be there in ten.
User avatar

Topic Author
andrewhake
Admin
Posts: 580
Joined: Oct 2016
Location: Mt. __________
Contact: YouTube IG
United States of America
#120

02-02-2015

Mounted the emblem to the front bumper. Just had to trim the pegs off that normally go into the small holes in the front bumper, smoothed everything out with a Dremel, and then used some additional 3M automotive mounting tape (there were small strips on the top and bottom already).

Image

Image

Image

Image

Image

Image
o_O S2000 | Mark I Stage II...

That’s thirty minutes away. I’ll be there in ten.

Return to “Projects”