o_O S2000 | Mk I — Stage II

Permission to engage...

User avatar

andrewhake
Admin
Posts: 580
Joined: Oct 2016
Location: Mt. __________
Contact: YouTube IG
United States of America
#91

05-11-2014

This isn't the update you were looking for. :)

Winmax W5 brake pads:

Image

Just got these in from GoTuning and I have to say, these are by far the best packaged brake pads I have ever seen. They come packaged with a great bed-in procedure card, sticker, and a little Winmax brake pad keychain. :thumbup:

Hoping these perform well and if anything I hope they are similar to the feel of the Project µ Club Racers which are a little more expensive than the W5. Looking forward to trying them out! Kudos to the Winmax USA marketing team.
o_O S2000 | Mark I Stage II...

That’s thirty minutes away. I’ll be there in ten.
User avatar

Topic Author
andrewhake
Admin
Posts: 580
Joined: Oct 2016
Location: Mt. __________
Contact: YouTube IG
United States of America
#92

05-11-2014

This is the update you were looking for:

Recaro Pole Position (Jersey Red) & Ballade Sports seat rails:

First things first. Let's remove the OEM seat and weigh it. 32.6 lbs f@#king hell that is pretty damn light actually.

Image

Then let's assemble the driver's side seat rails and weigh that. 16.1 lbs

Image

And let's weigh the Pole Position by itself. 15.9 lbs

Image

Finally, let's weigh the entire new seat assembly. 32.5 lbs

Image

Whew, just under the stock seat weight, with more of the weight now lower in the car. The Ballade rail is a bit heavier than some with it's excellent base plate that makes everything extremely sturdy and lets the sliders work well.

Now let's take a closer look at the seat assembly.

Image

Image

One thing I really like about the Ballade Sports rails is the single piece side mount compared to the 2 piece mounts that many seat rails use.

Image

Also the rails included some great delrin spacers which were actually required to fit the Pole Position properly since it's rear mounting point is so high up on the seat. I had actually purchased some nice black socket cap bolts similar to the ones in this photo, but was a bit worried when I realized the ones I had purchased were too short to work with the spacers, luckily Ballade is nice enough to include stainless socket cap bolts which are the perfect length for use with the spacers. The washers I purchased separately from fastenal.com along with the black socket cap bolts.

Image

I purchased seat belt extenders as well and decided to just bolt them directly to the seatbelt anchor on the Ballade rails, which again is very well thought out with it's swept back design. I removed the big beefy bolt and washer setup from the OEM seat belt receptacle (minus the spacer) which fit perfectly through the hole in the male end of the seat belt extender, and bolted it directly to the anchor. Again big win here from Ballade, as they actually included nuts for the seat belt anchor bolt. This allowed the extender to fit through the lower harness hole nicely without extending too far and more importantly it is bolted down in an ideal position nearly perpendicular to the harness hole in the seat.

Image

Now how does it look in the car?

Image

Image

Image

Image

Image

Image

Image

Image

Gorgeous! Finally I have achieved my favorite sports car color scheme of silver, bronze wheels, and red seats. I am still waiting on the second seat as they are on backorder. Luckily Evasive had this one in stock but I will have to wait a little while to get the second one in to complete the look. I was extremely excited when the Jersey Red Pole Position was released. Finally there was a perfect seat for the street that looks like it could have come on the car from the factory with the small Recaro logo that they use on all of their seats they make for other OEMs. Also it is basically an NSX-R seat without the ultra light weight carbon kevlar shell and the insane price tag.

I took the car out for a quick drive and I am extremely happy with the seating position. It is mounted at the highest front and rear points on the Ballade Rail (with the Pole Position I don't think you can really mount the rear any lower) but because the Pole Position has a rear mounting point high up on the seat, this gives the seat the perfect driving position rake. Not too upright and not too laid back. I am about 6'2" and this height is perfect for me so I can't imagine anyone would need to go lower in the Pole Position. I have pretty long legs and in the OEM seat I was jut high enough up that I couldn't put my knee directly under the steering wheel, perpendicular to the brake pedal, without grazing the steering column cover with my knee. Now that I am just the right amount lower, I can finally have my foot in a perfect position for braking and heel toeing, and even better I can sit slightly closer to the steering wheel because my legs can bend a bit more and still avoid hitting the steering column cover. PERFECT seating position for me. The seat is incredibly solid on the Ballade rail and installation was made very easy with the full baseplate. The rails also slide very well, the Pole Position does sit very close to the center column though so the overall slider range may be limited. Something I was pretty happy to see is with my new closer seating position and the thin bucket seats, there might actually be plenty of room for a roll bar with a proper harness mount if I ever decide to do that in the future. For now it isn't in the plans at all since this will always just be a street car and I feel a roll bar on the street (where I do a majority of my spirited driving) would actually be a bit more dangerous with no helmet on.

One thing I found a bit annoying. I was planning to just completely remove the OEM seat belt receptacle since I won't be using it. I did unbolt the SRS sensor from the OEM seat and leave it under the seat. But the car actually shows the SRS light if the seat belt sensor plug is disconnected on 06+ models it seems. At the moment I can simply connect my second seat belt extender to the connected OEM receptacle which sits under the seat and avoid getting the annoying seat belt light and chime and an SRS light. But I will have to deal with an SRS light anyway when dealing with the passenger seat so I will likely just go ahead and remove the OEM receptacle, SRS sensor, and then just pull the SRS light from the cluster and be done with it, and will have removed about 1 lb or so of stuff that no longer does anything from the car. I definitely find it frustrating that there is still no good solution for 06+ aftermarket passenger seats. I wish one of the more S2000 focus shops would put some R&D time into this. In the end though I am really not very worried if I have no airbags at all to be honest. I always use the seatbelt lock trick to do any serious driving and rarely have passengers.

Big thanks to Mike at Evasive Motorsports for the seat and the guys at Ballade Sports for the great seat rails! Definitely one of the best modifications I have made to the car. :thumbsup:
o_O S2000 | Mark I Stage II...

That’s thirty minutes away. I’ll be there in ten.
User avatar

Topic Author
andrewhake
Admin
Posts: 580
Joined: Oct 2016
Location: Mt. __________
Contact: YouTube IG
United States of America
#93

06-03-2014

Project µ brake lines

Image

Image

Decided to finally switch to stainless brake lines. New bottle of fluid for the change over. These are going on the car tonight.

I have been using Project µ fluid for quite awhile now. I have had no reason to try anything else.

Brake lines installed!

Image

Image

These are the smoked version that Project µ offers with stainless fittings. I bought these specifically because I really like all of the Project µ products I have used and am happy to support them even though I could have gotten other stainless lines for cheaper. Extremely well made lines though and labeled ready to install.
o_O S2000 | Mark I Stage II...

That’s thirty minutes away. I’ll be there in ten.
User avatar

Topic Author
andrewhake
Admin
Posts: 580
Joined: Oct 2016
Location: Mt. __________
Contact: YouTube IG
United States of America
#94

06-05-2014

Finally grabbed a few quick photos of the right front fender liner and how it was trimmed and rolled. The biggest thing here is to just get the fender liner tabs up out of the way. Most people will be totally fine just heating up the tabs and bending them up, or trimming them off. But really there aren't any downsides to fully trimming the liners once you have taken care of the tabs.

Image

Image
o_O S2000 | Mark I Stage II...

That’s thirty minutes away. I’ll be there in ten.
User avatar

Topic Author
andrewhake
Admin
Posts: 580
Joined: Oct 2016
Location: Mt. __________
Contact: YouTube IG
United States of America
#95

06-14-2014

Recaro #2 arrived and installed! Definitely nice to have this all taken care of now.

As usual pull the OEM part out and weigh it.

Image

Quite a bit heavier than the driver side with the additional SRS sensors on this one. Now time to weigh the new passenger seat assembly.

Image

Almost 10lbs of weight savings here! I am actually not using the slider handle since I don't care about the passenger seat sliding on the rail at all so take the .6 lb or so away I think. Definitely glad to see this. The Ballade 06+ passenger rail actually uses separate left and right mounting brackets since it just isn't quite possible to design a good one piece bracket for the passenger side. Like most rails for the 06+ this one can't really slide properly because the slider handle is forced up against the big hump in the floor. It actually can slide just fine and I can even reach under the seat to trigger the sliders if I want to, but you just can't really use the slider handle properly. I mentioned this to Ballade and recommended they consider designing a slider handle specifically for the 06+ cars. But really not a concern for me as I was easily able to get the passenger seat in the position I wanted to and it never really needs to move. Also with the 06+ models the passenger seat belt actually bolts to the right hand side of the passenger seat as well and their rail is setup to support this since you can install seatbelt anchors on both side of the rail with no issues. Definitely a fan of the Ballade rails overall. I think it would be smarter for them to sell specific gets for bucket or reclining seats though to bring the price down.

Here are some photos showing how the car looks now with the completed seat setup.

Image

Image

Image

Image

Image

Image

I should mention as well. I ended up contacting the company I got the seat belt extenders from and had them send me some slightly shorter extenders. I felt the ones I got initially were a bit too long and changed the position of the shoulder harness more than necessary. Shorter extenders are working perfectly on the driver and passenger side for me now though.

Thanks again to Mike at Evasive for getting me the seats quickly. :thumbsup:
o_O S2000 | Mark I Stage II...

That’s thirty minutes away. I’ll be there in ten.
User avatar

Topic Author
andrewhake
Admin
Posts: 580
Joined: Oct 2016
Location: Mt. __________
Contact: YouTube IG
United States of America
#96

06-23-2014

Installed Winmax W5 pads all around:

Image

Image

Image

Image

It seems that Winmax uses a pretty unique high temperature paint on their pads compared to others I have used and I believe there is about 1mm more pad material than the Club Racers. The backing plate is slightly thinner on the Winmax but the build quality is excellent with chamfered edges and they seem to provide the same great feel as the Club Racers. I have to say the Winmax pads are easily the nicest looking brake pad I have ever seen, on the same level as Endless in terms of build quality but a much less painful price thanks to the guys at GoTuning properly distributing them in them by setting up Winmax USA. I have only done a light bed-in cycle on them but so far so good. I will have to take them out for another bed-in cycle and give them a proper shake down to see how they hold up under higher sustained temperatures. I can already tell they have a similar initial-bite and feel to the Club Racers though. Should be interesting to see how these do since they are a bit cheaper than the Club Racers. I also really like how much information Winmax provides about their pads, as well as their easy to understand range of pads. The one thing about the Club Racers that still amazes me is how little dust they put out, so if the Winmax pads can also match that I will be extremely impressed.

As you can see I also ended up getting an additional set of Girodisc front rotors so I will be able to replace the worn out rotor rings without having any down-time. I got nearly 11,000 miles of very hard use on the rotor rings before I wore them out past the slots and with a slight groove worn into the face. My last set of Brembo blank rotors with slightly less aggressive pads only lasted me 7500 miles before they were no longer usable. I could have pushed the Girodisc rotors to 14,000 miles or so I think if I wanted so very pleased with the increased lifespan and no worries about cracks. Very nice even wear, the usual hairline surface cracks on the face of the rotor but significantly better than the Brembo 1 piece blanks I had before. I was worried I might crack a rotor out in the mountains since the temperatures are always quite low and the rotors go through rapid temperature changes.

I will post up a more thorough review of the pads once I have a chance to put them to use. One of my favorite roads has a corner very similar to turn 1 at Thunderhill, braking hard from 5th to 4th downhill. This corner is a great test in brakes because if you are confident in them, you can brake VERY late. I say confident because you are essentially braking hard from 110+mph into the nothingness of the unlit forrest on the outside of the road. Great brakes let you push those few extra meters before braking hard.
o_O S2000 | Mark I Stage II...

That’s thirty minutes away. I’ll be there in ten.
User avatar

Topic Author
andrewhake
Admin
Posts: 580
Joined: Oct 2016
Location: Mt. __________
Contact: YouTube IG
United States of America
#97

07-10-2014

Honda Access Premium Floor Mats:

After giving up all hope the impossible happened and a Honda parts vendor in the U.K. put in some leg work with Honda Japan to get more of these Honda Access floor mats made. The moment there was word this was actually happened I jumped on the chance and placed my order. After many long months they finally arrived and I got them installed yesterday.

Image

Image

Image

Image

Image

Very simple to install the new bracket in place of the original floor mat bracket on the drivers side. For the passenger side I didn't worry about directly mounting the bracket to the chassis as everything can be simply placed around the hump in the floor and everything stays in place just fine. It's amazing what a simple well designed pair of floor mats can do to the interior of the car, especially in combination with the seats. I may have to try a pair of the same mats in red to see how they look, but at the moment I love the all black look, with red seats, start button, and shift knob lettering. The material used on these mats is much better than the standard ones, particularly the passenger side where the shape and sturdiness should keep it from developing any weird ripples.

Thanks again to Si@HendyPerformance for making this happen. :thumbsup:
o_O S2000 | Mark I Stage II...

That’s thirty minutes away. I’ll be there in ten.
User avatar

Topic Author
andrewhake
Admin
Posts: 580
Joined: Oct 2016
Location: Mt. __________
Contact: YouTube IG
United States of America
#98

08-24-2014

Spoon Pressure Plate, new wheel hubs and bearings

Image

Picked up a few maintenance items and a Spoon pressure plate as I am planning to replace the clutch soon as I am getting close to 100k miles. Starting to get some ticking and rough sounds from my front bearings so going to replace those as well. I plan on using the Spoon pressure plate with an OEM disk and an AP1 flywheel. I was considering something like an Exedy Hyper Single VF or O.S. Giken setup, but first I wanted to try out a stronger than OEM pressure plate like what the Spoon one offers to keep it nice and streetable. Maybe I will go for something more aggressive in the future but I think I will be served well by this setup.
o_O S2000 | Mark I Stage II...

That’s thirty minutes away. I’ll be there in ten.
User avatar

Topic Author
andrewhake
Admin
Posts: 580
Joined: Oct 2016
Location: Mt. __________
Contact: YouTube IG
United States of America
#99

09-13-2014

Yokohama Advan AD08 R and new alignment specs:

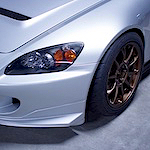
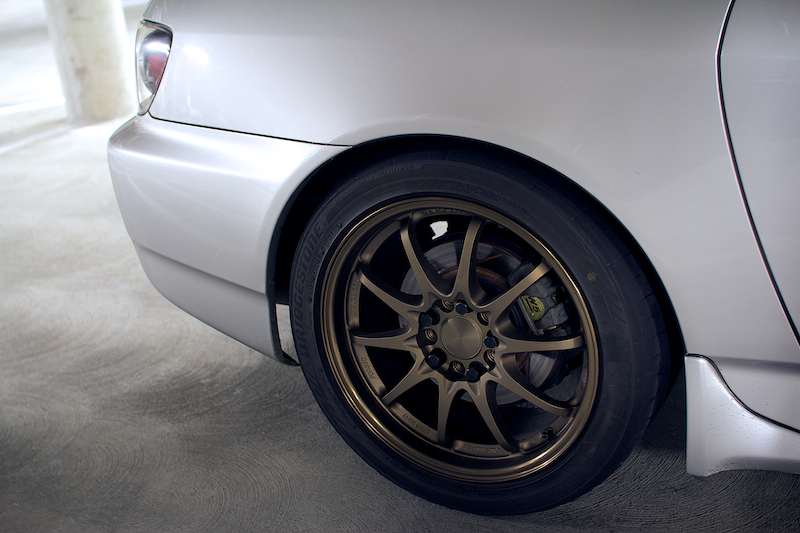
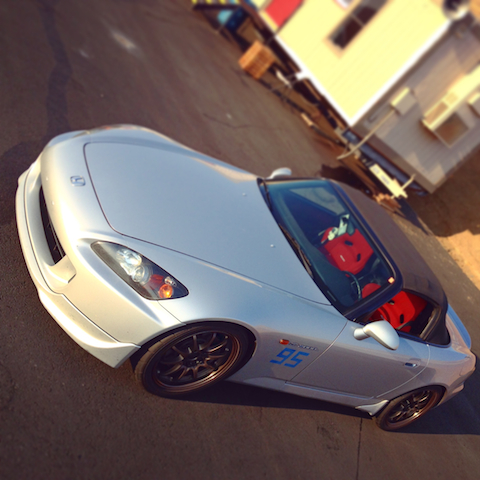
I ordered a set of AD08 R's not long after they became available and they had been waiting for me to mount at Tech3 for quite a few months now, so I was extremely happy to get them mounted yesterday as well as make a few tweaks to my alignment. Big thanks to Anish who has set me up with a great price on basically every set of tires I have put on my S2000, and Sonny at Tech3 who spent a lot of time dialing everything in perfectly for me.

Image

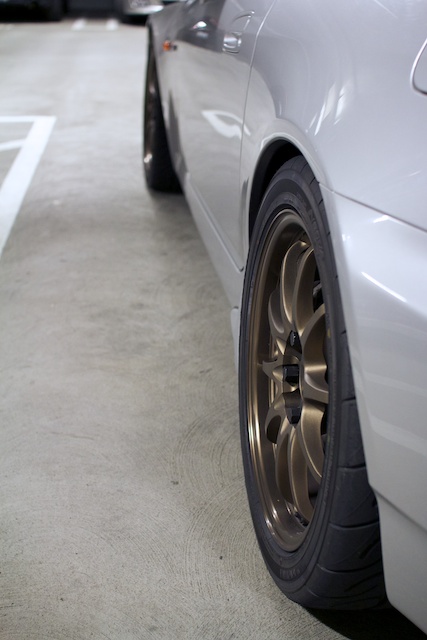
There is just something about this tread pattern that I have always loved. Not that it really matters, but I have always thought this was the prettiest of all the tires. Certain tires just have a much more sculpted look to them while some look designed by a machine. The AD08s just have a nice rounded shoulder to them. With the tires off the wheels, to my hands the side walls seem pretty similar in stiffness to the RE11A, but the RE11A has a much more squared off shoulder.

Image

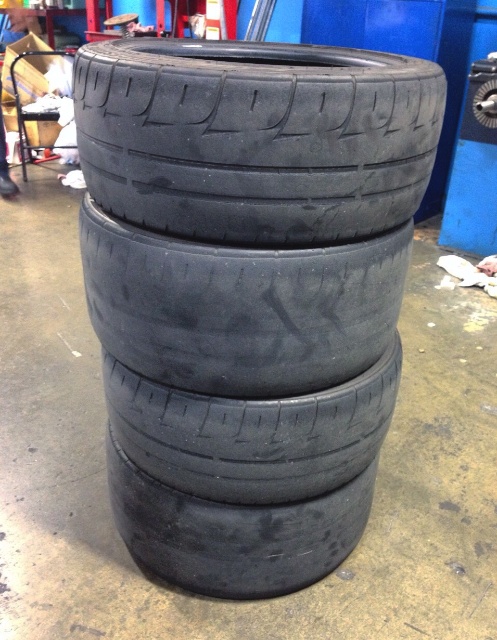
I had nice overall wear inside to outside on these RE11As. The rears were finished off in an act of non-violent protest against those who throw away tires before they have used up all the rubber, doing tandem donuts with my friend in his Mustang who was finishing off some ZIIs.

Image

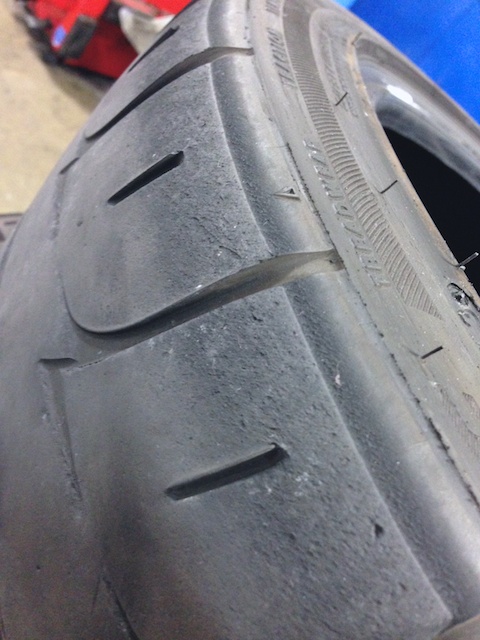
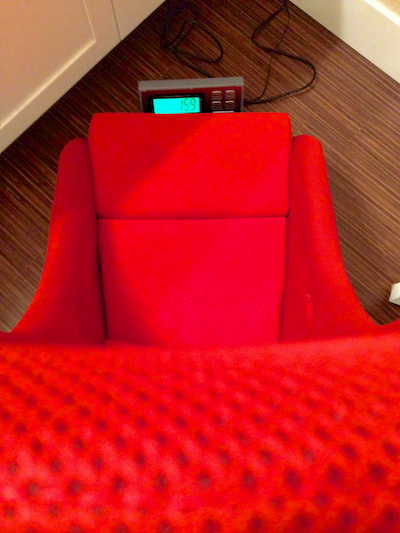
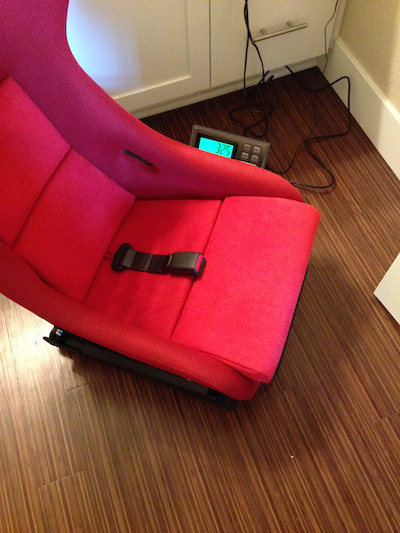
Front outer shoulder.

Image

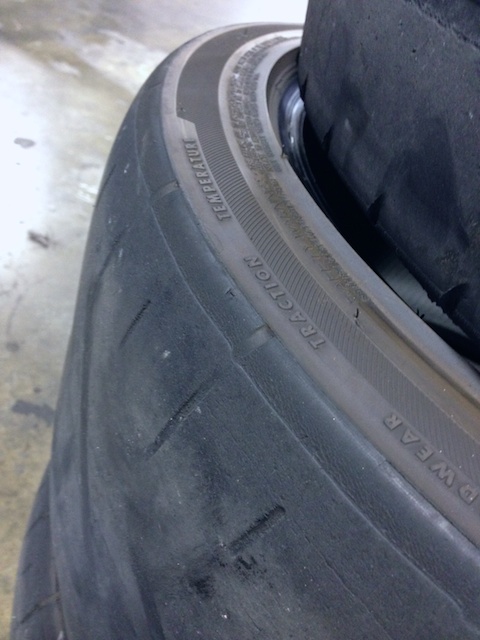
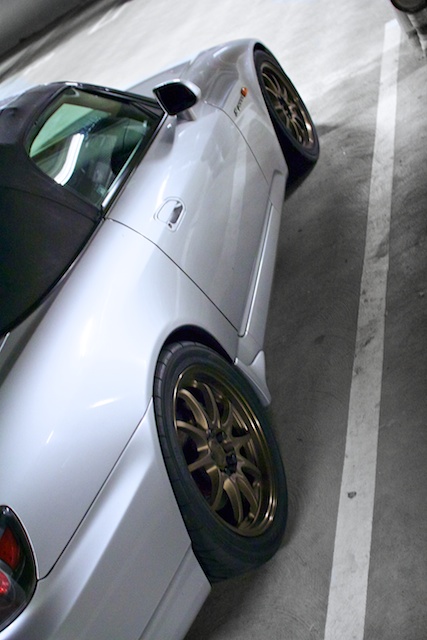
Rear outer shoulder. Time for a bit more rear camber. The results were similar on both sides of the car.

Image

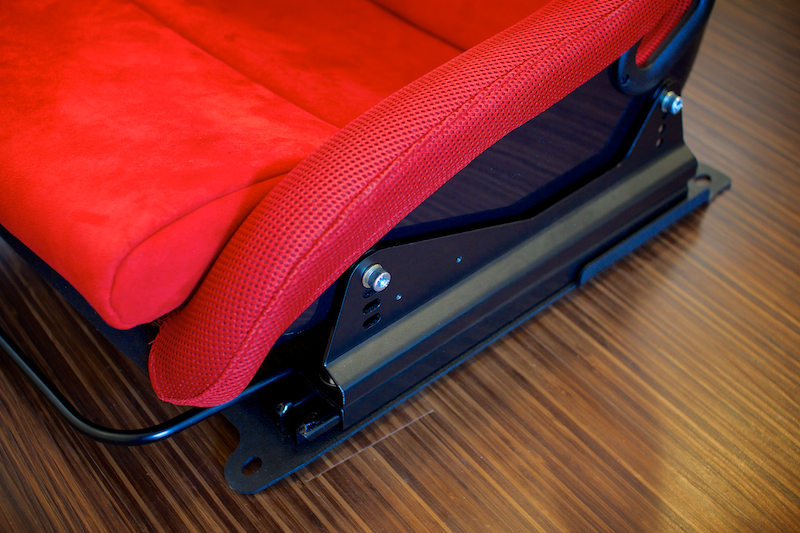
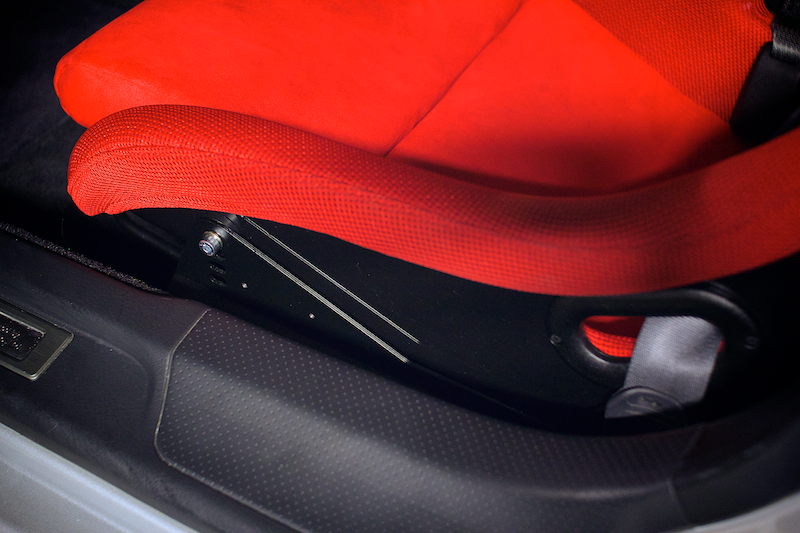
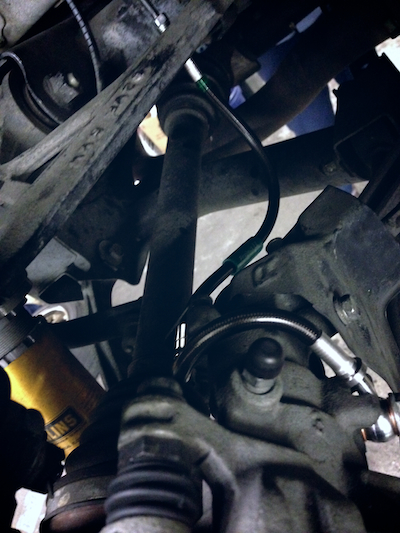
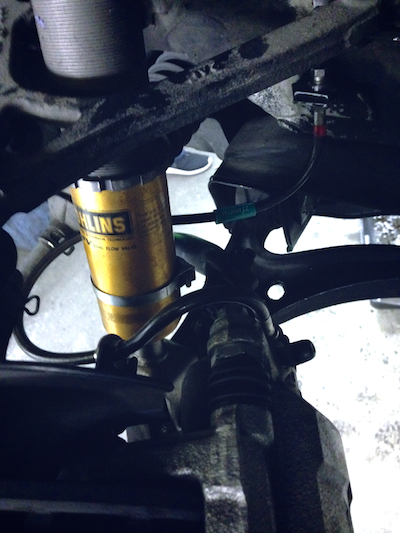
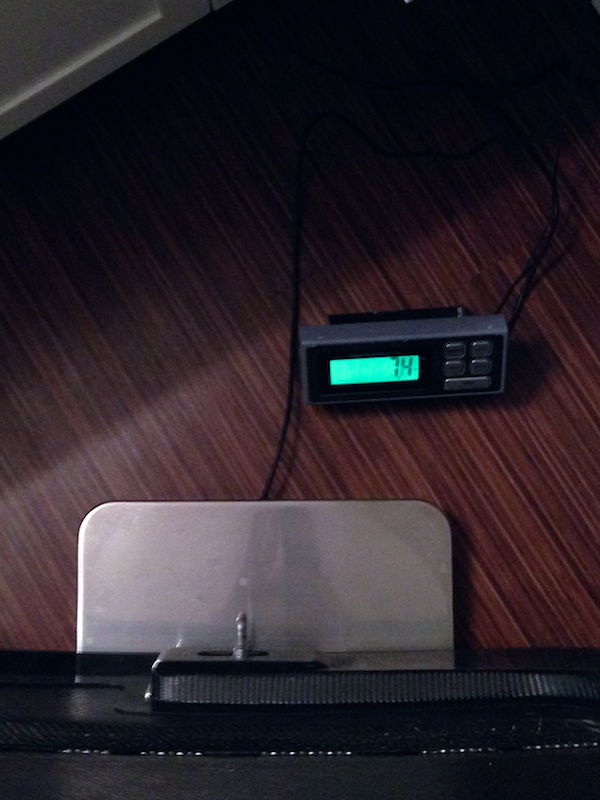
Sonny and I got the ride height dialed back to 13" (330mm) (the springs had settled about 1/4" all around) and he also marked all of my perches with a paint marker so I can easily keep an eye on things and make sure nothing gets loose. I usually make it a point whenever I remove the wheels to make sure everything is snug. We were actually able to mark them in a way that can be easily seen without removing the wheels as well.

And next up was the alignment. I was curious about the adjustability range of my front J's S1 camber joints/rca so we did a little testing. The maximum caster possible at my ride height was 7.5 and at this caster setting the camber maxed out around -3.0. The max camber possible was -3.5 with a caster of around 6.8. This will likely vary a bit with each car, but hopefully that can help someone make their decision when it comes to camber joints. The S1 should provide me with the range I need for the life of the car I think. I definitely don't want anything over 6.5 caster, and can't see myself ever going beyond -3.5 camber.

Initially I was planning to do -2.8 F -2.6 rear on this alignment (coming from -2.6 F -2.4 R) but looking at my front and rear shoulder wear I decided to move in small increments and only adding more camber in the rear so I could see the specific effects that would have. The car was lacking a little bit of corner exit grip with my last setup. A lot of people say certain tires like more or less camber, but I think your spring rate plays a huge role in this as well. I plan on picking up a pyrometer do do some further testing, but so far -2.6 seems to work very well with the tires I have used and my suspension setup.

So my current setup is -2.6 F -2.6 R — 6.5 — 1/16th total toe-in. I increased the caster to see what effect that would have on high speed braking stability.

Of course later that evening I took the car out to put the new tires through their paces and see what they could do, and to see what effect my alignment changes would have.

Initial Impressions: f@#k these tires are good

Image Image

Without another set of wheels it is hard to do a truly fair comparison between different tires honestly. After going through quite a few sets of RE11 I like to think I have a pretty good understanding of their initial grip when new. On my first few runs I definitely found myself thinking the AD08 R exhibited more general grip all around. But again it really isn't fair to compare grip levels unless I can do direct back to back tests with new sets of each on the same surface on the same day at the same temps.

Being a particularly warm day (70 F in the middle of the night) the braking, turn-in, and corner exit was phenomenal. The AD08s definitely don't make as much noise as the RE11A but still provide useful audible feedback. I don't really care about noise from the tire in terms using it as a tool for driving to be honest, but less noise can be a good thing when it comes to avoiding unwanted attention. The transition is nice and buttery just like the RE11A, but so far I think the AD08 gives better feel and allows me to a be a bit more precise with how I am placing the car. Right away with the AD08 R I was even surprising myself with how precisely I was able to place the car and how close I was getting to the specific landmarks I like to use on my favorite roads. They are both happy with a large range of slip angle so in that since they are both very easy to drive.

Image

In terms of normal driving, the RE11A probably makes a little less noise on the freeway, but who gives a f@#k? With full tread they both seem equally comfortable to me, but again who gives a f@#k? Whenever I wear a tire down past the wear bars I will usually soften up the dampers a bit to accommodate for daily driving. Stiffening them back up a notch was definitely necessary with this new set of AD08s.

Image

I am the type of driver who just goes out without a plan and just does a general test to see how the car feels. And then react based off those tests and take mental notes. The change in camber was a massive win in this case. I immediately realized I am going to need to push myself into full throttle earlier with this setup to make the most of the grip available on corner exit now. The simplest way for me to judge my own driving and my setup (as well as others) is by looking at how much of a gap their is from full throttle to full throttle. If anything this is just a good measurement of how much confidence a driver has in a car and there are many different ways to decrease the full throttle to full throttle time. I am talking about the time from being full throttle coming into a corner, braking, and transitioning back to full throttle. It is easy to tell when a driver is new, because this transition will be much less precise. They will lift off the throttle and get onto the brakes with less urgency, they will brake earlier and not use the full braking grip, they will release the brakes in a way that loses the weight transfer and will be sluggish back into full throttle often losing a lot of momentum and grip on exit. Through every part of a corner there are ways to decrease this time. Transitioning from throttle to braking faster, which will let you brake later, using maximum braking grip, which will keep the weight transferred in a way that maximizes cornering entry grip, releasing the brakes in a way that maintains the weight transfer, letting you get back to full throttle earlier and maximize corner exit grip.

Image

The purpose of that little anecdote was to say that the AD08 R is begging me to do all of those things a bit better. Even if the AD08 grip falls off quicker than the RE11A (which I have no reason to believe it will) I would still choose it for the various reasons mentioned above. What a phenomenal tire.
o_O S2000 | Mark I Stage II...

That’s thirty minutes away. I’ll be there in ten.
User avatar

Topic Author
andrewhake
Admin
Posts: 580
Joined: Oct 2016
Location: Mt. __________
Contact: YouTube IG
United States of America
#100

09-19-2014

This isn't the post you're looking for...

I was hoping to be taking some photos of another part tonight but due to some seriously ridiculous shit with the shipping that can't happen. Because I was expecting this part to arrive today, yesterday I decided to put in a little work on another related part. I cleaned up the Mugen intake nicely when I received it, but recently I got some 303 Aerospace Protectant and made sure it was well protected for future use. I also ordered some DEI reflect-a-gold heat resistant material and covered the back of the intake. I just did the back half as that will be what is mostly exposed to heat from the engine and radiator, and no way would I cover up the beautiful dry carbon on top. The 303 really makes the carbon look perfect.

Image

Image

Image

Image

Image

Image

Image

I also decided to weigh the intake assembly parts that will be replacing the stock air box. I will need to weigh the stock parts after they are removed.

Image

4.8lbs not bad. I am looking forward to weighing the car and doing a corner balance, especially after I get a light exhaust on the car.

If things go to plan I should have some very interesting stuff to show early next week, I am off to Thunderhill West for the entire weekend which is going to be fantastic.
o_O S2000 | Mark I Stage II...

That’s thirty minutes away. I’ll be there in ten.
User avatar

Topic Author
andrewhake
Admin
Posts: 580
Joined: Oct 2016
Location: Mt. __________
Contact: YouTube IG
United States of America
#101

09-23-2014

Thunderhill results incoming! Editing some video tonight.

I don't know anything about any Amuse parts sorry..

Image
o_O S2000 | Mark I Stage II...

That’s thirty minutes away. I’ll be there in ten.
User avatar

Topic Author
andrewhake
Admin
Posts: 580
Joined: Oct 2016
Location: Mt. __________
Contact: YouTube IG
United States of America
#102

09-24-2014

Thunderhill West

I have been looking forward to this one for some time now. With Thunderhill recently completing their new circuit, this was the first event focused on Thunderhill West only and not the entire 5 mile circuit which includes the old track. The new track is a much more exciting and technical course that is very well designed with a beautiful track surface. This event was a two day event hosted by BlackTrax. Day 1 was all about learning the track and making sure the car was good to go. I was having a few issues with the clutch slipping the first day but luckily I was able to resolve this on the second day by replacing the clutch fluid in the master cylinder. This could simply be an issue of the clutch delay valve coming into play more as the clutch fluid got hot, but I still plan on replacing the clutch soon as I believe I was experiencing some pretty clear clutch slipping on the first day.

I decided to setup my GoPro directly on my helmet this time, giving a good eye-level view of the circuit. This turned out to work extremely well, the camera really doesn't get in the way of my vision at all when driving and gives a great sense of speed and elevation change compared to mounting directly to the car.

Image

The ambient temps were higher on the first day (85F+) but on the second day it was a bit cooler at around 80F. Both days with me on fresh Advan AD08 R 225/255. I will do a more elaborate review of the tires later on now that I have driven them on the track but to keep it simple they were fantastic. I prefer them to the RE11/RE11A so far.

Image

Image

Here is a video of my fastest lap of the weekend. Which luckily for me I was able to pull of on the last lap of the last session of the last day of the weekend. Just wanted to get in a nice clean lap that I can use as a benchmark for my next visit to the track:


And here are some photos before heading home for the weekend. Great circuit! Highly recommended!

Image

Image

Image

Image
o_O S2000 | Mark I Stage II...

That’s thirty minutes away. I’ll be there in ten.
User avatar

Topic Author
andrewhake
Admin
Posts: 580
Joined: Oct 2016
Location: Mt. __________
Contact: YouTube IG
United States of America
#103

09-24-2014

Amuse dry carbon hood

Oh and I almost forgot, I know not very many people are interested in Amuse dry carbon street hoods but I figured I would post up some photos anyways:

Image

Image

Image

Image

Image

Image

No captions needed. This thing is the most beautiful S2000 part I have ever seen. Massive thanks again to WISEGUY (Jiwung) for making this available for me to purchase. Not having to wait 3-4 months to get this from Japan was a huge factor in me actually making the purchase as well as the good price. I have already been in contact with body shops and was able to find a good one with experience in painting high quality carbon fiber parts. The plan is to paint this beauty Sebring Silver as I never plan to sell either the hood or the car, and keeping the car simple and understated has always been the main goal. What an absolutely beautifully made part.

Oh, and it only weighs 7.4lbs

Image
o_O S2000 | Mark I Stage II...

That’s thirty minutes away. I’ll be there in ten.
User avatar

Topic Author
andrewhake
Admin
Posts: 580
Joined: Oct 2016
Location: Mt. __________
Contact: YouTube IG
United States of America
#104

09-26-2014

Image

Great photo from Bill Wang from the Thunderhill West event. The S2000 looks so damn good at speed in profile.
o_O S2000 | Mark I Stage II...

That’s thirty minutes away. I’ll be there in ten.
User avatar

Topic Author
andrewhake
Admin
Posts: 580
Joined: Oct 2016
Location: Mt. __________
Contact: YouTube IG
United States of America
#105

10-07-2014

o_O S2000 Maintenance template v1 is ready to go!

Image

o_O S2000 Maintenance Template v1

This is a simple Numbers spreadsheet that is formatted and ready to go for S2000 maintenance.
  • Rows in each category are setup to use your current mileage to show you how many miles a part has been used. The formatting is quite simple (current mileage - install mileage) so it is easy to change or adjust as needed.
  • I have also added a conditional highlighting example to the oil section. This allows you to have the current part mileage color coated if certain conditions are met. To adjust this simply select the cell, go to the Format tab/Cell, and you will be able to add or adjust Conditional Highlighting Rules.
  • When you need to add a new item, simply select the row, right click and choose "Add Row Below".
  • In the tire section, I setup the 'tire type' cell to be ready to accept the 3/4 tire images from tirerack.com with a 90% white color fill over the top so it is easy to read. To add a tire image, select the tire type cell, go to the Format/Cell tab in the upper right of the UI, and drag and drop your new image into the Advanced Image Fill bucket.
  • The main header image is setup as a media placeholder, so you can drag and drop any image you like into it and the image will be replaced. If you double click the image you can edit the zoom and crop.
  • Numbers documents saved in iCloud are fully accessible and editable from iPhones or iPads or any modern web browser. I like to use my phone to update my current mileage when getting out of the car and it is great way to be able to check things out when away from home.
If you have any issues or questions feel free to ask and if you decide to use this template post up some screen shots! Enjoy.

(This template was created in the latest version of Numbers for OS X from the Mac App Store. It is not available for Excel, Windows, Android, or any of that other nonsense)
o_O S2000 | Mark I Stage II...

That’s thirty minutes away. I’ll be there in ten.

Return to “Projects”